URBAN™ electric skateboard project
This time I would like to present you another project that I worked on some time ago. It was 2019 when I decided to design an electric longboard with a slightly different approach than the rest of the companies. This design still stands out in my opinion.
The URBAN project, as I called it, was one of the first projects from which I drew a ton of knowledge and experience not only in the field of design but also prototyping. This kind of shaped my current company – Yellowhammer, which, as you know, mainly deals with design and prototyping services using an extremely diverse range of production methods.
This project is still alive and I am currently preparing a slightly different version of it, which still uses solutions and the developed patent in an even more extreme way. I hope that thanks to this I will contribute to the improvement of comfort and safety of riding skateboards, mountainboards and electric scooters.
Product design
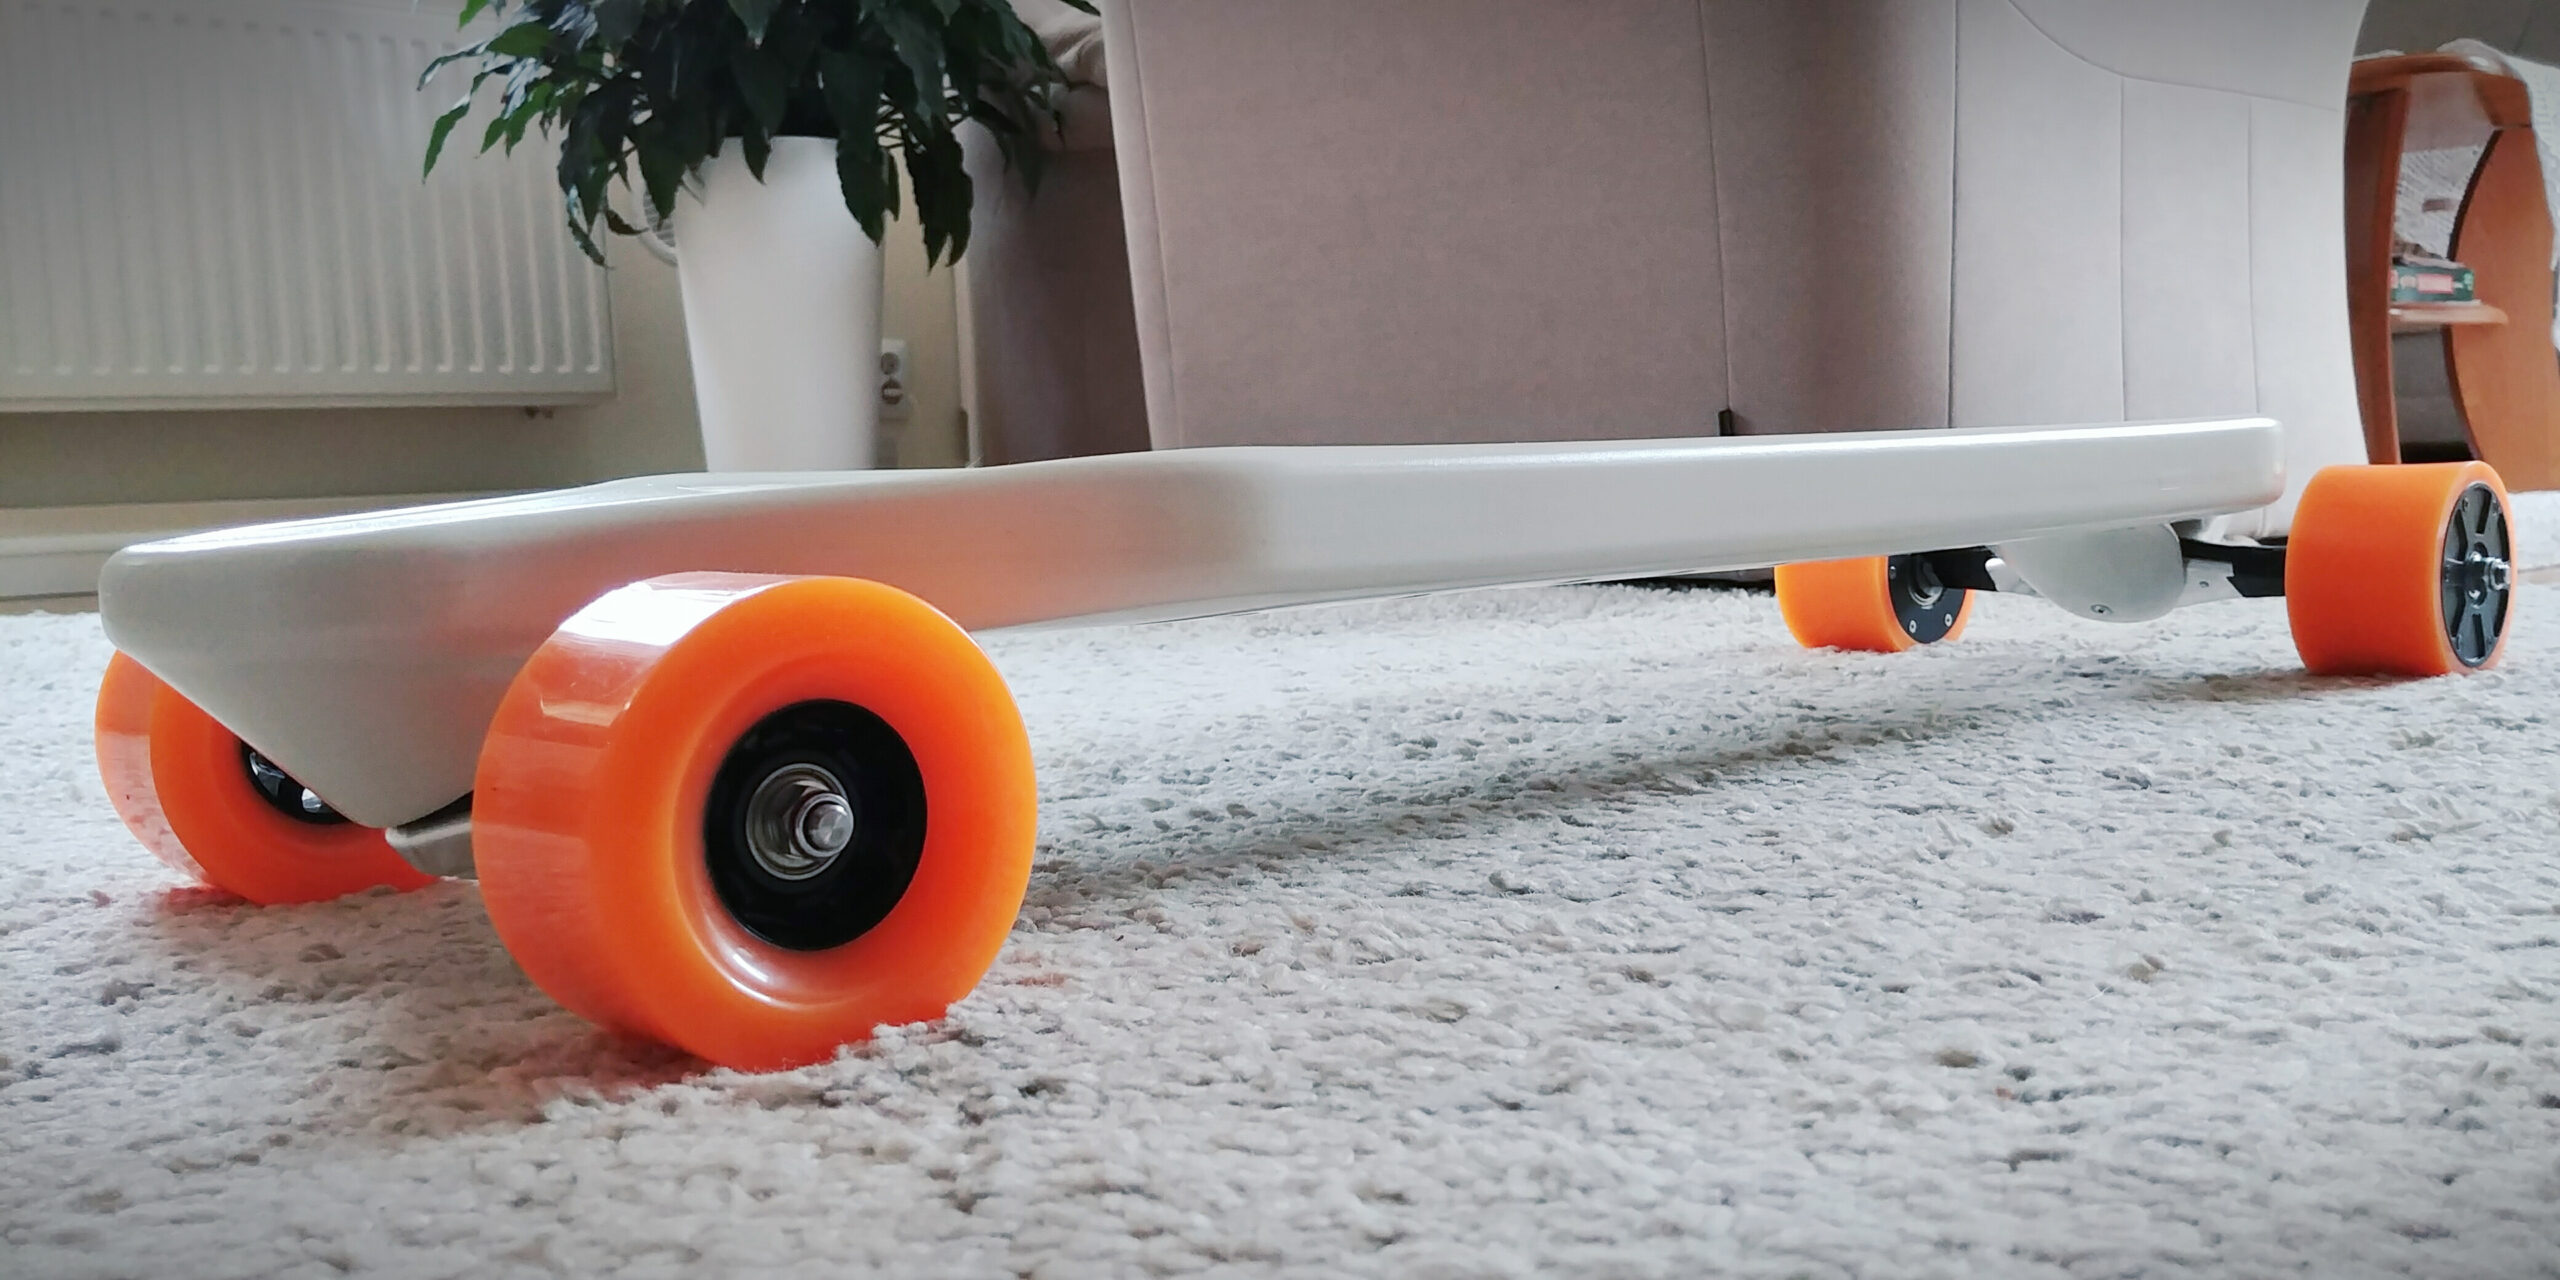
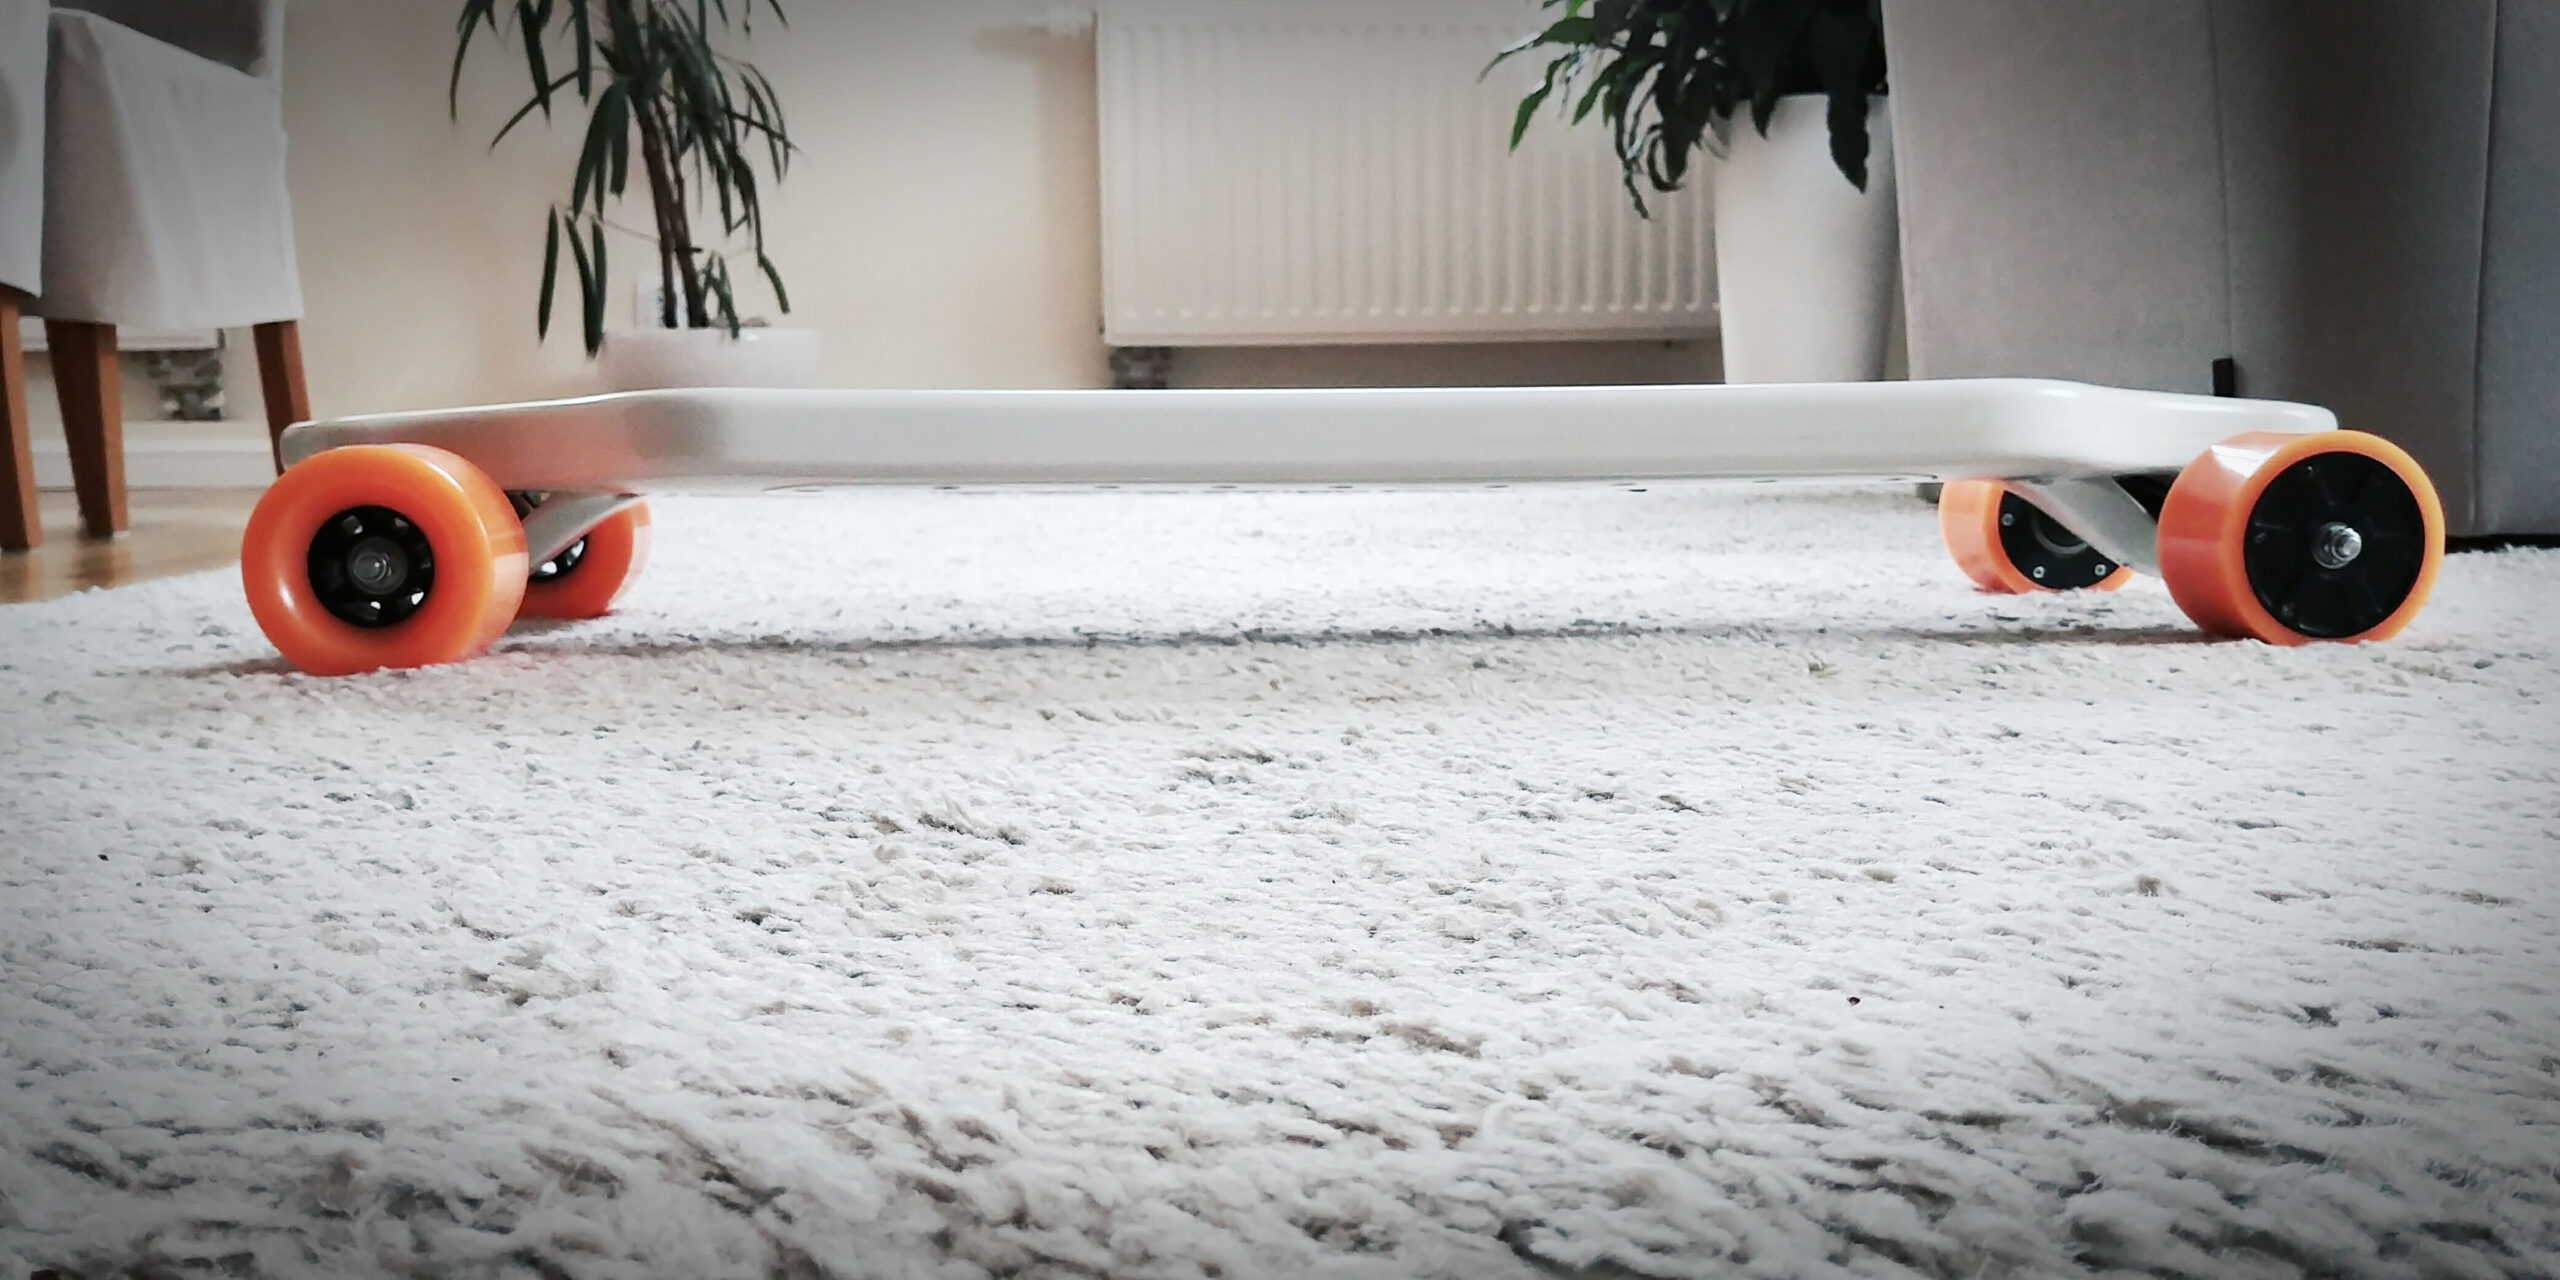
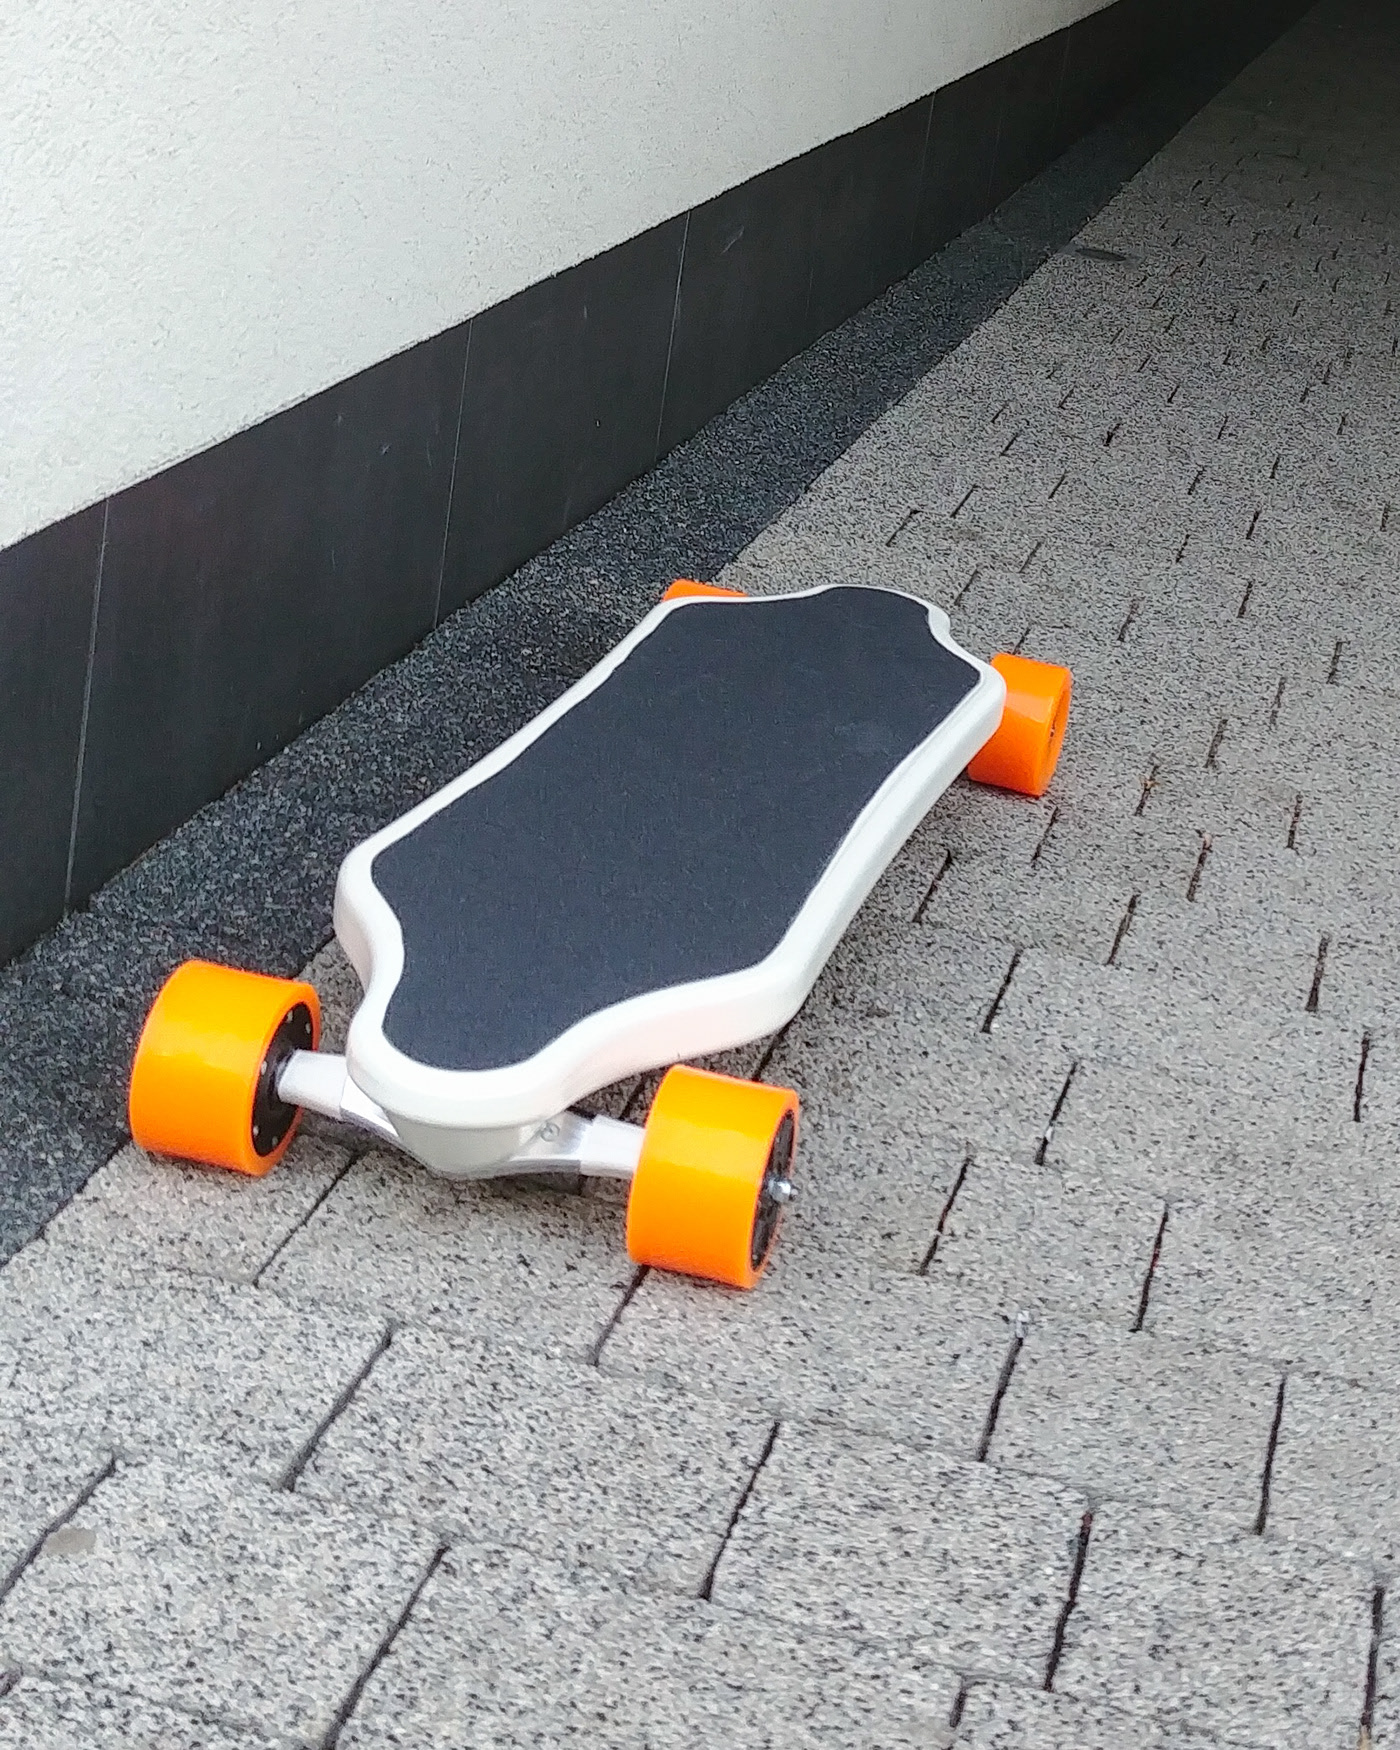
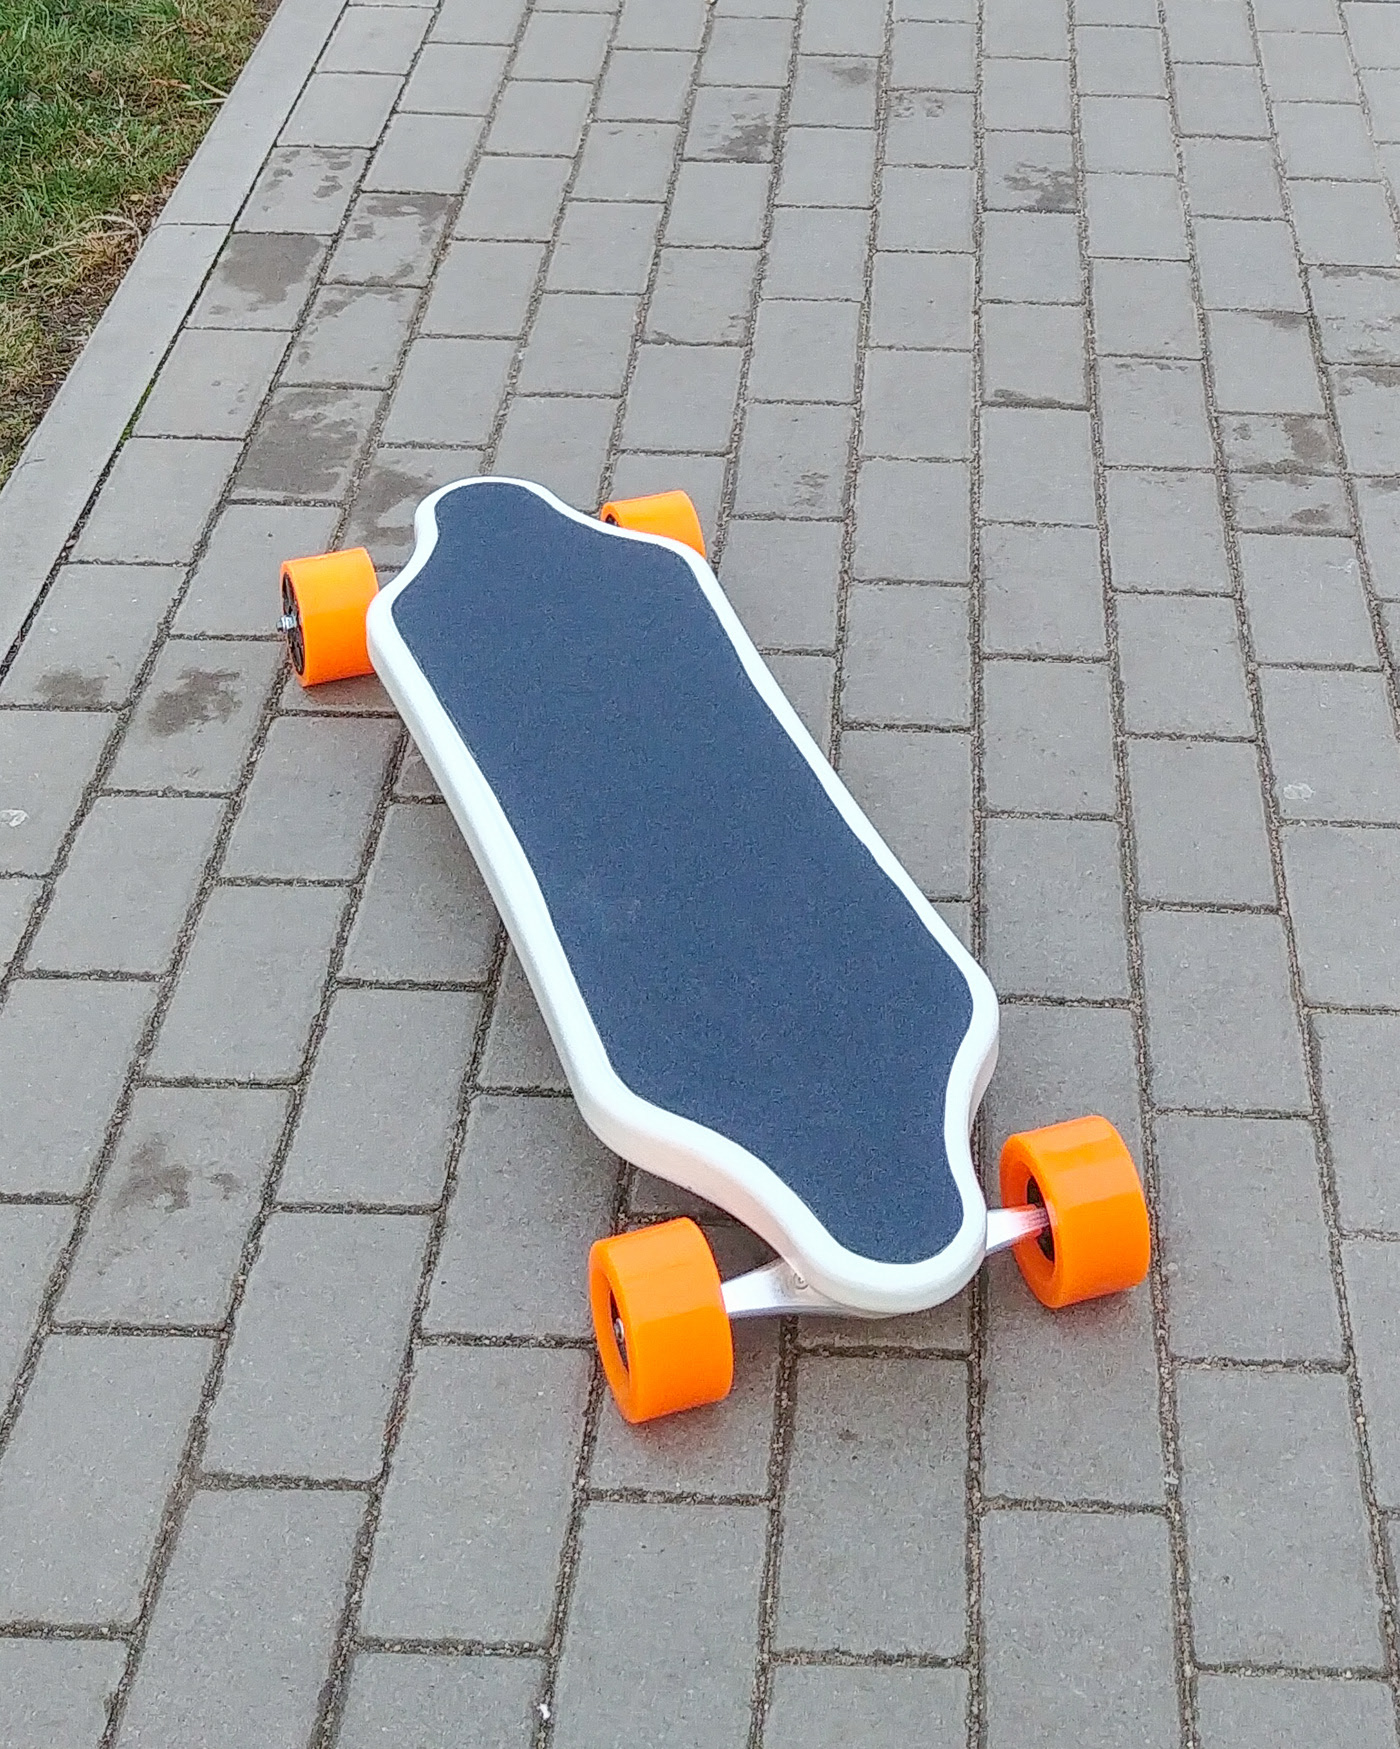
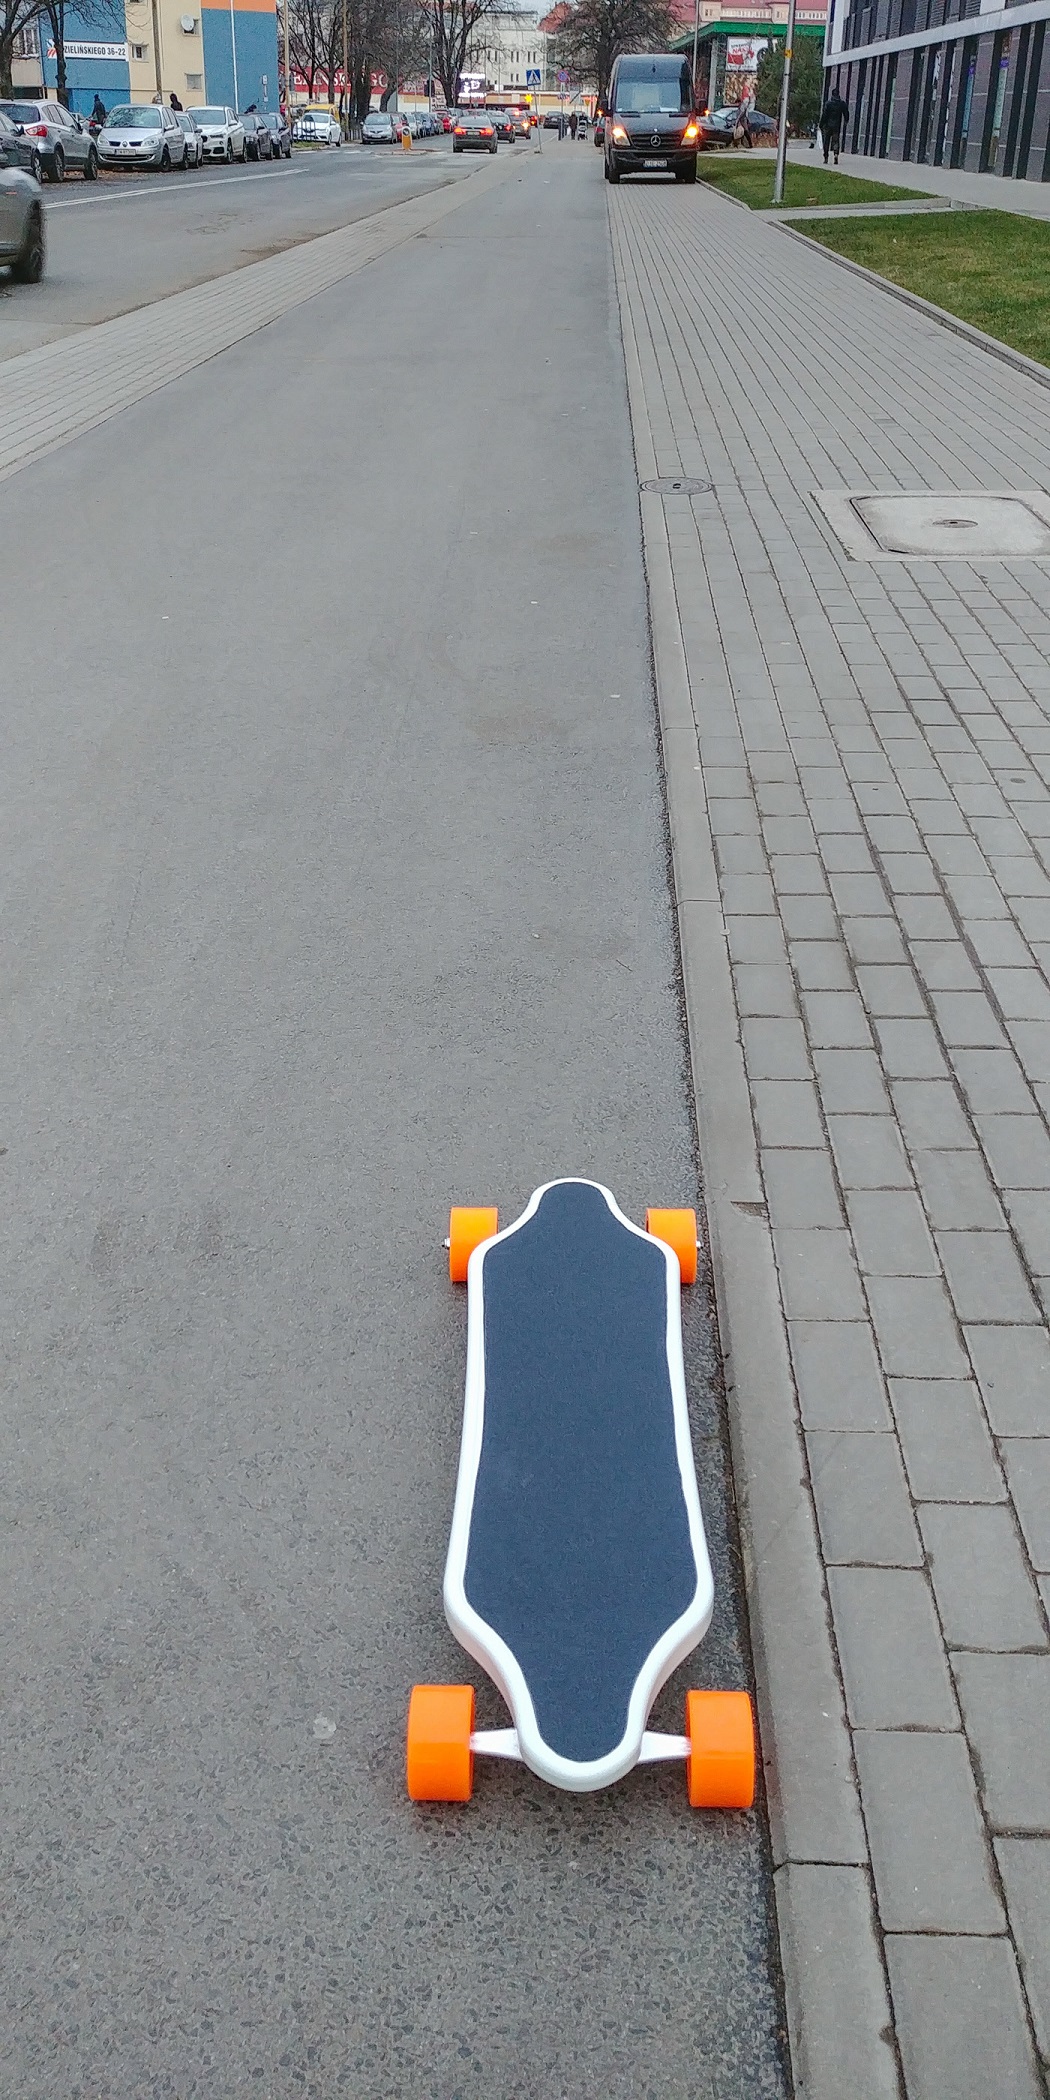
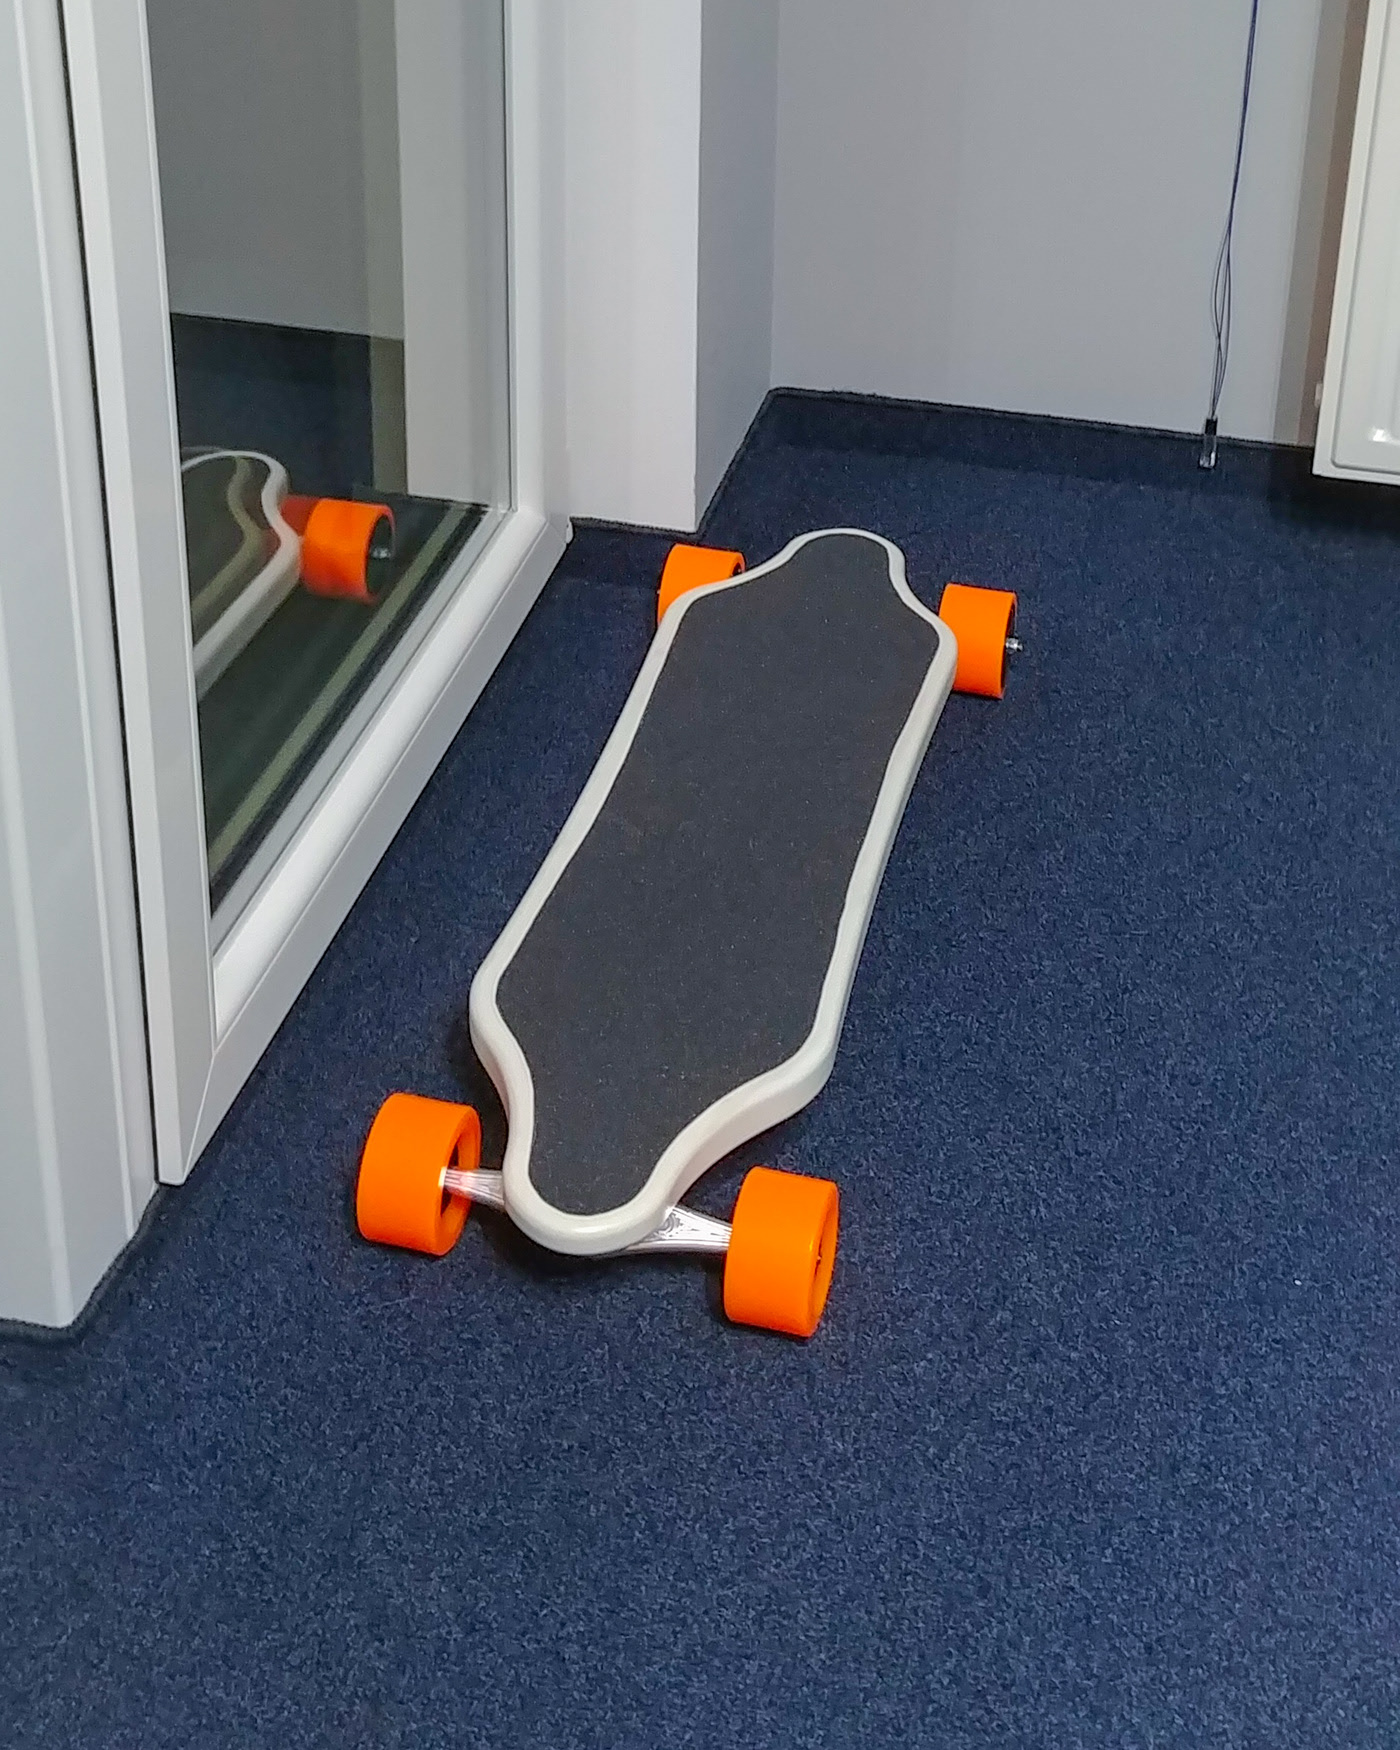
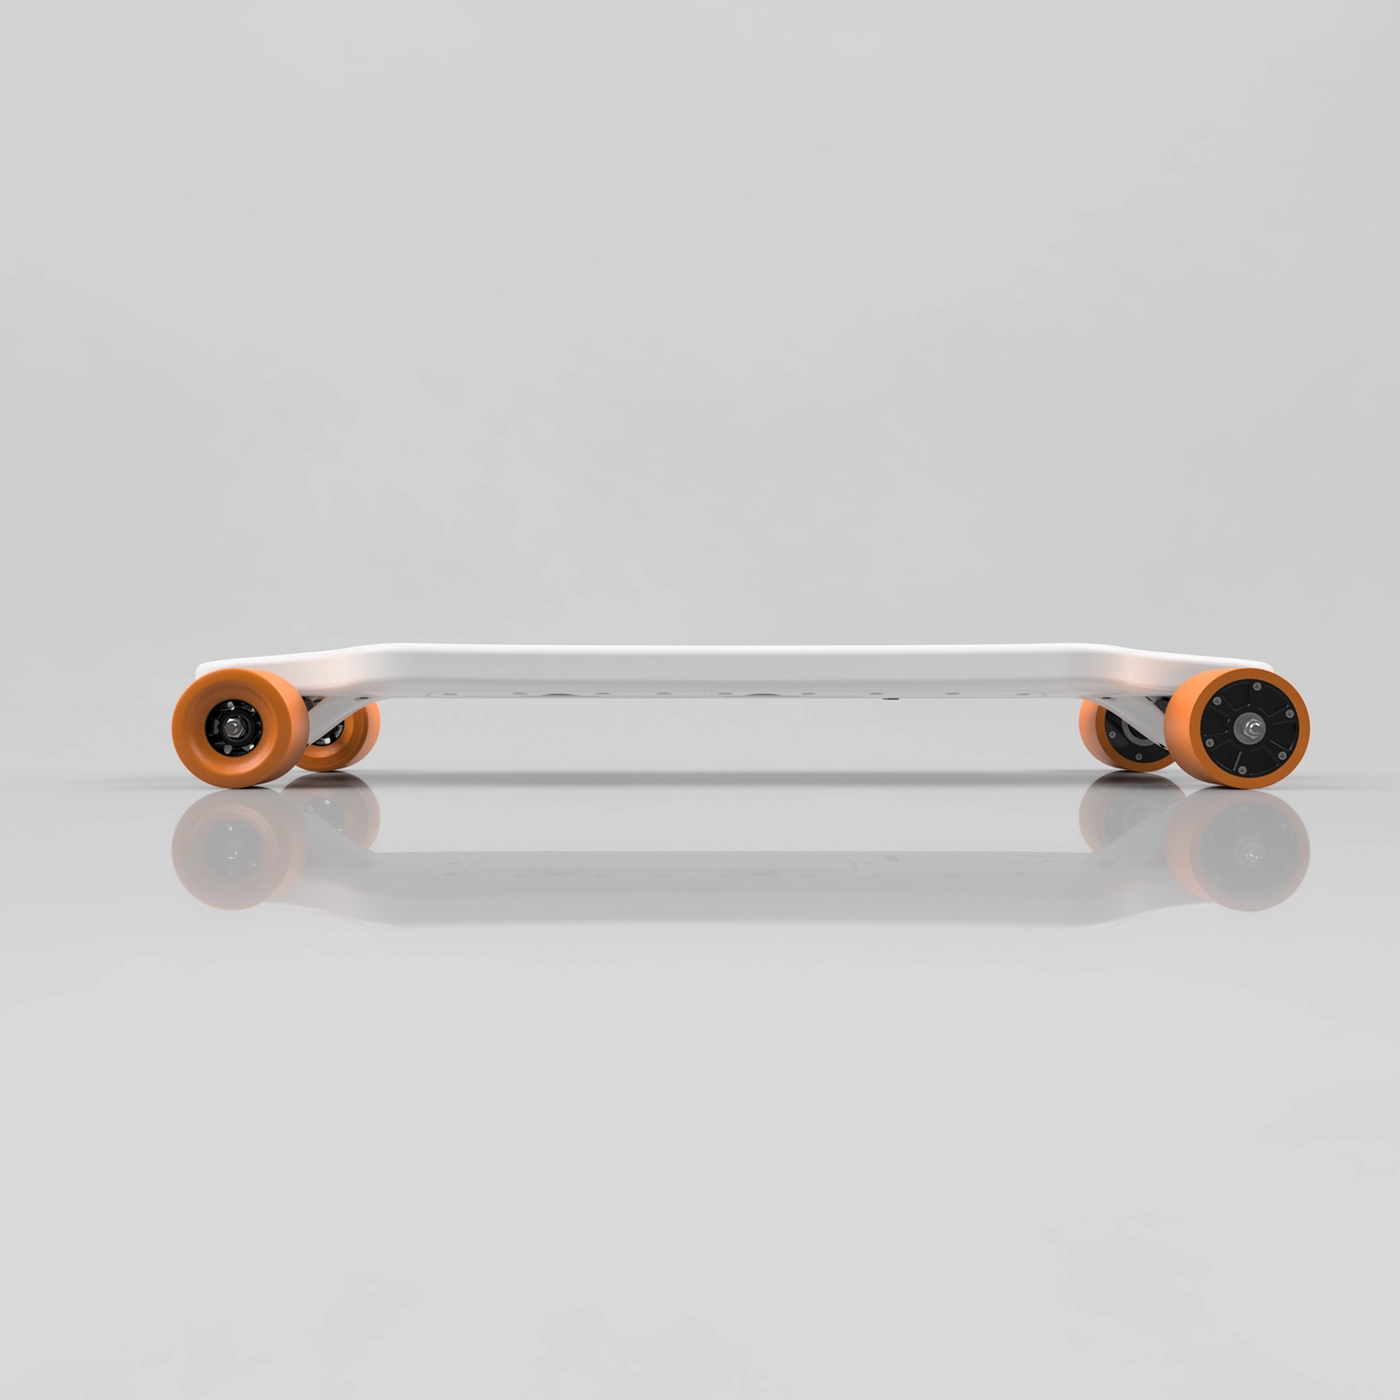
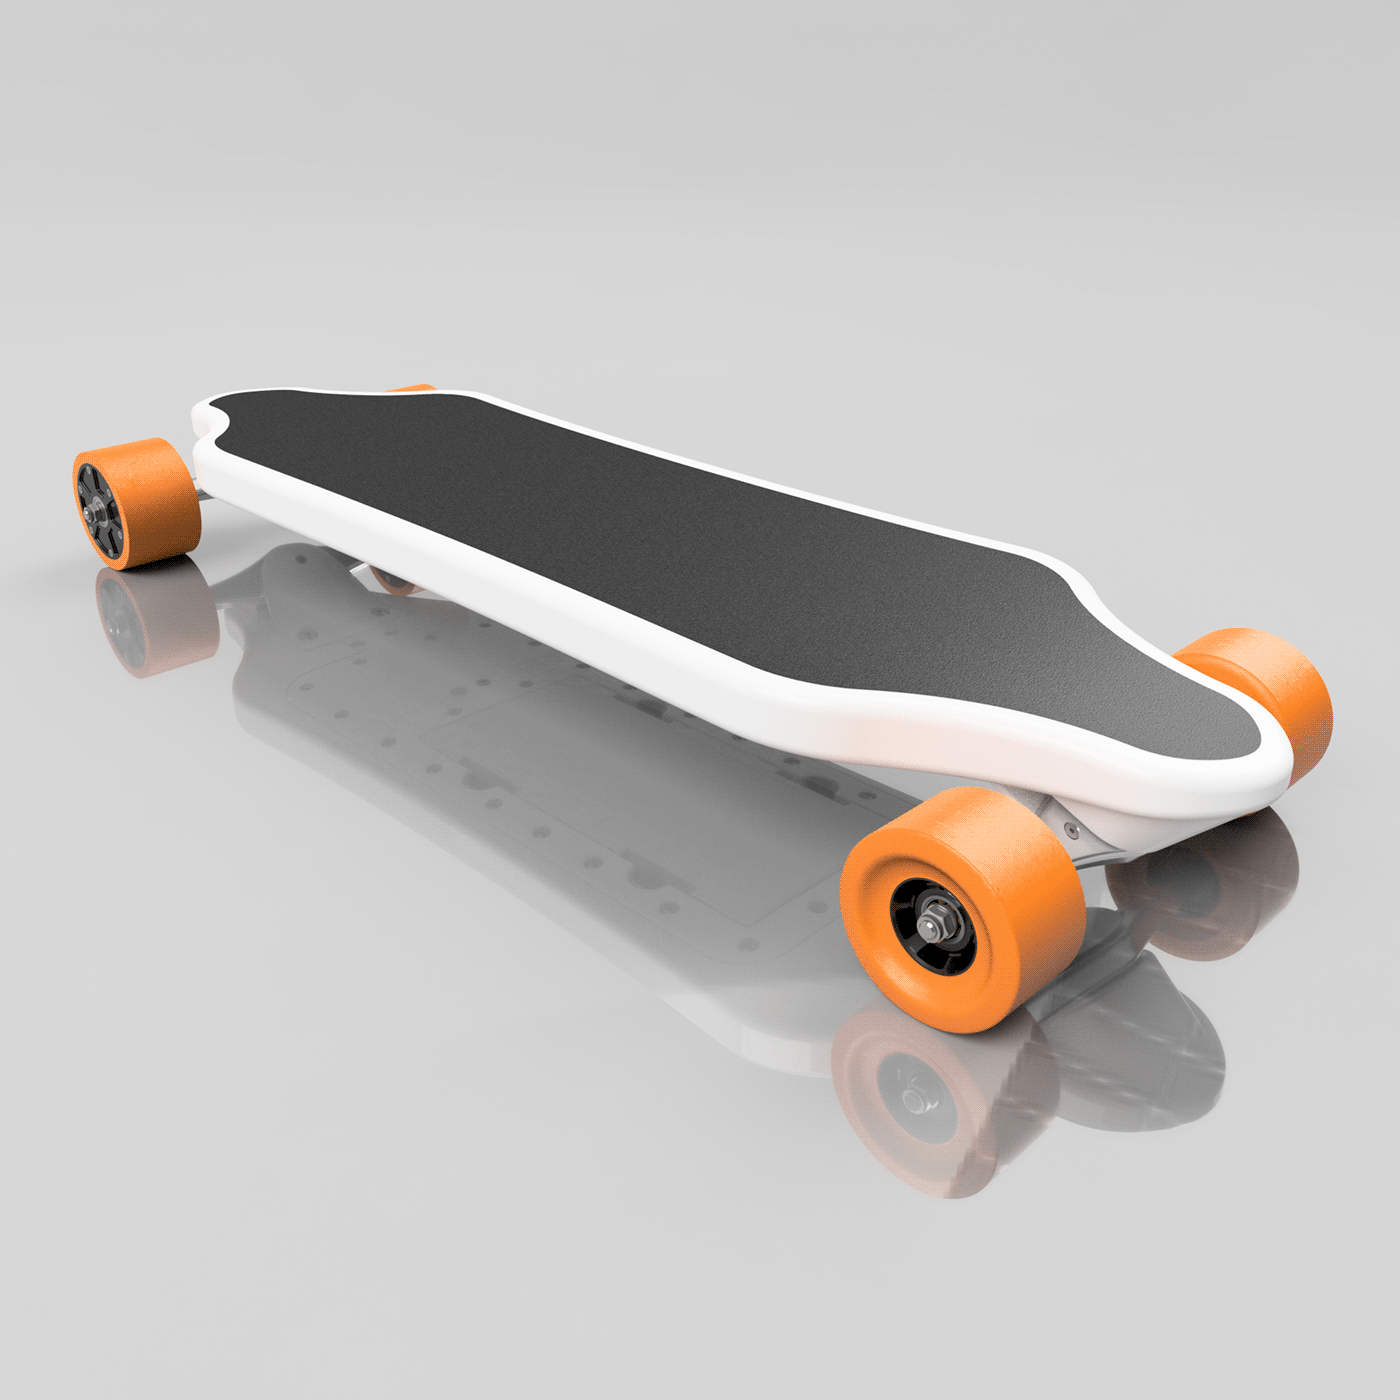
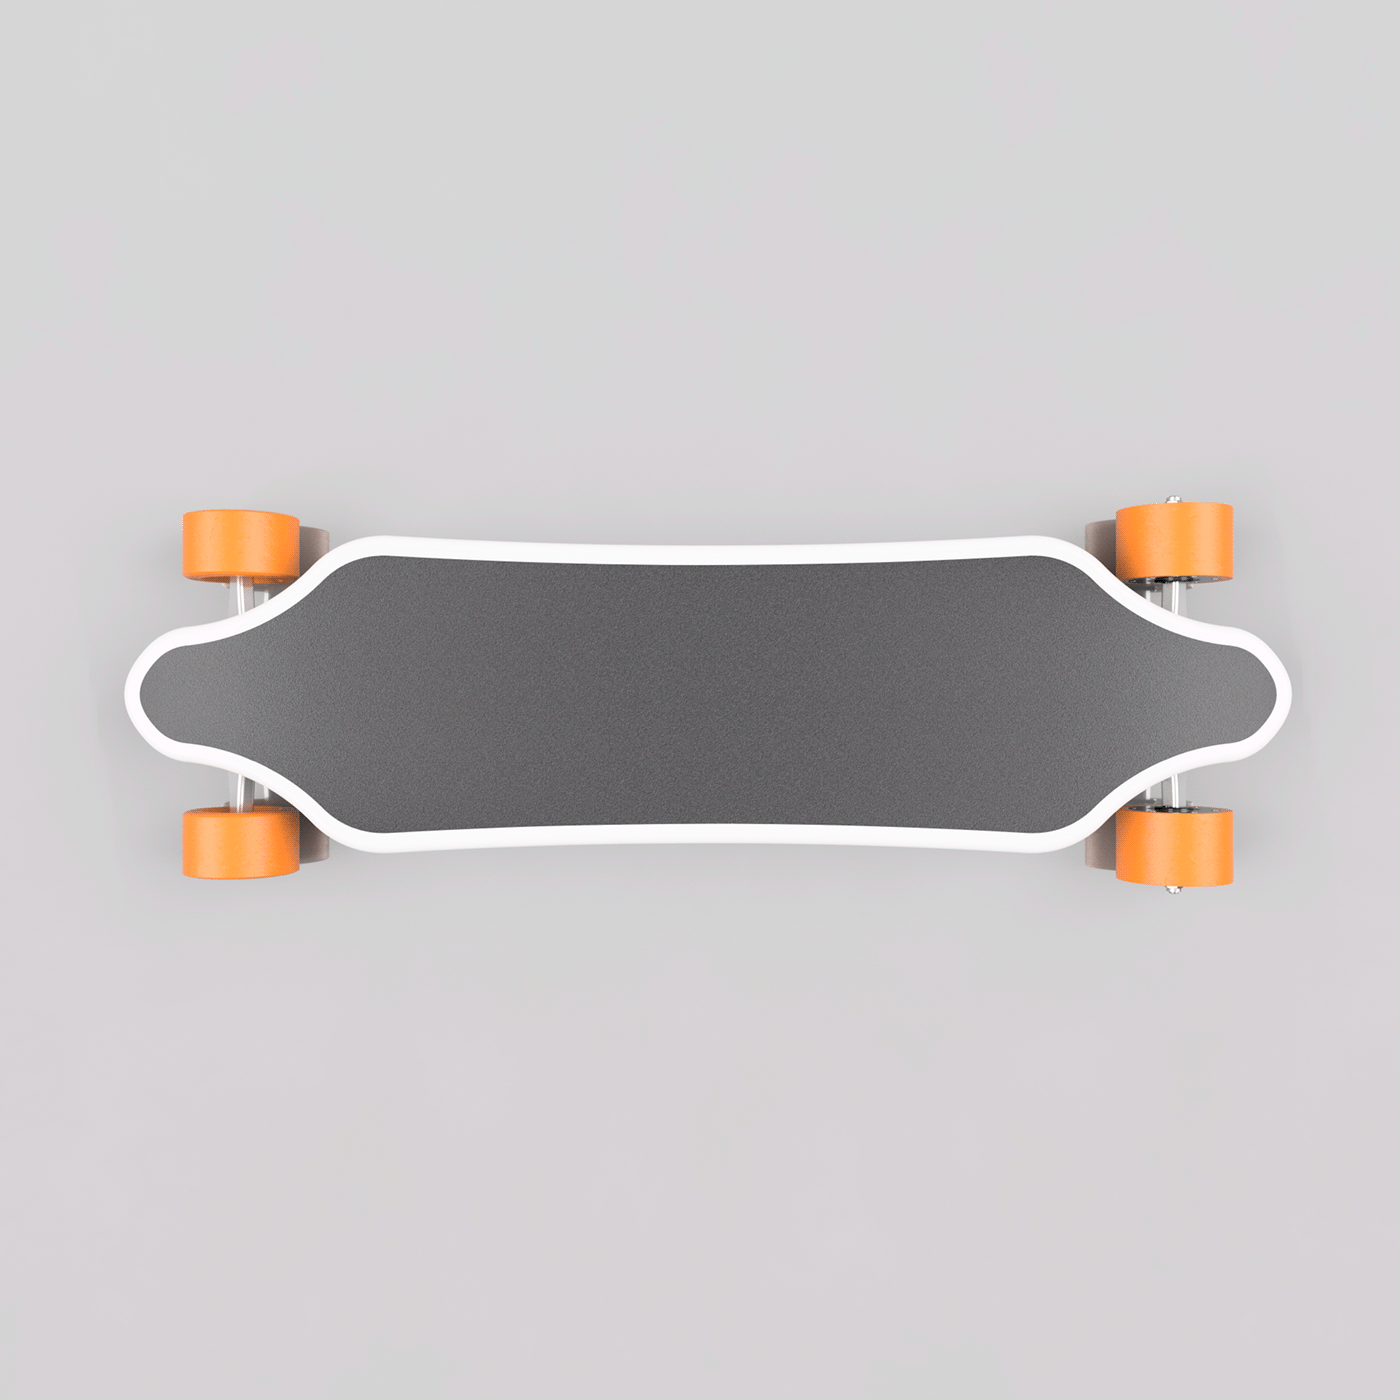
The URBAN project is an electric longboard with a very minimalistic design.
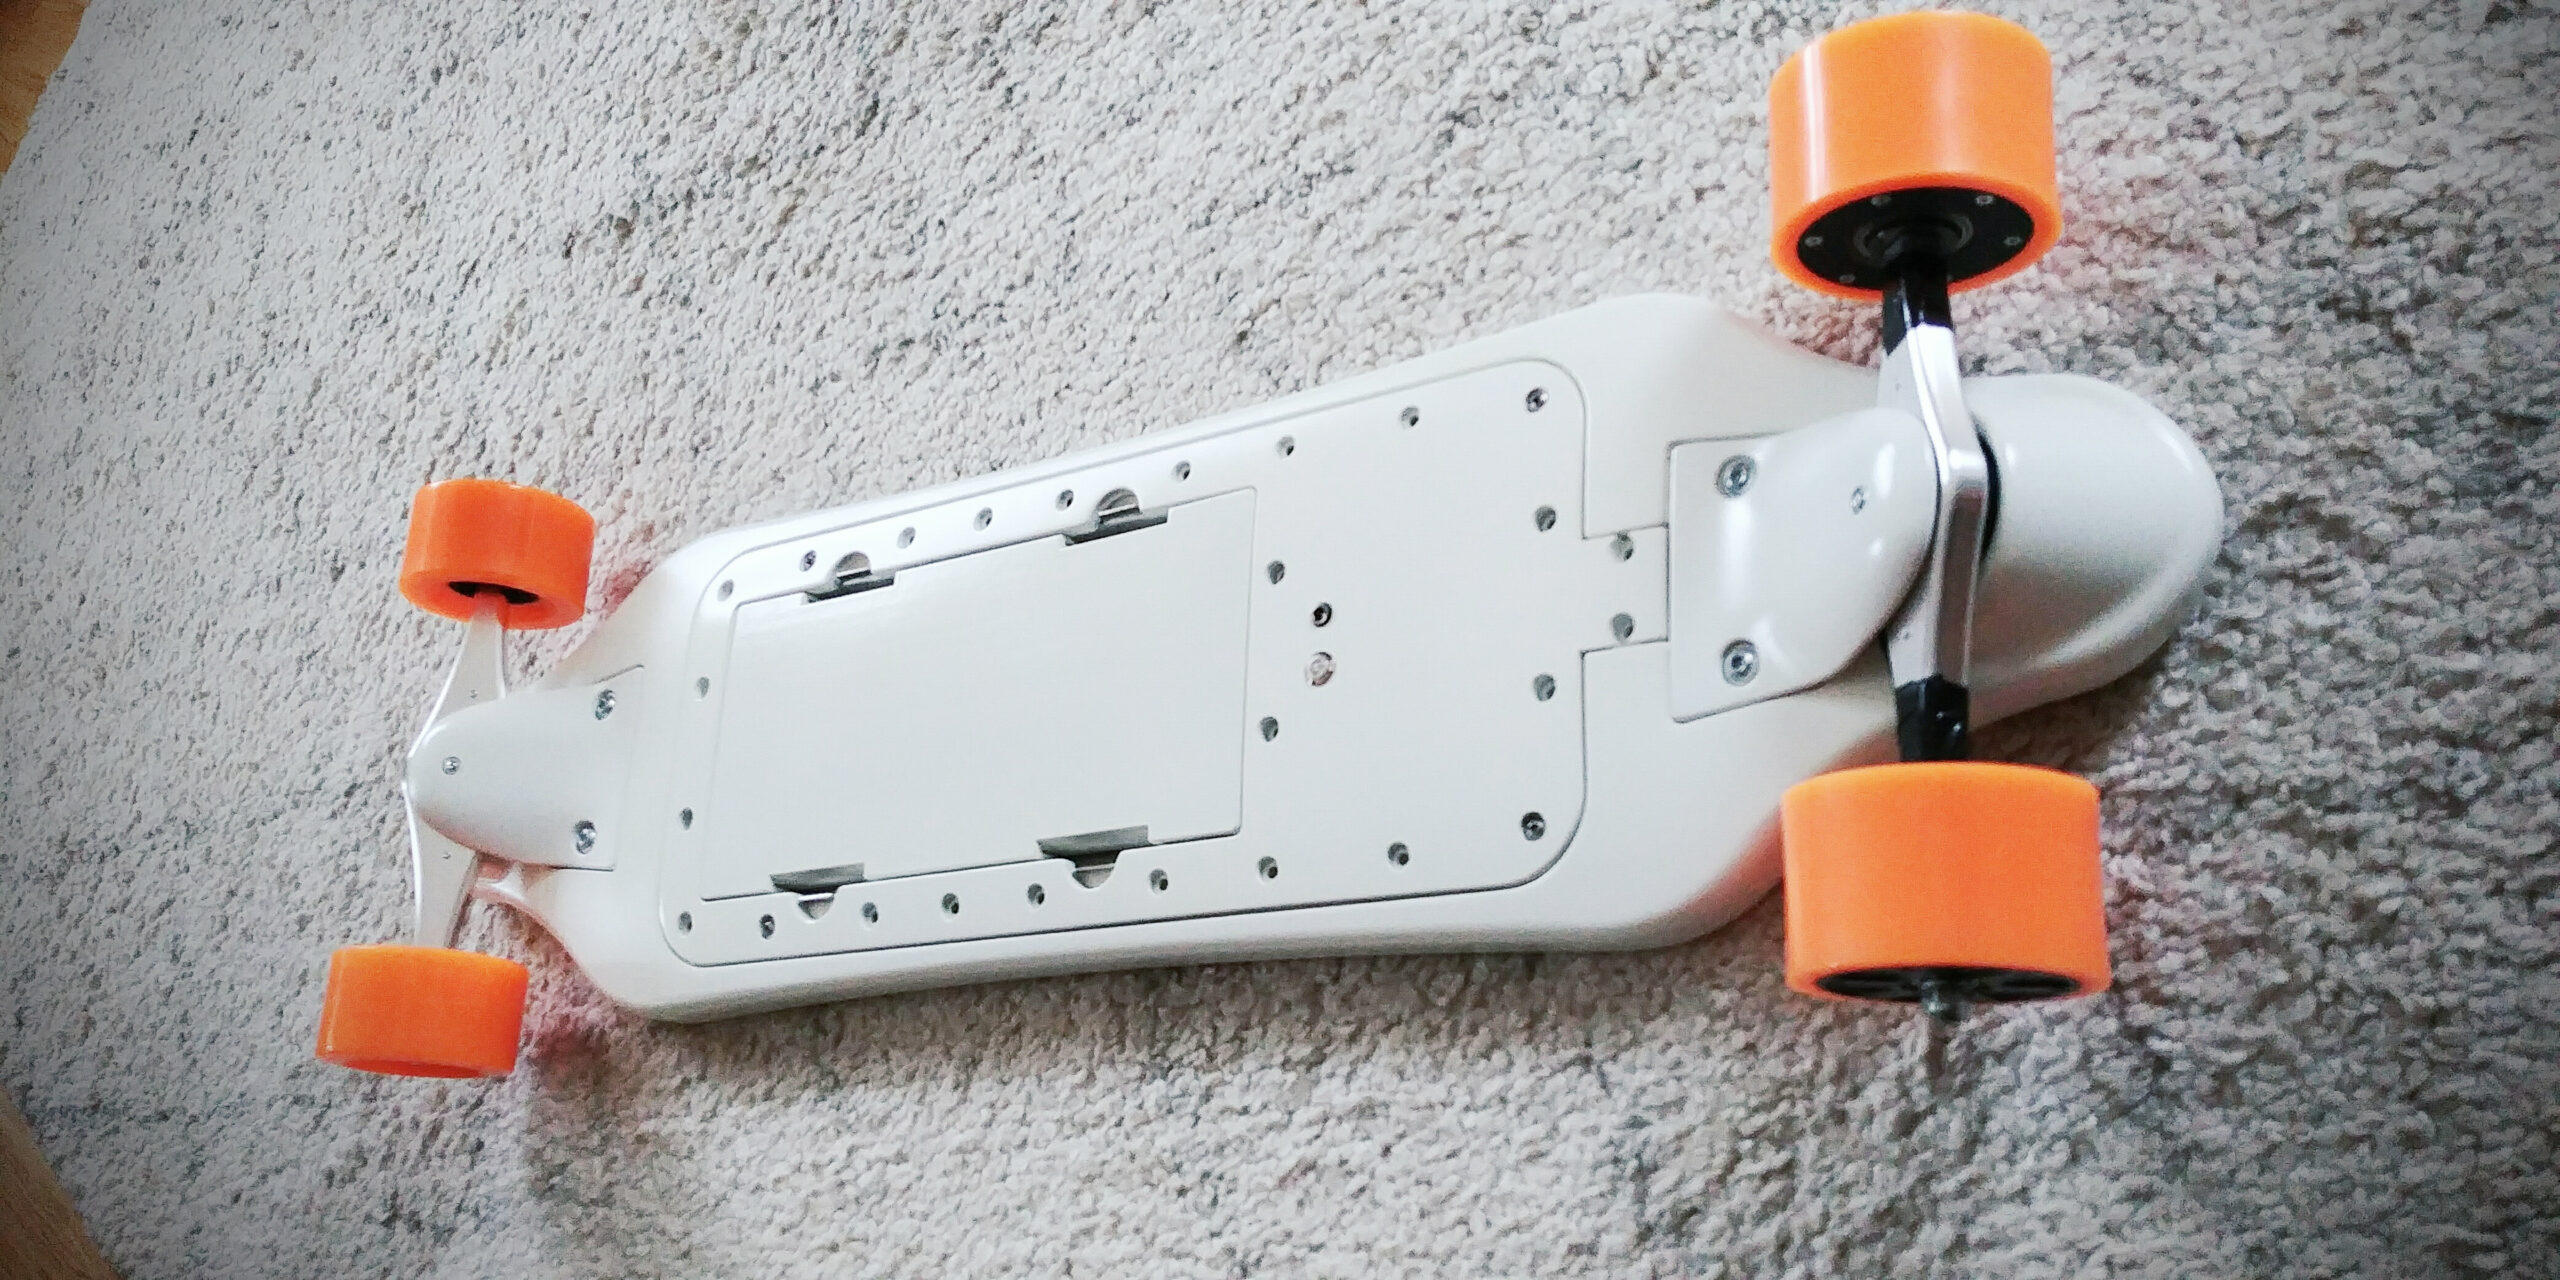
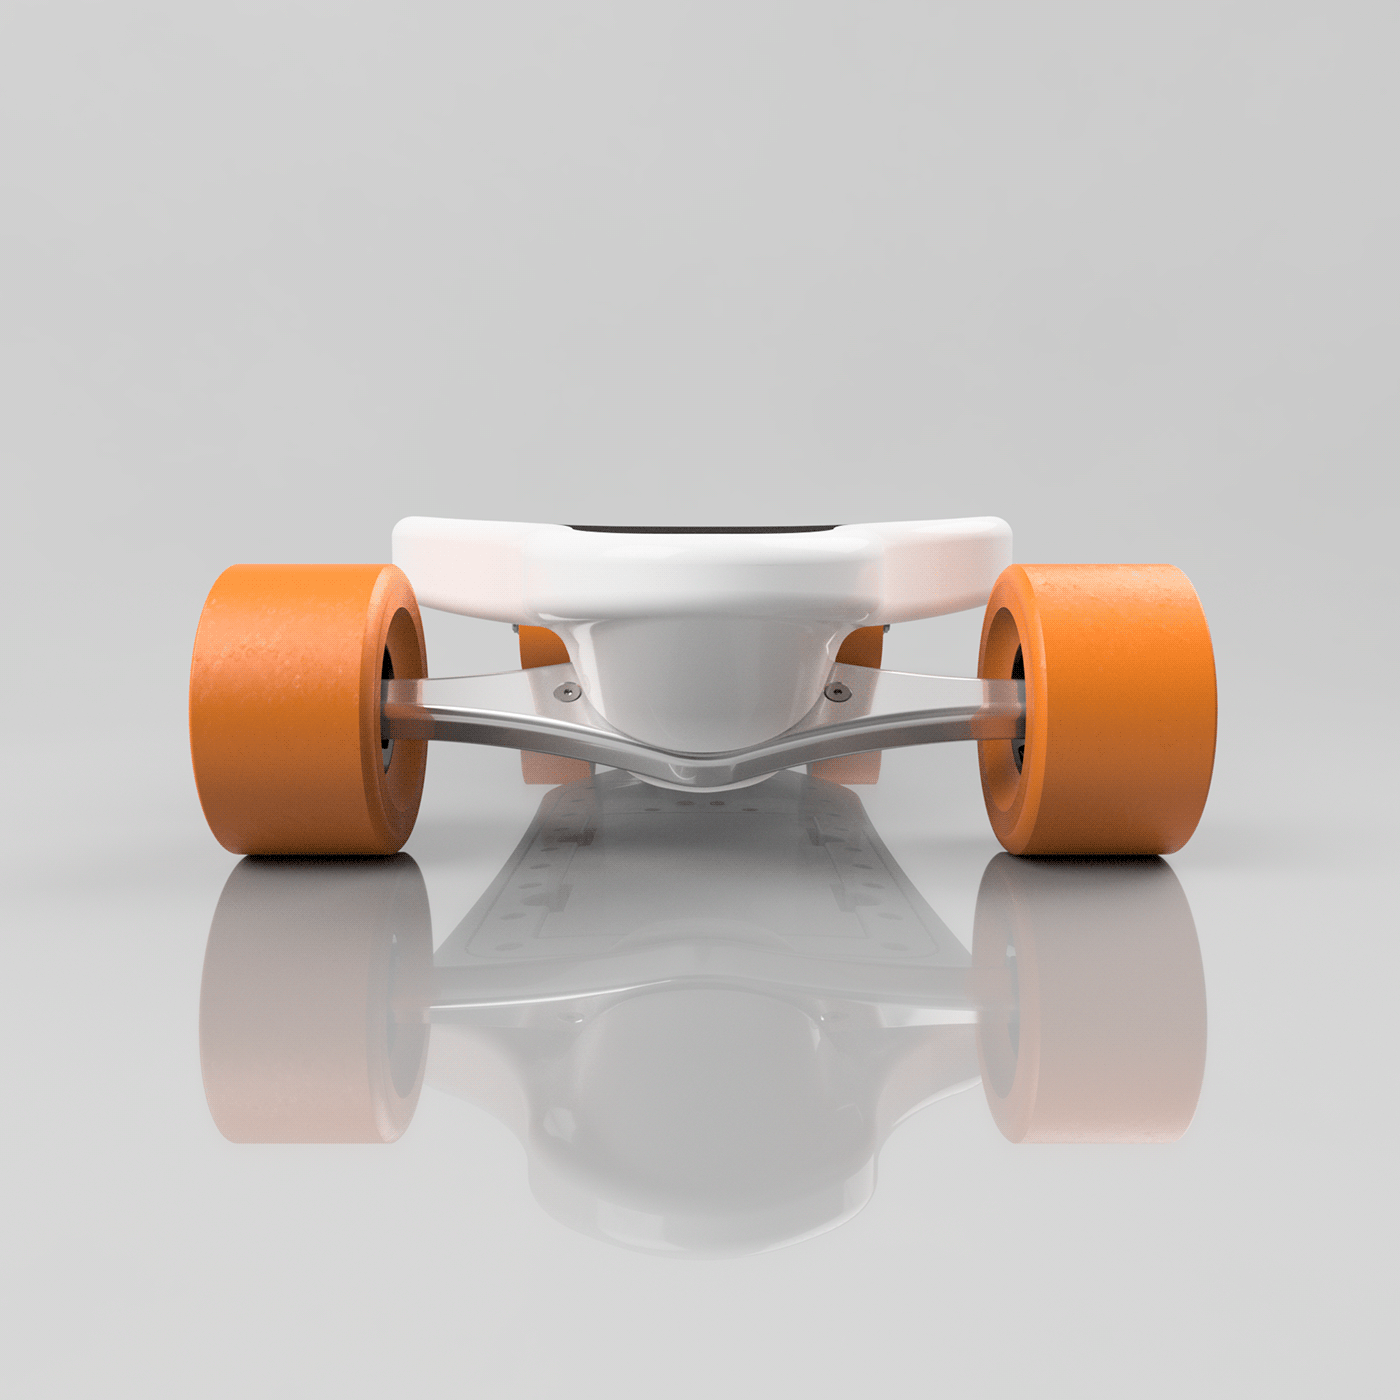
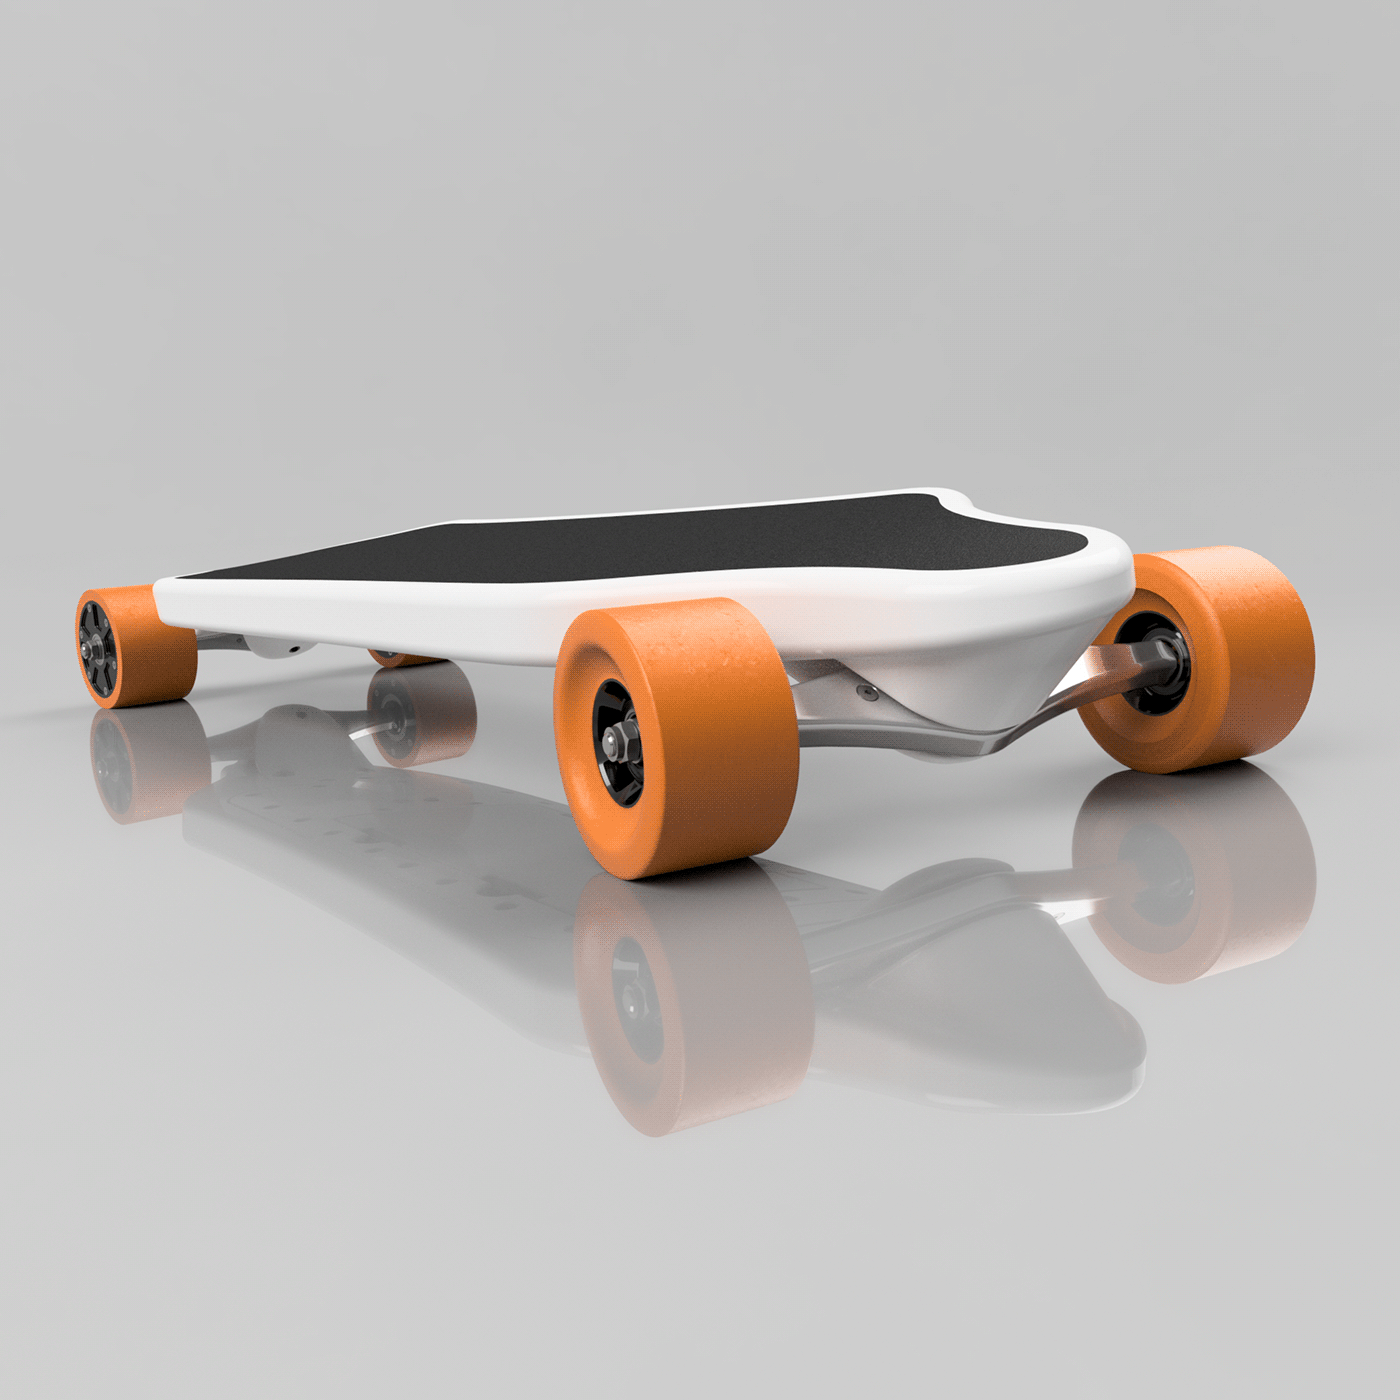
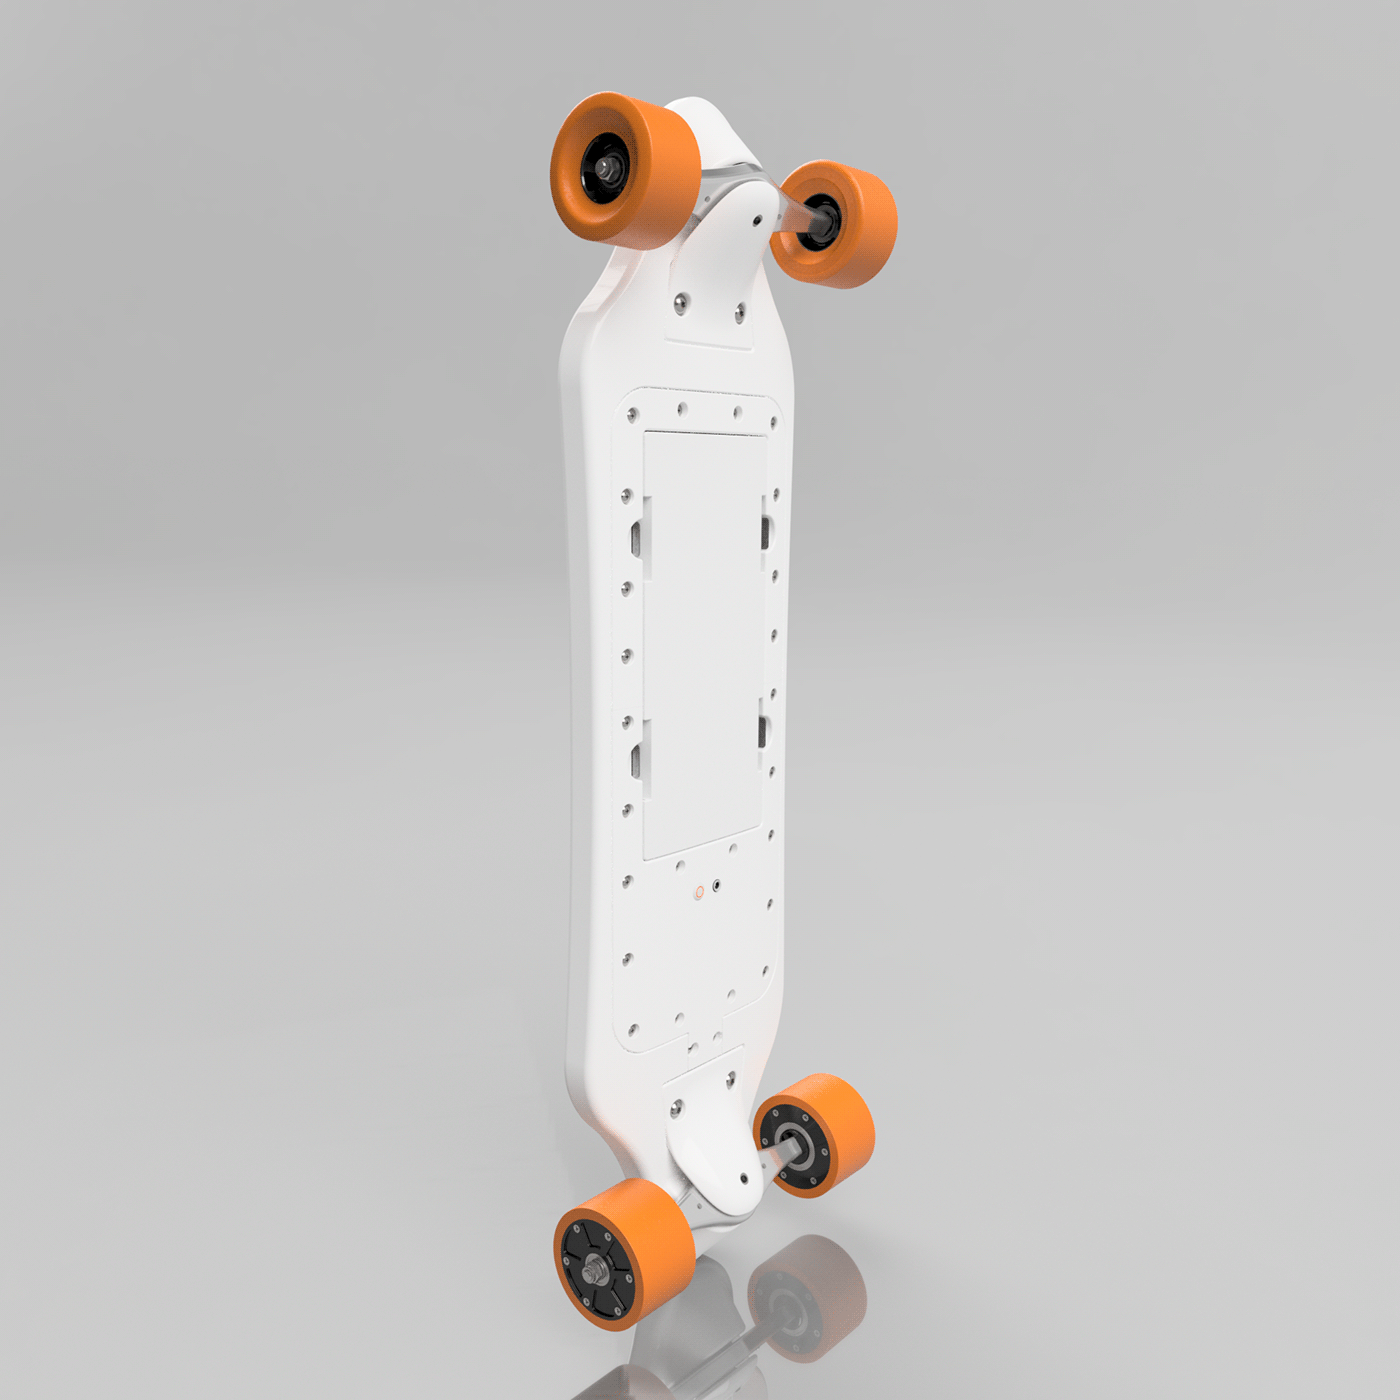
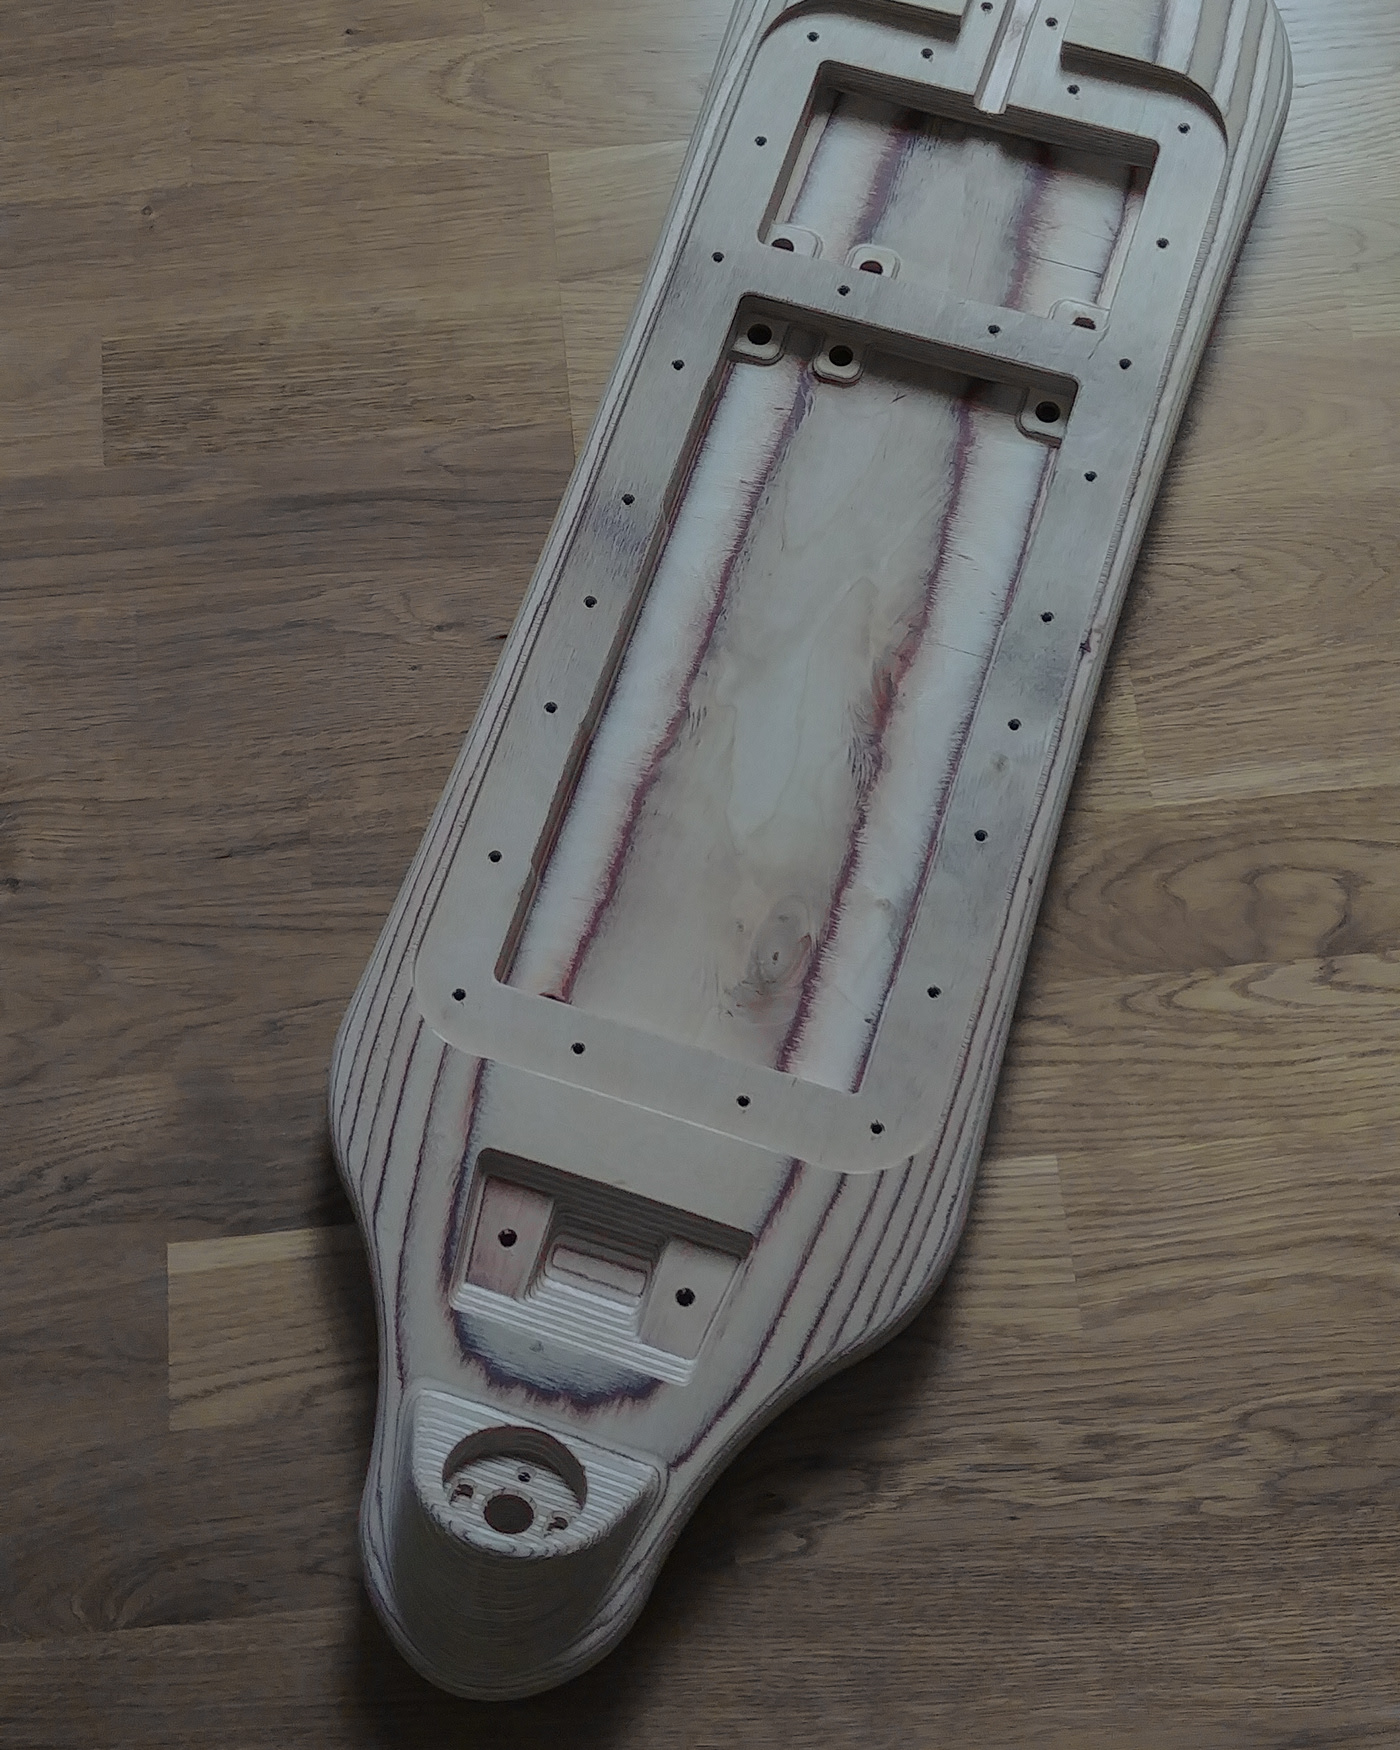
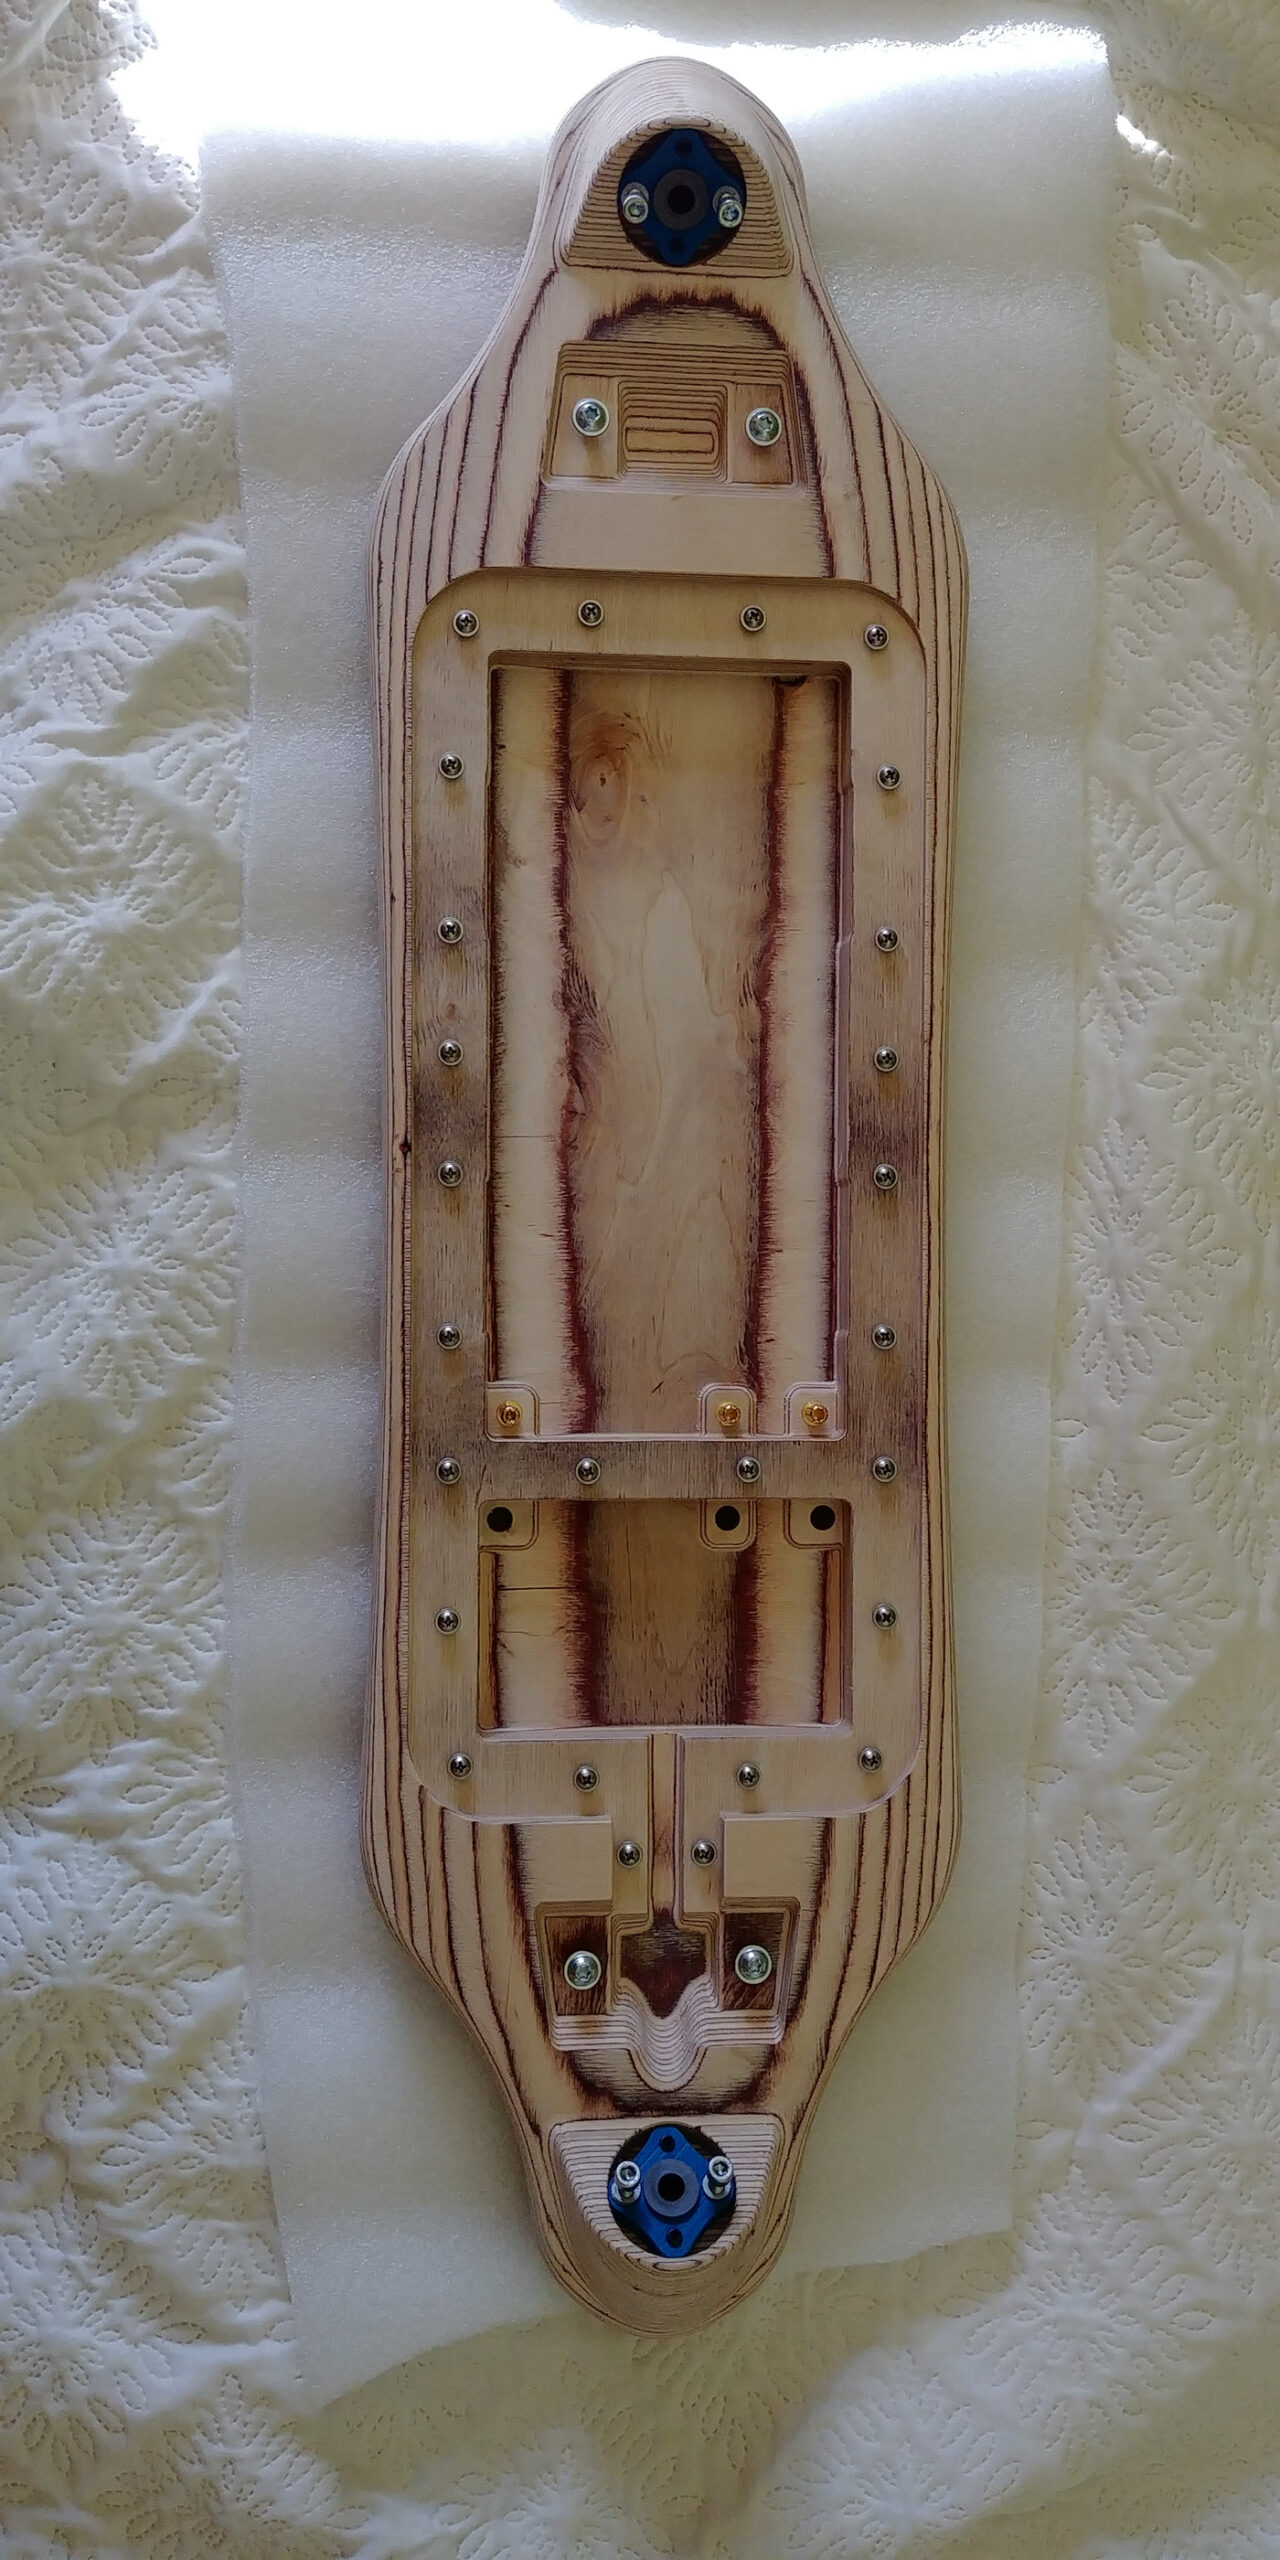
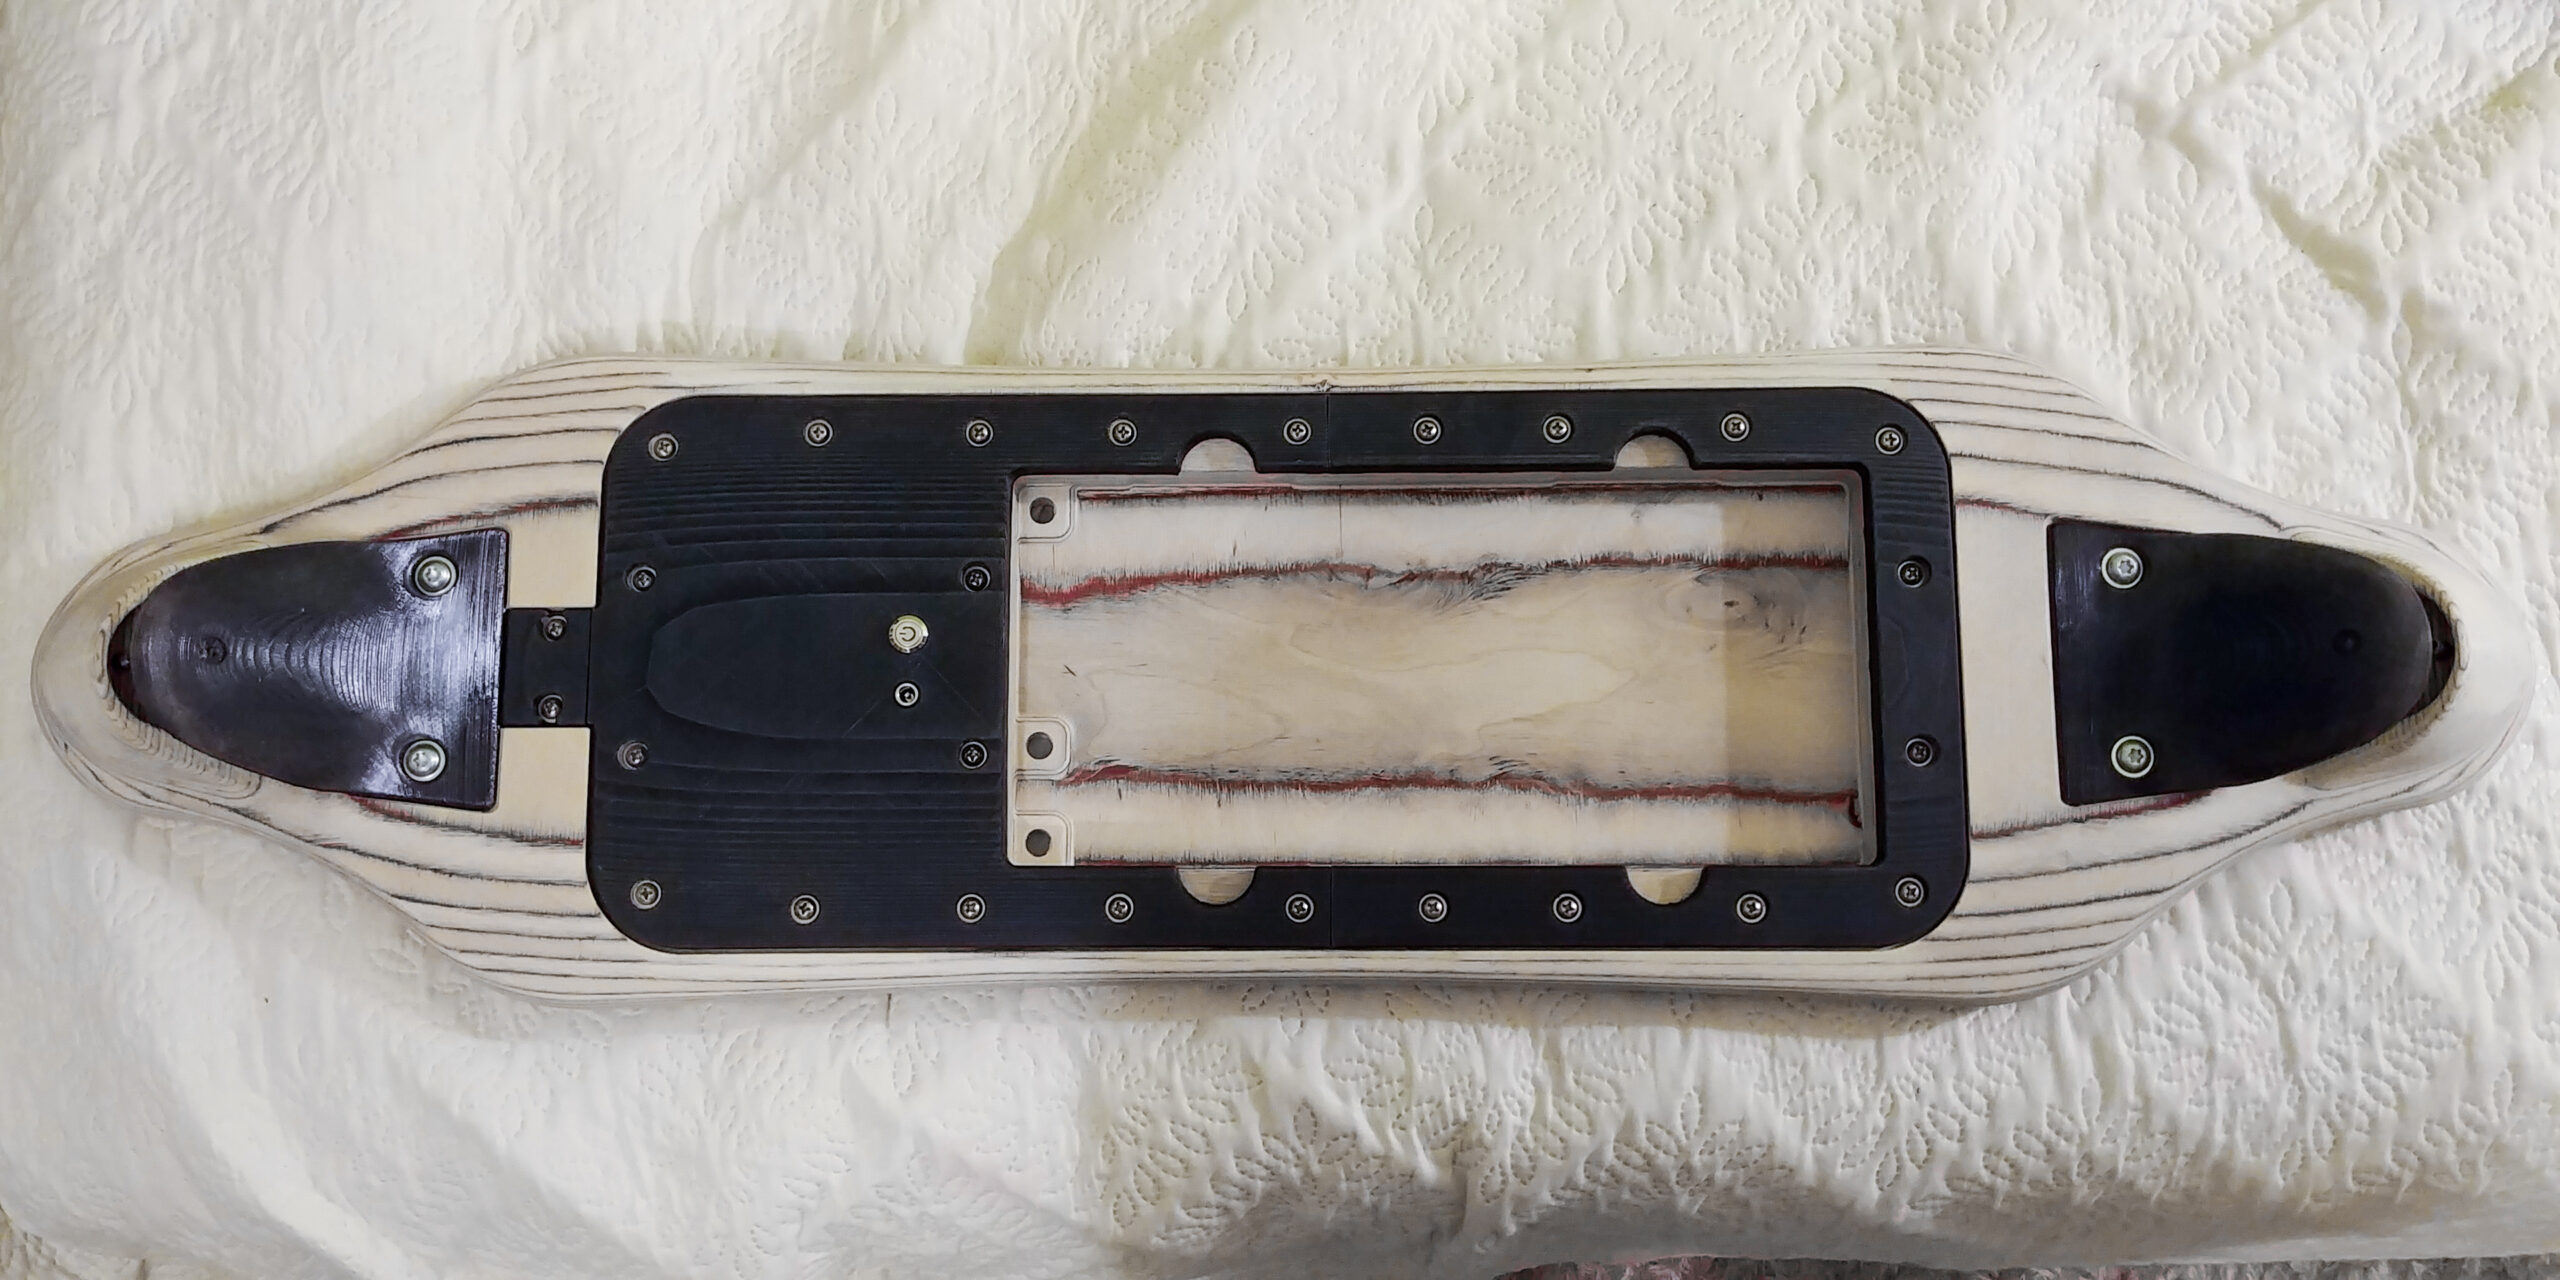
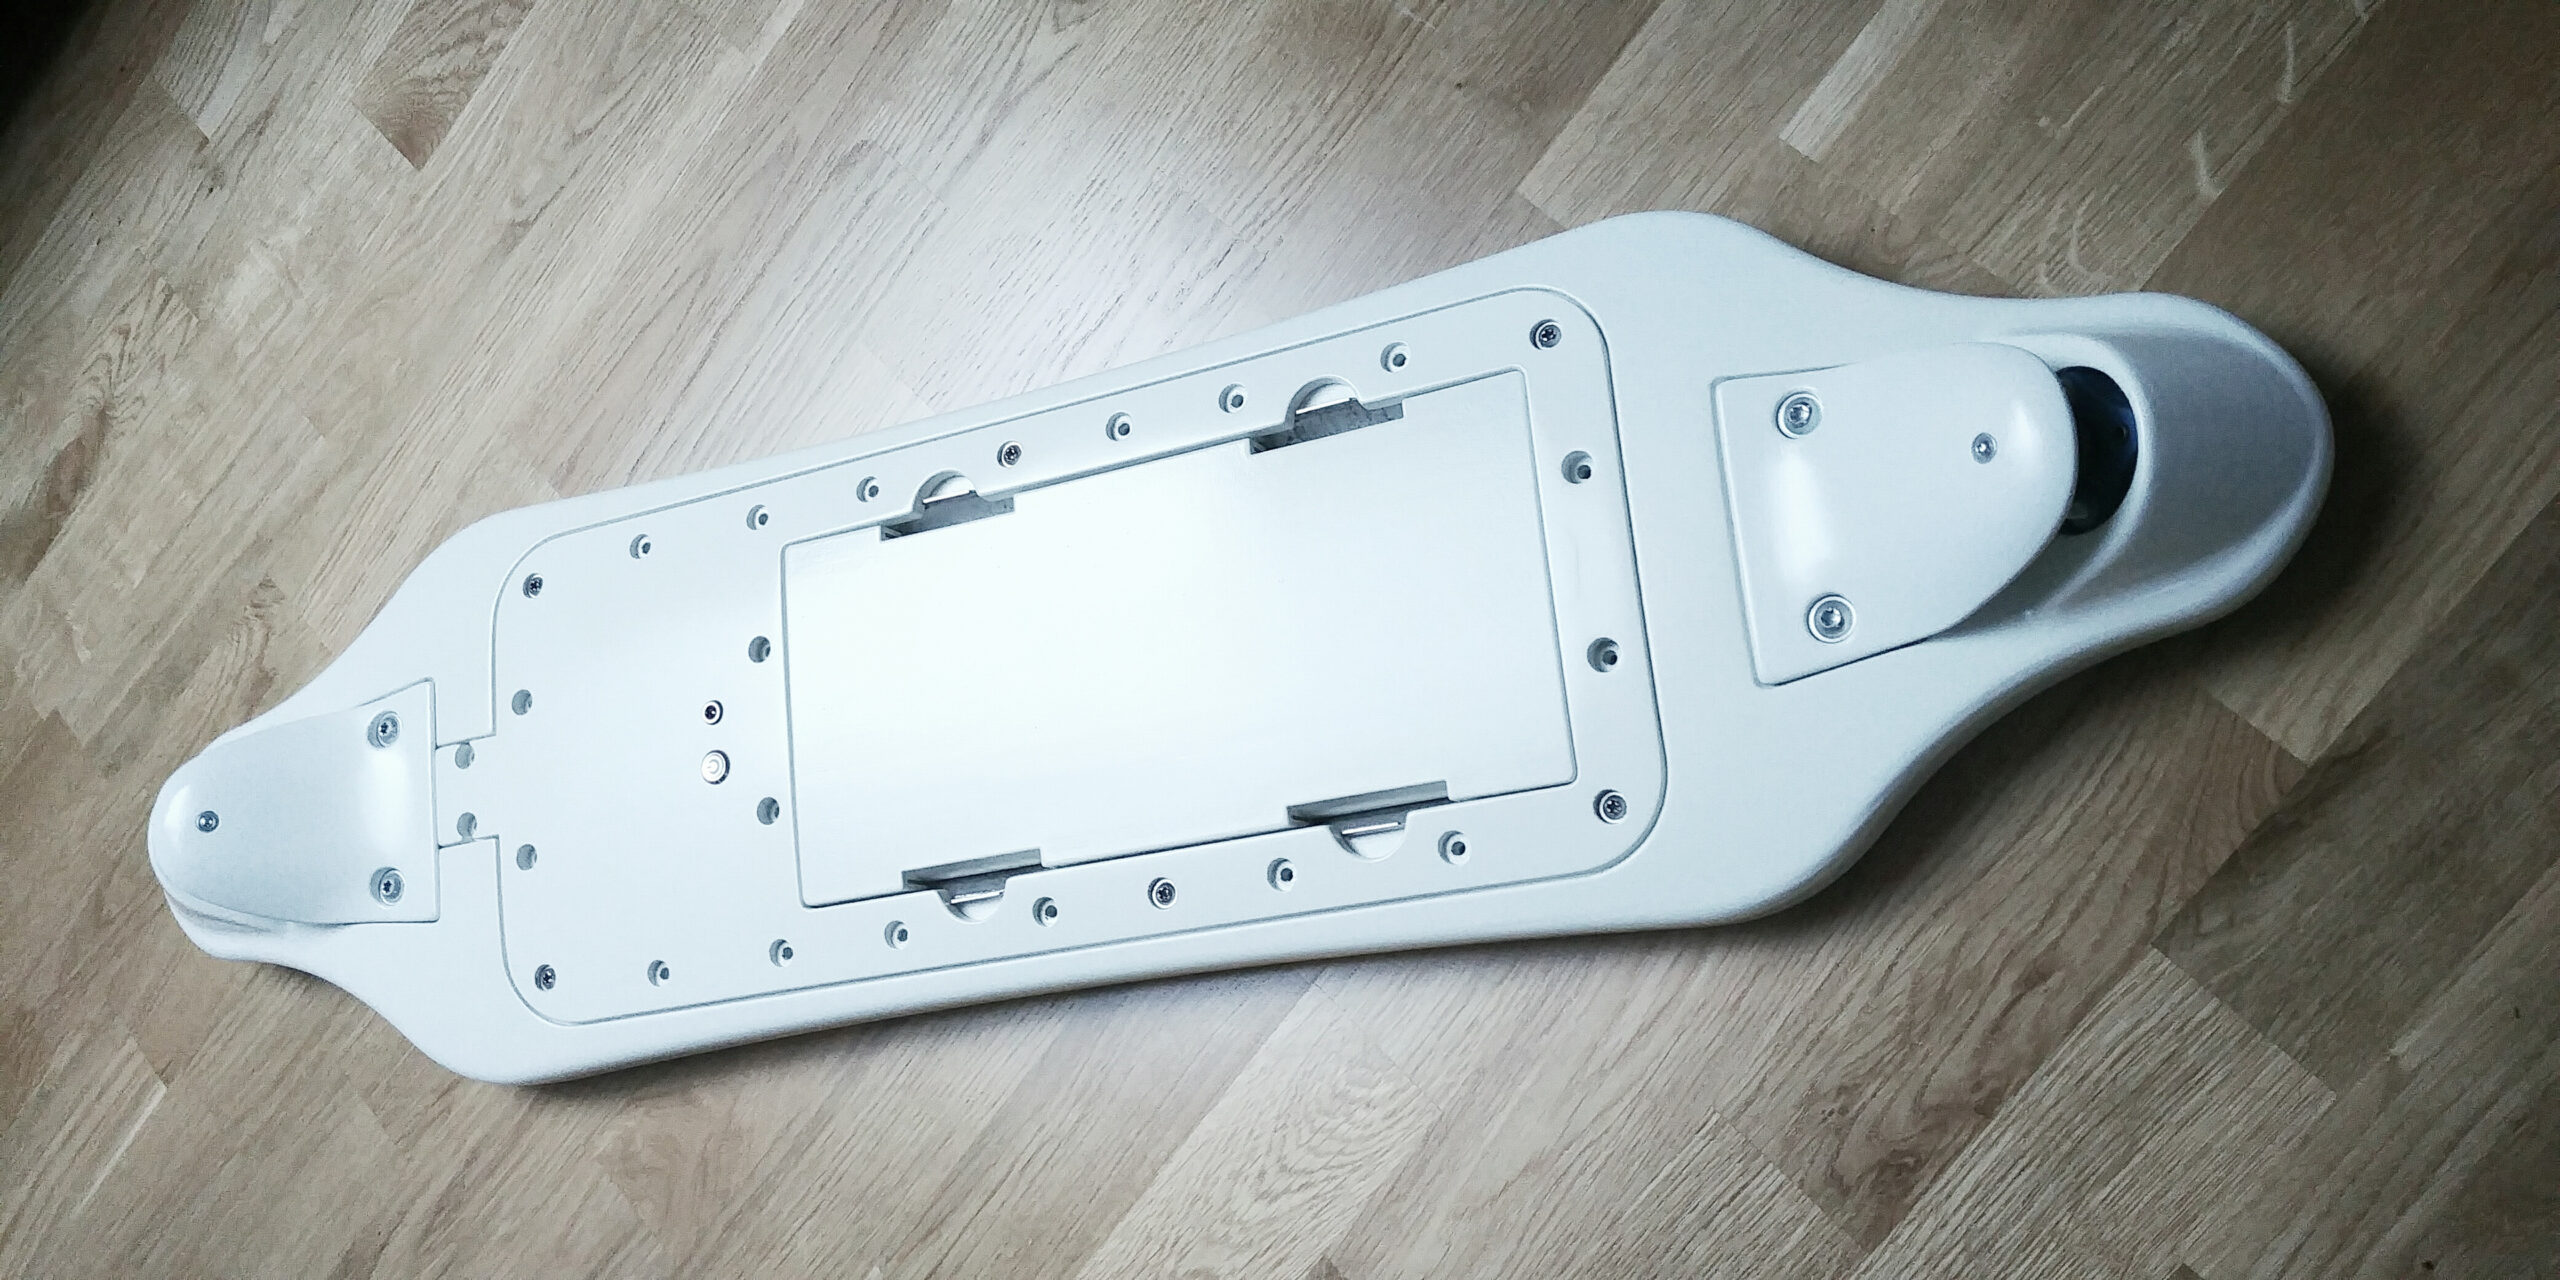
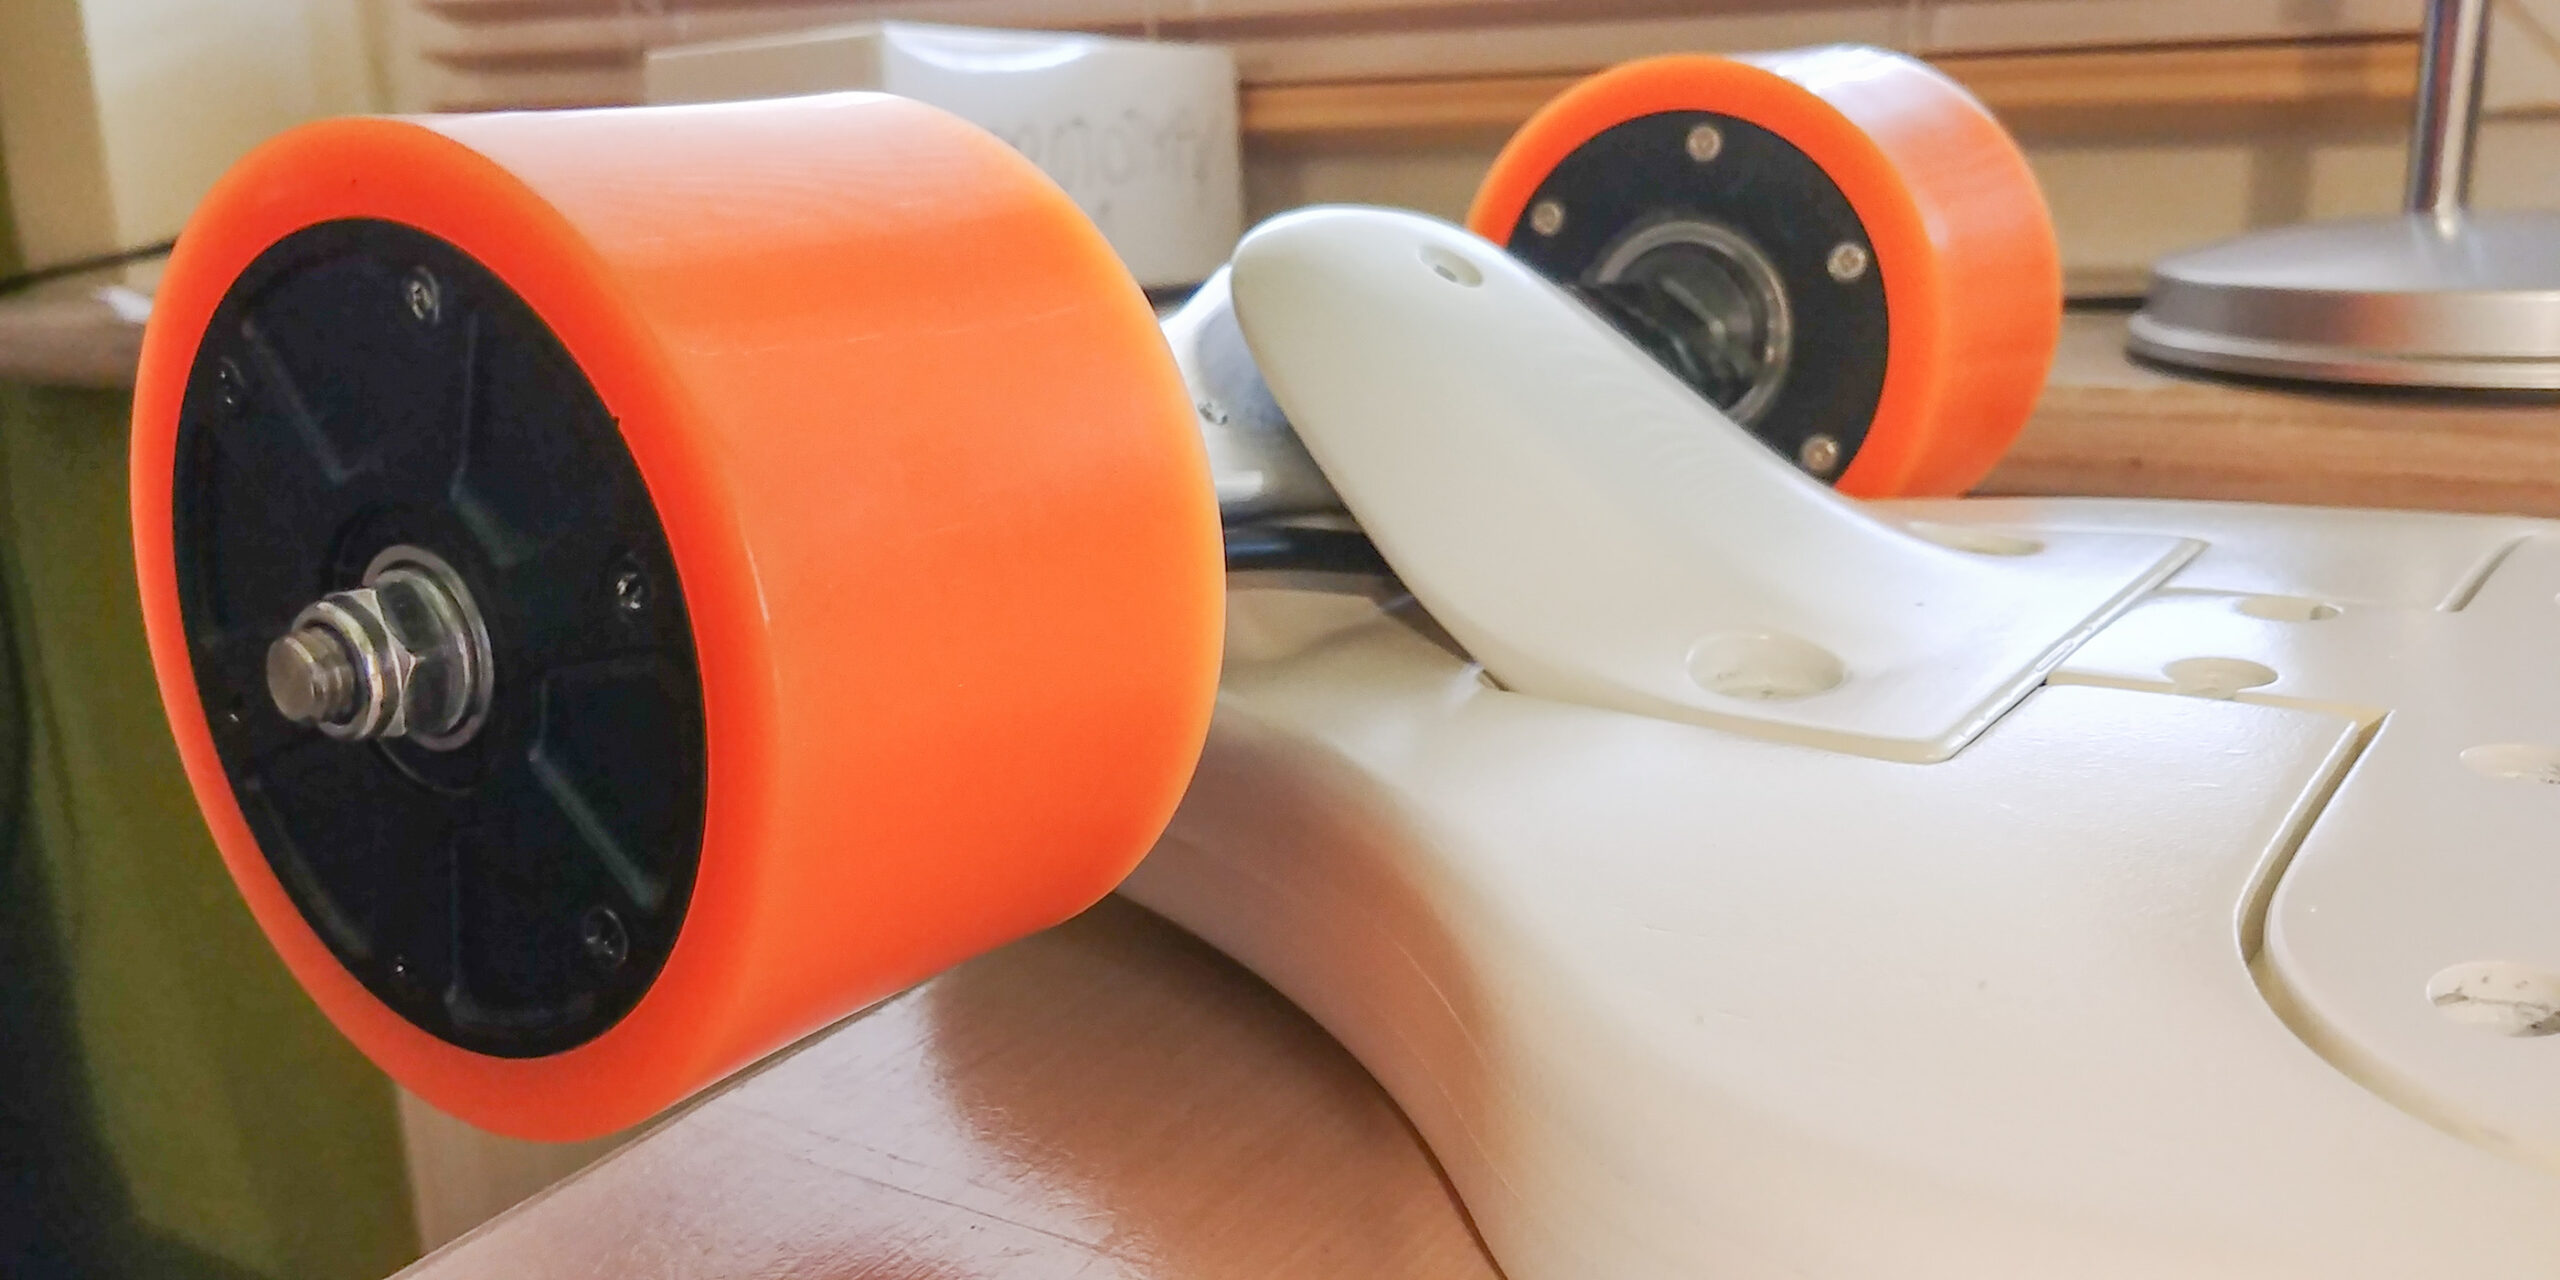
All electronics are hidden from the observer’s eyes inside the main body. The board has an integrated trucks that allows for a lower ground clearance. This is to improve the feeling of driving by bringing the center of gravity closer to the ground.
In the prototype, I used 90mm polyurethane wheels and hub motors. I know that this is not the perfect choice when it comes to acceleration, but it catches the eye with its clean design.

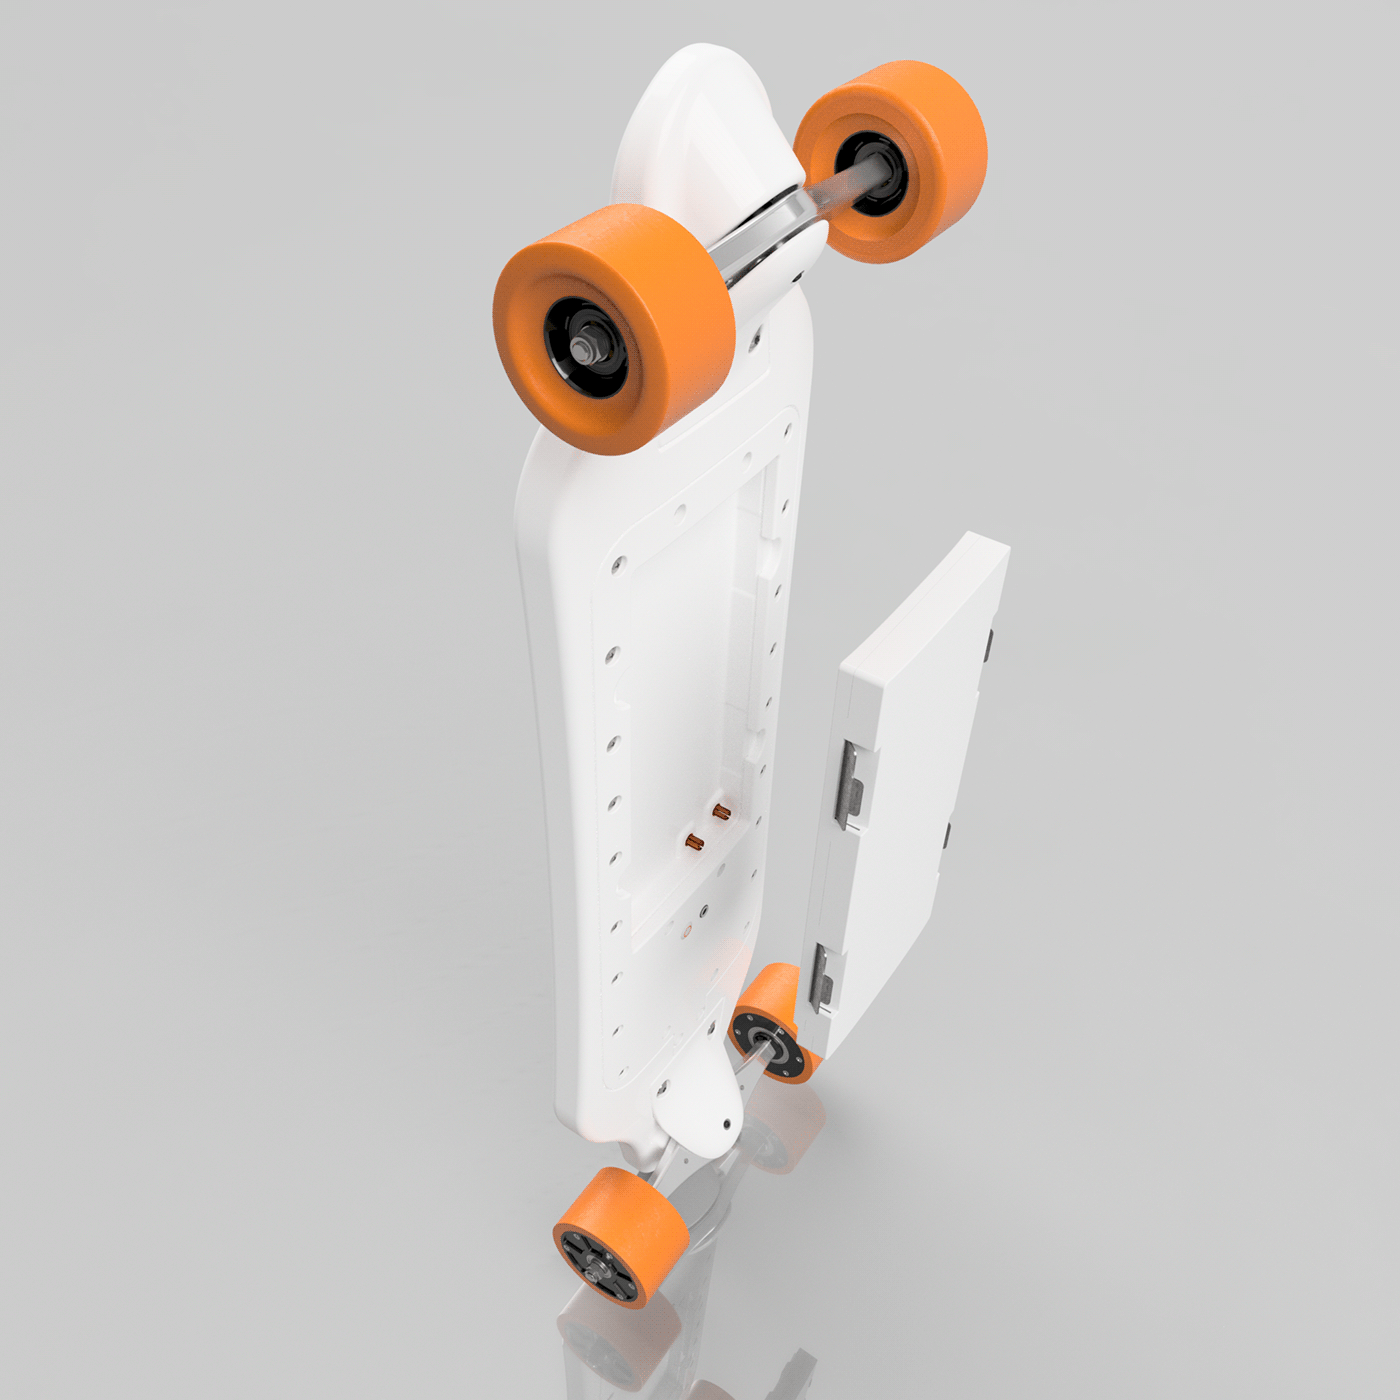
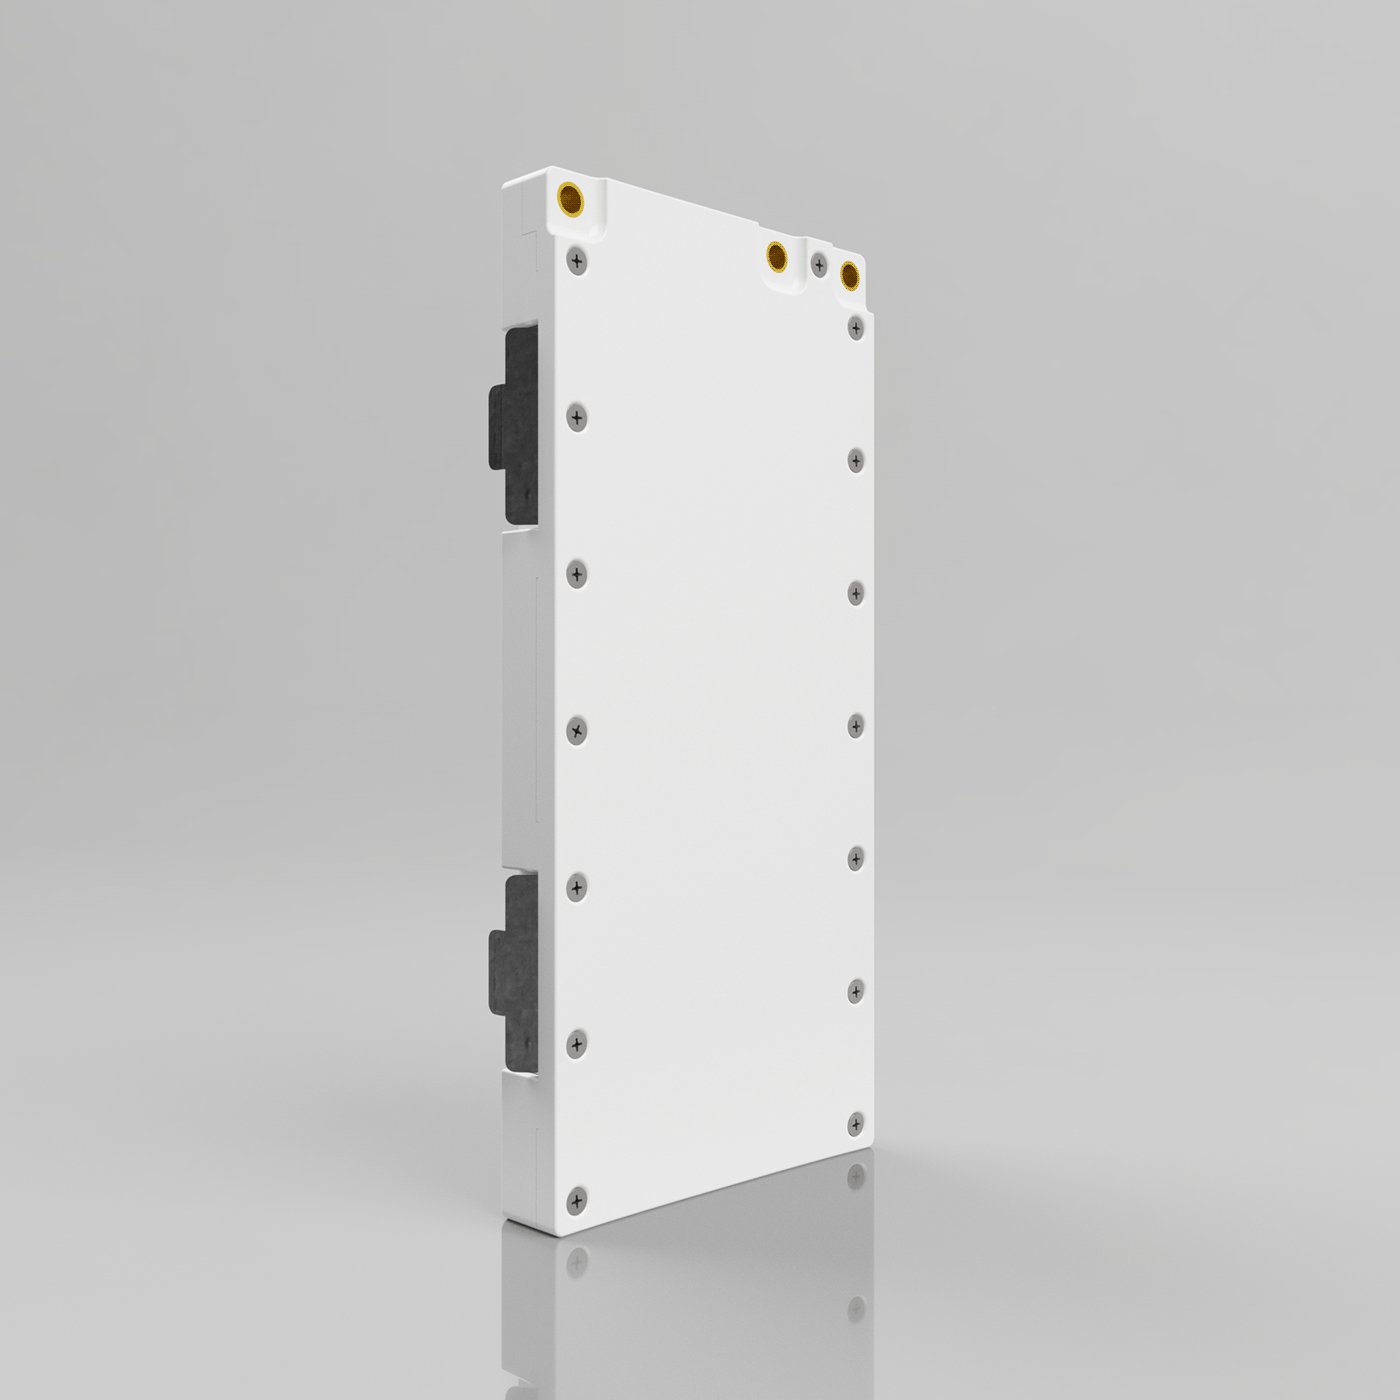
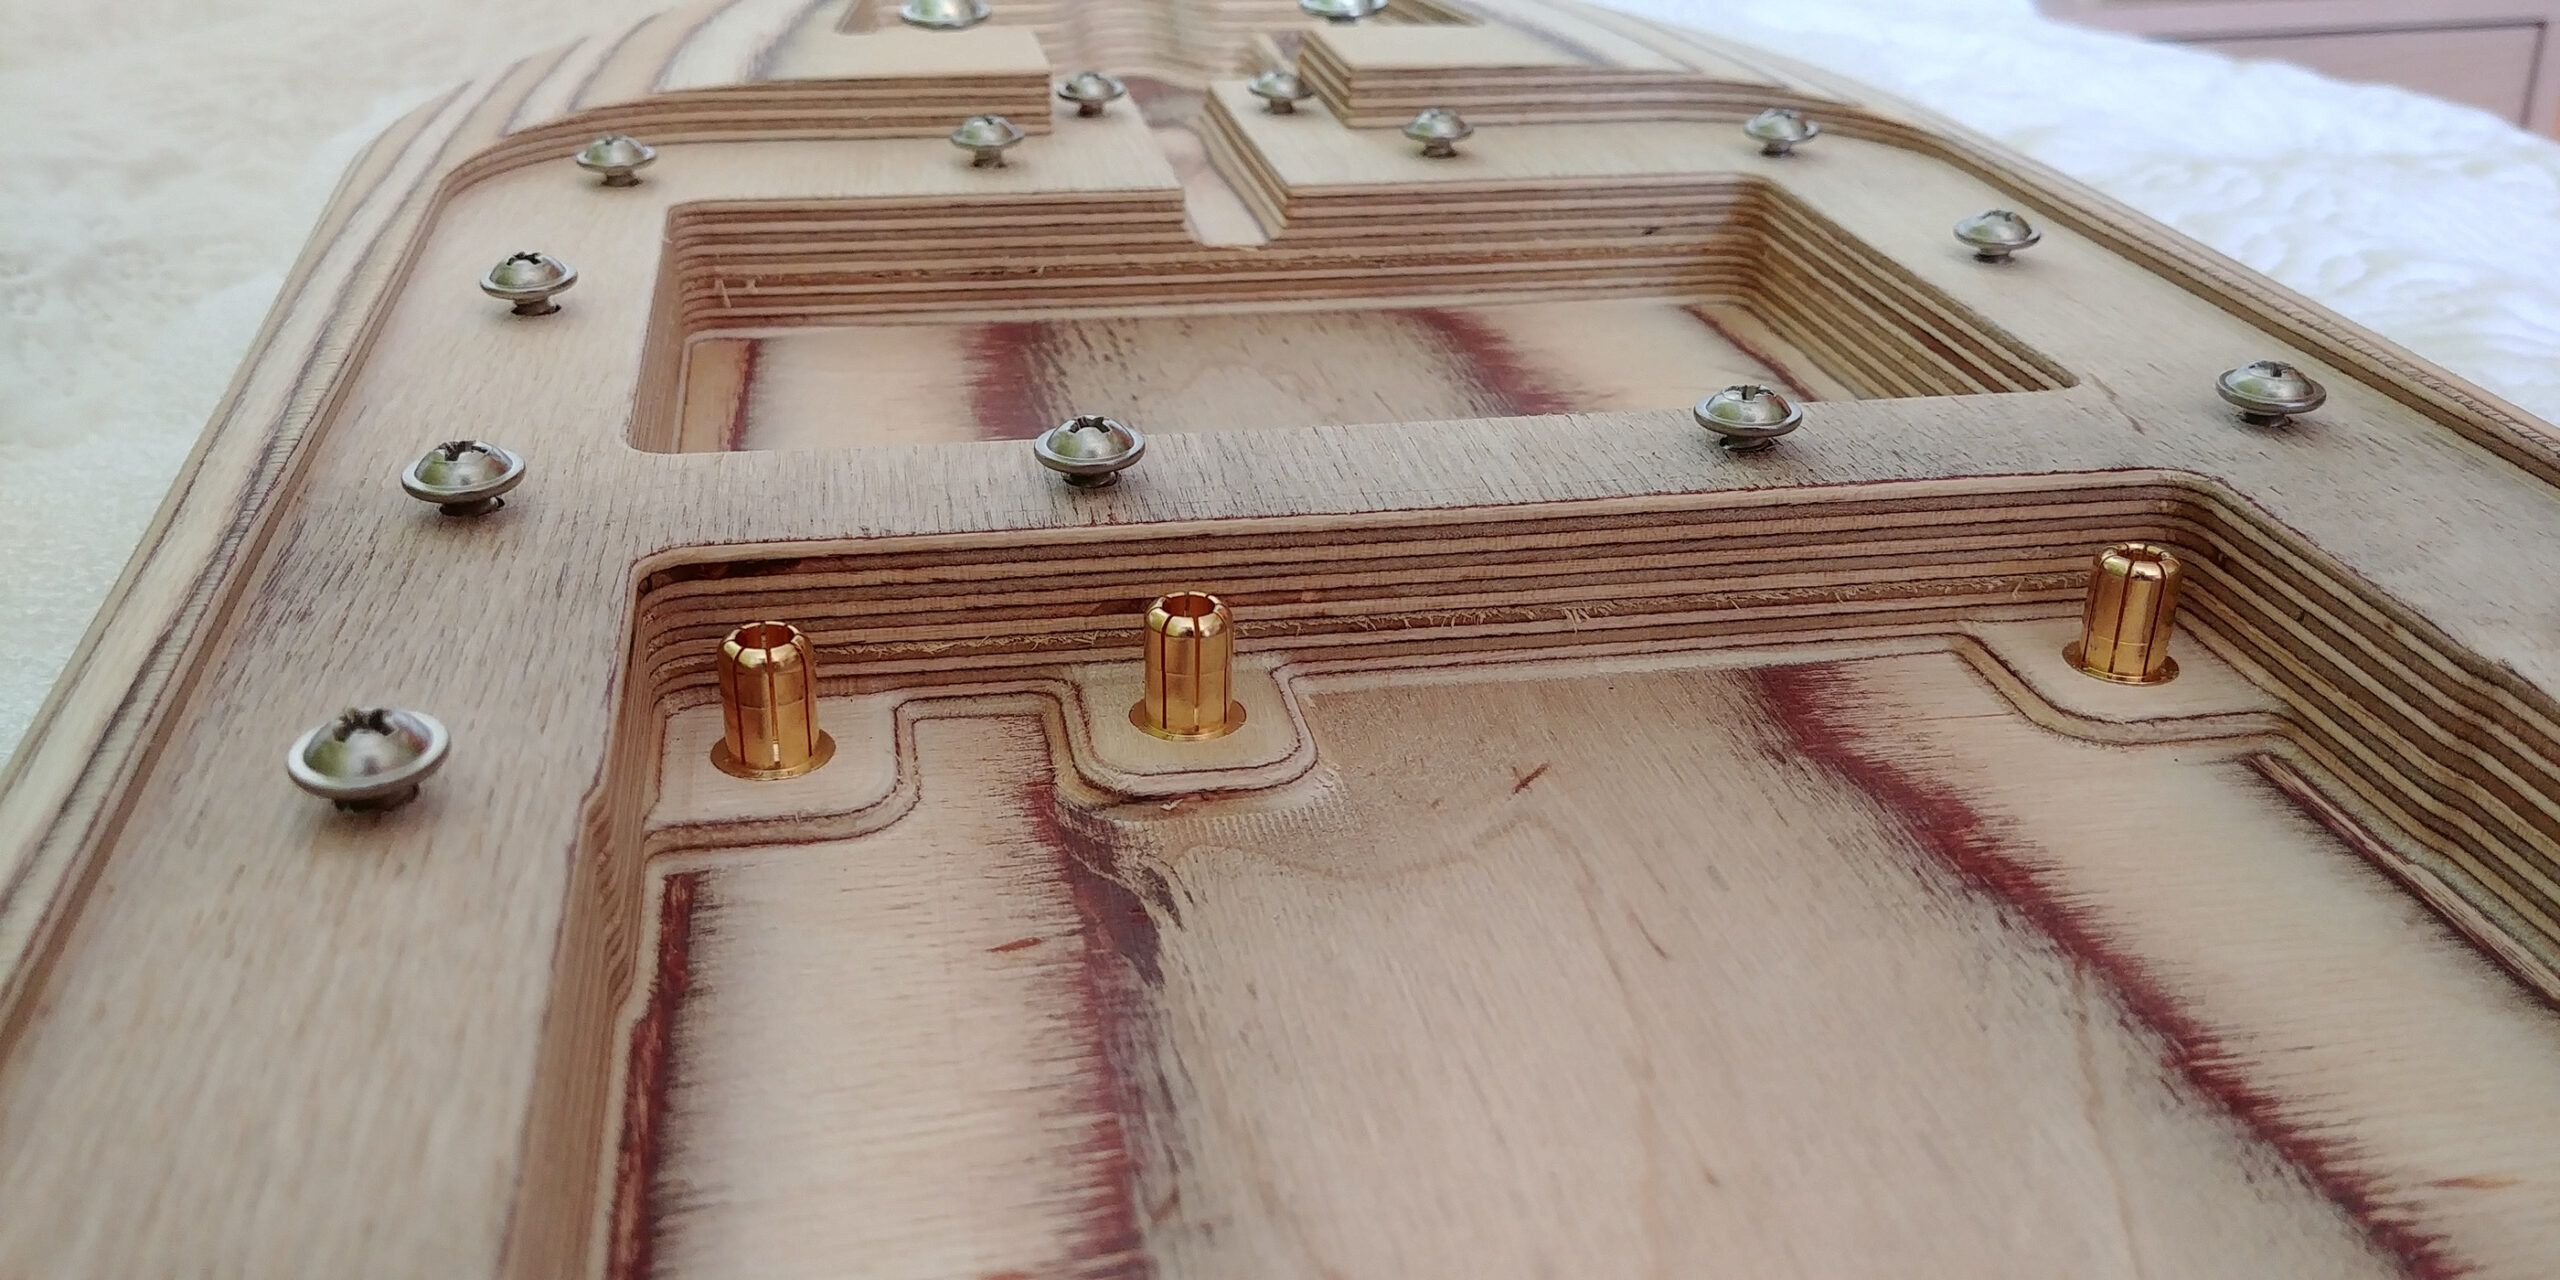
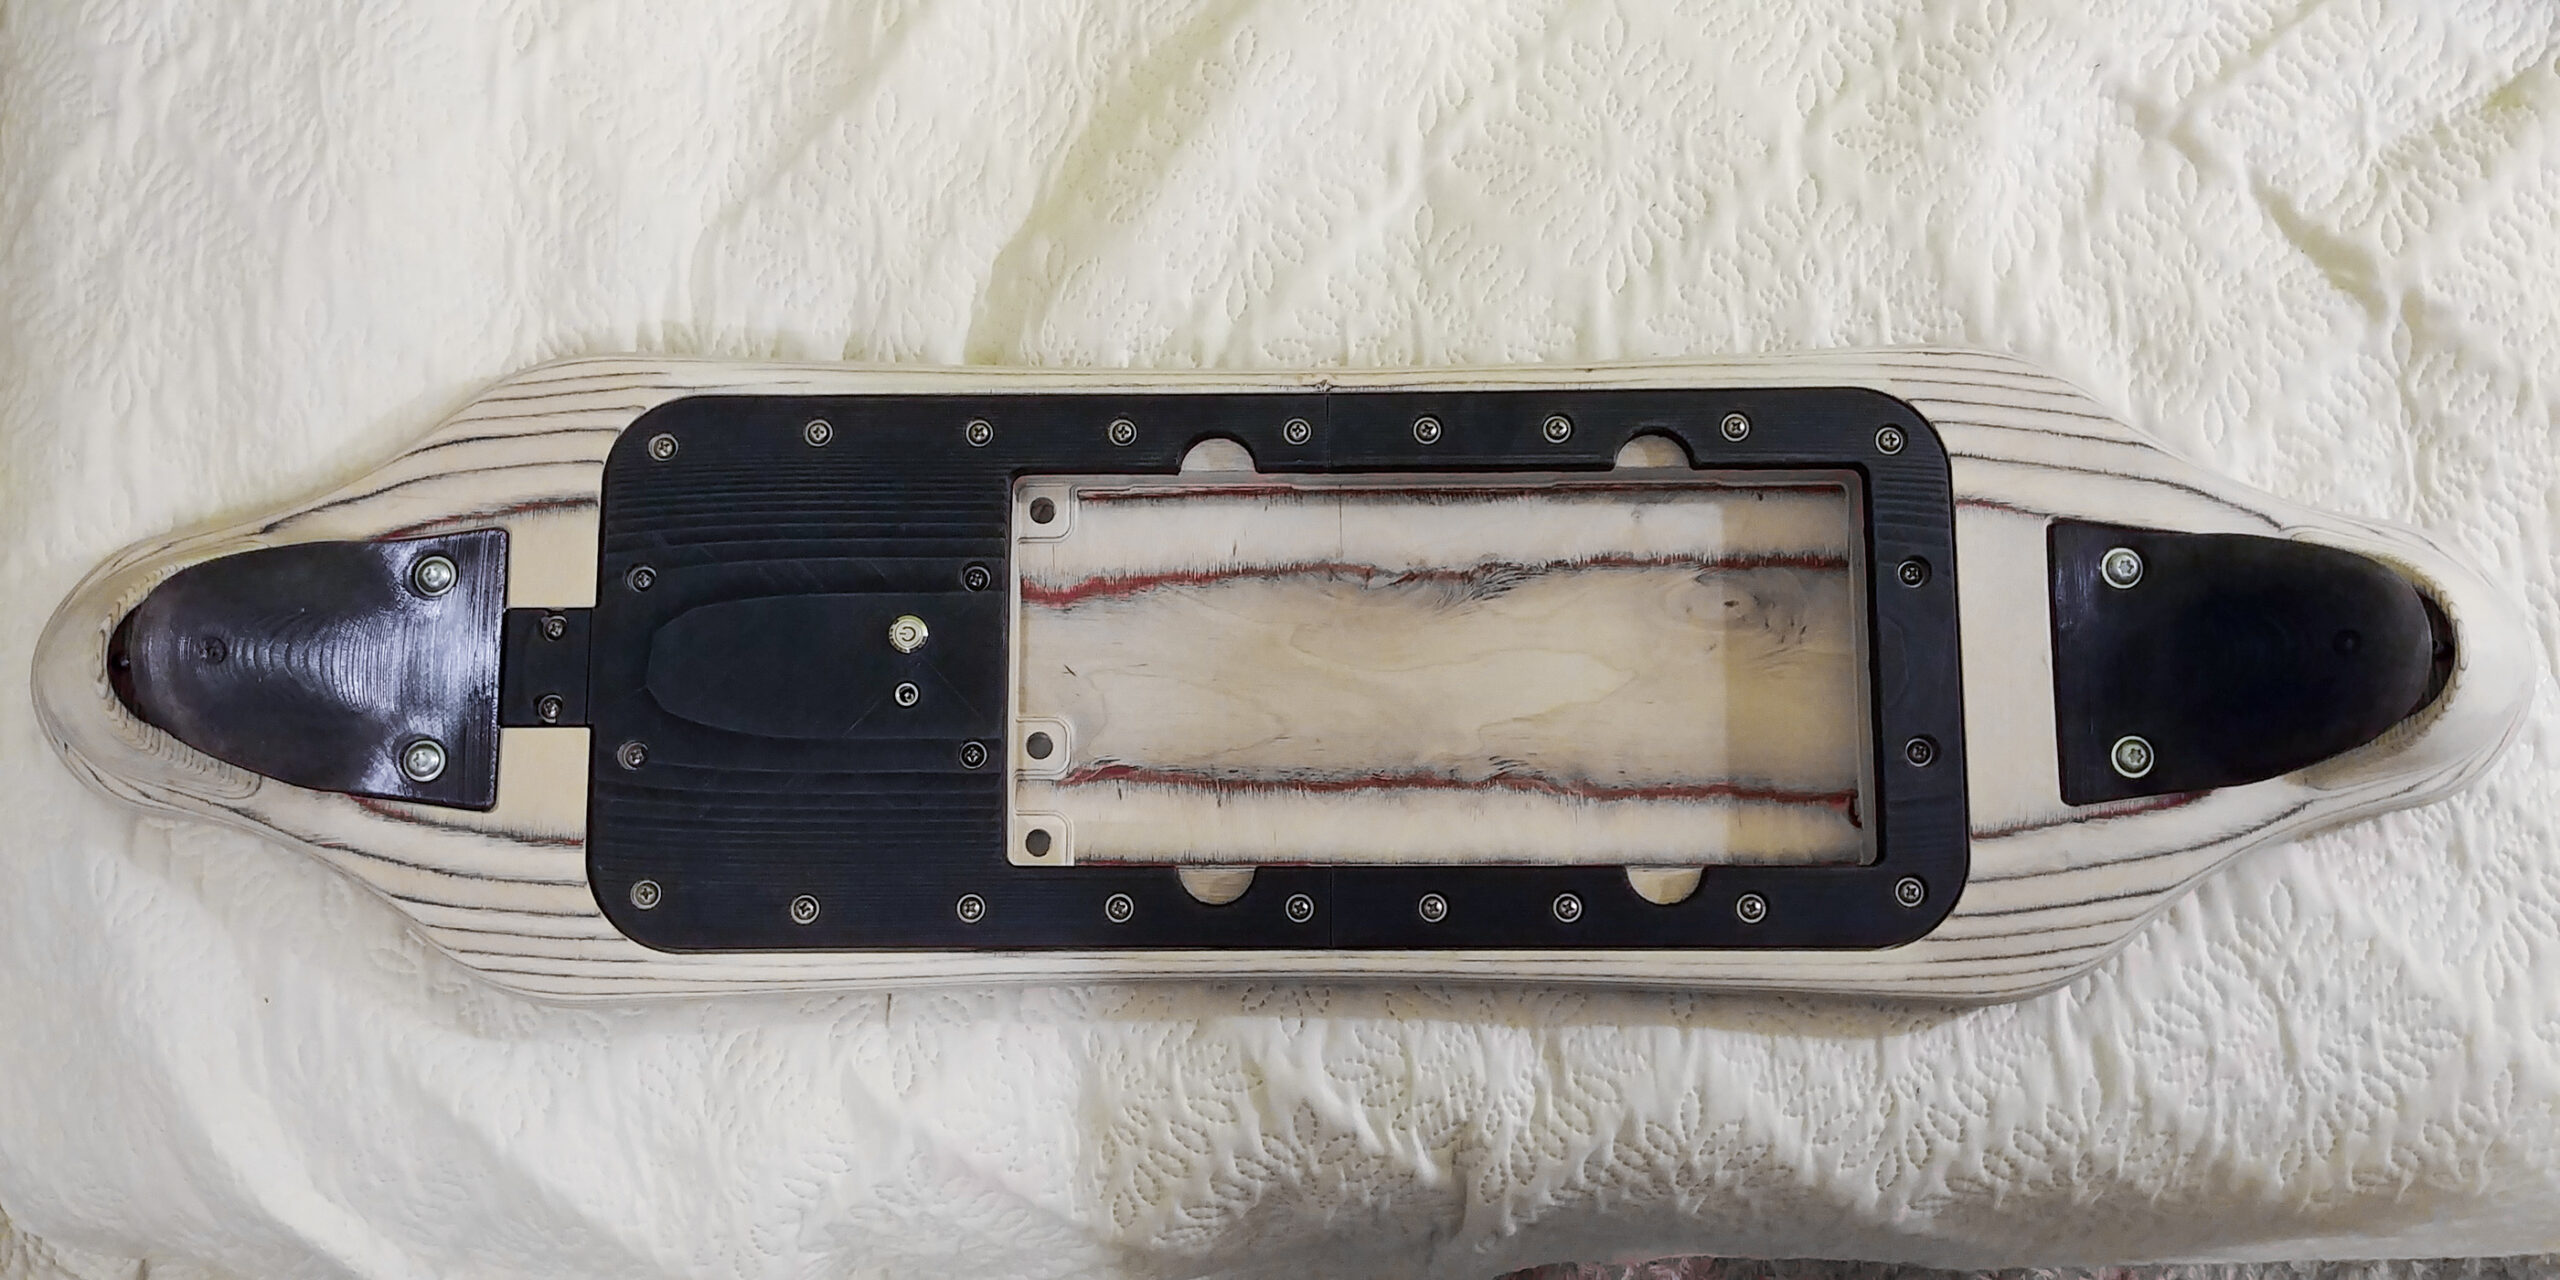
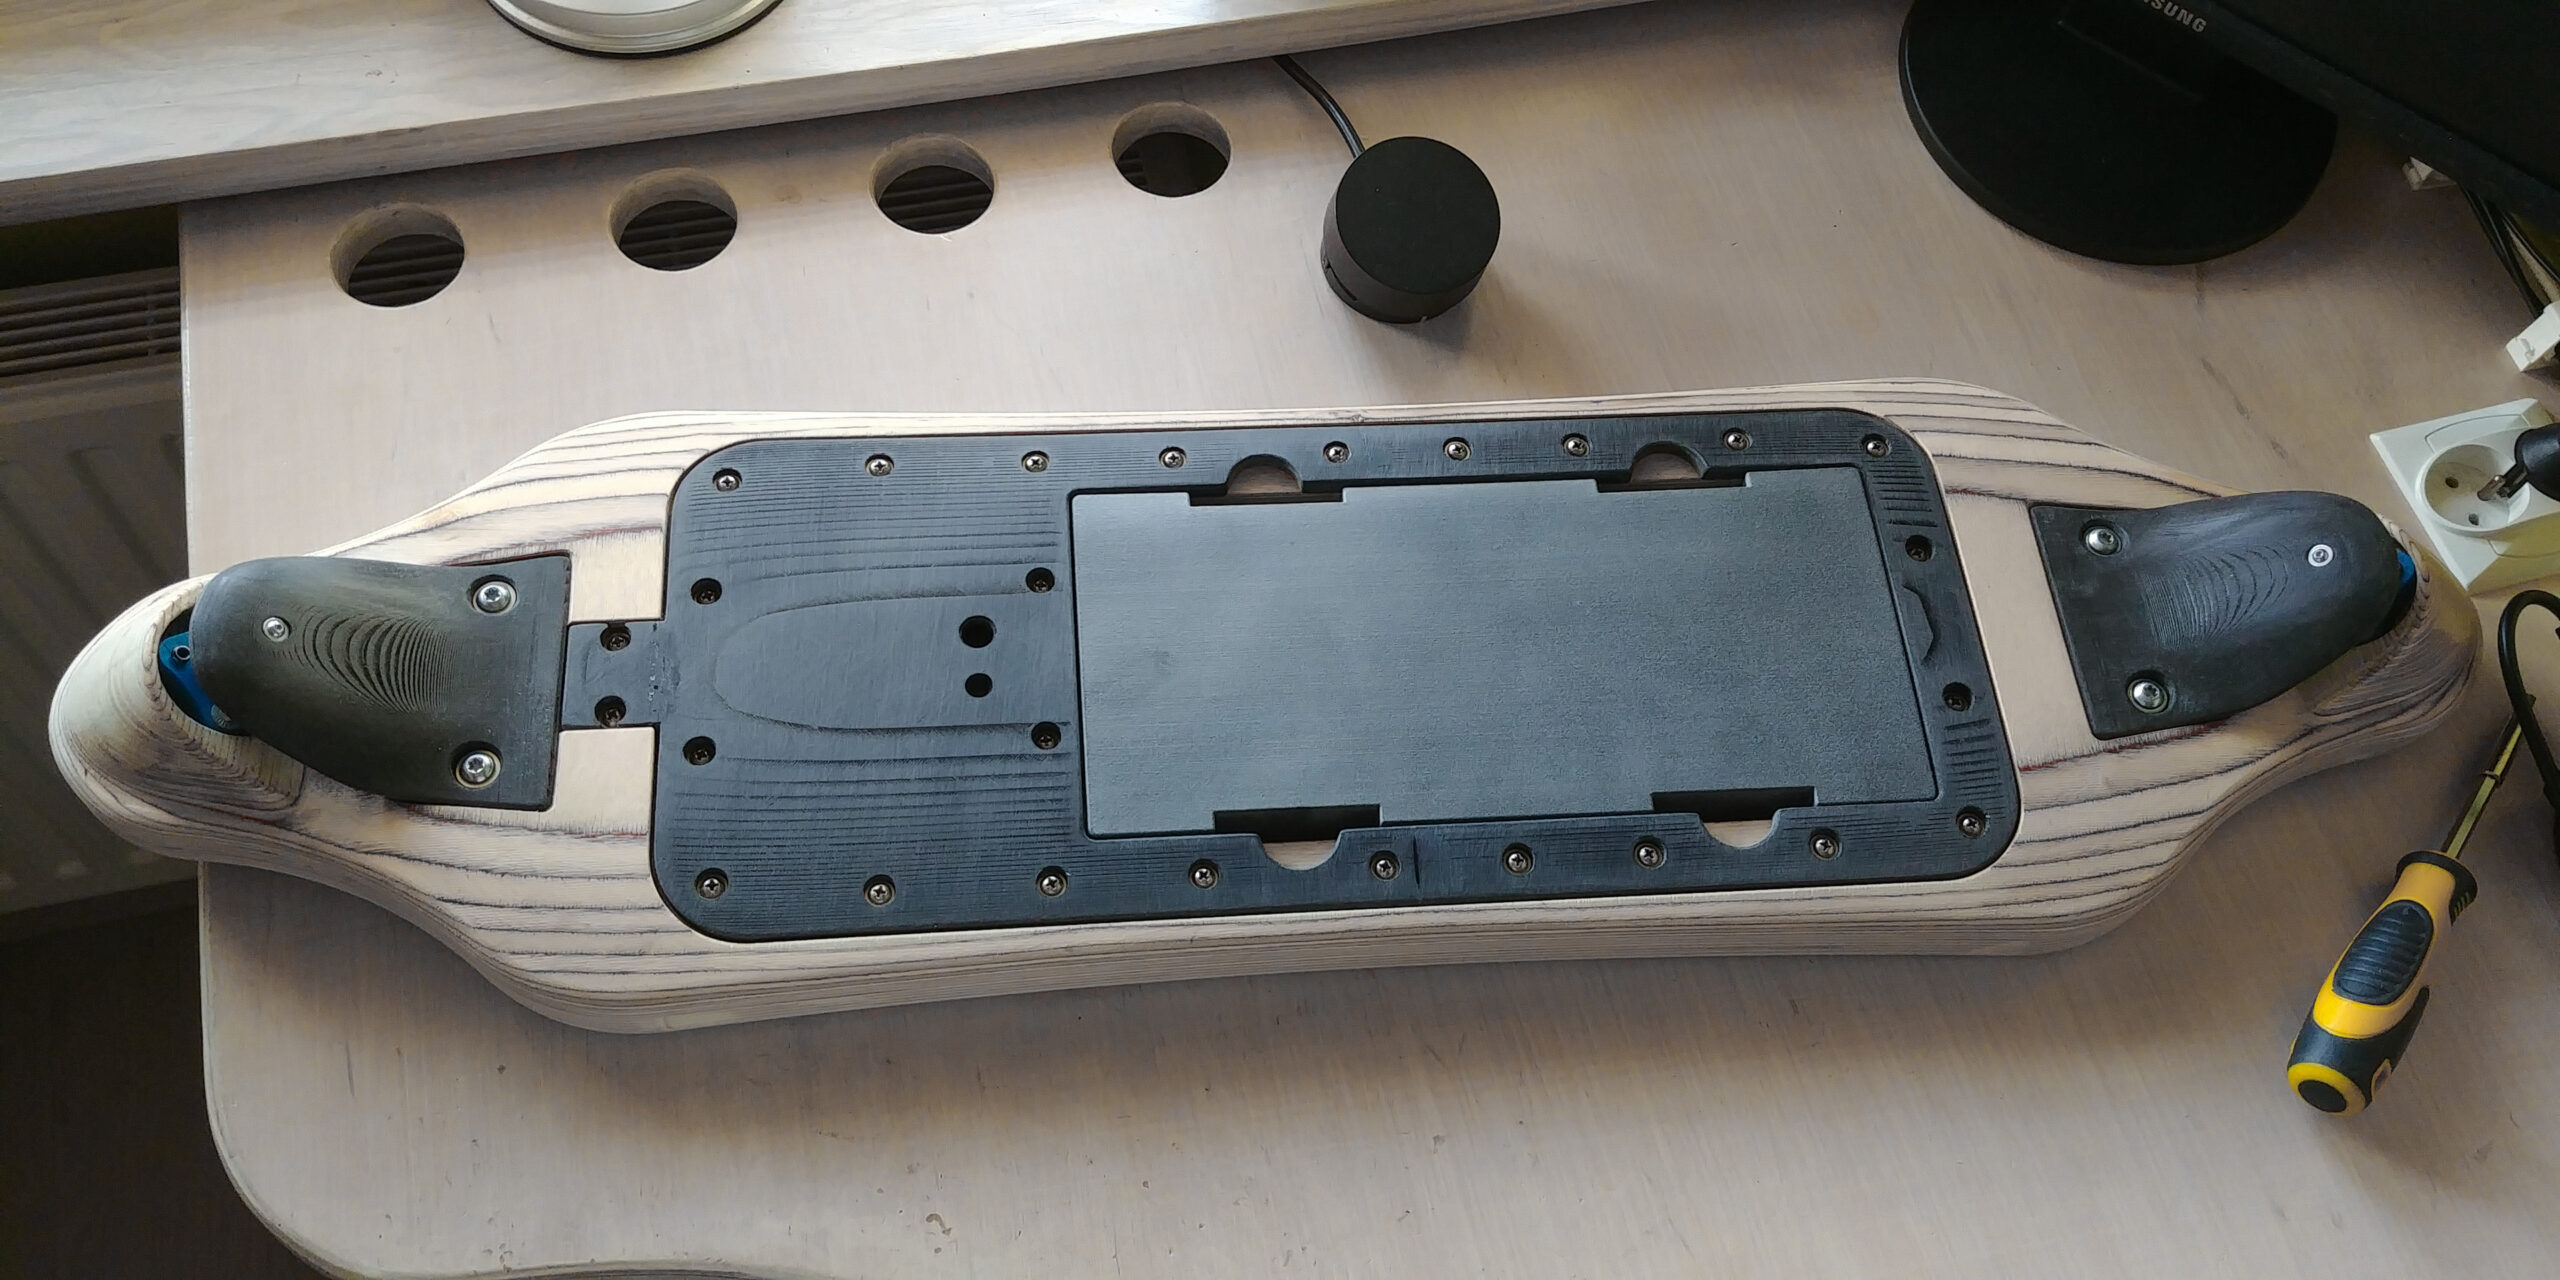
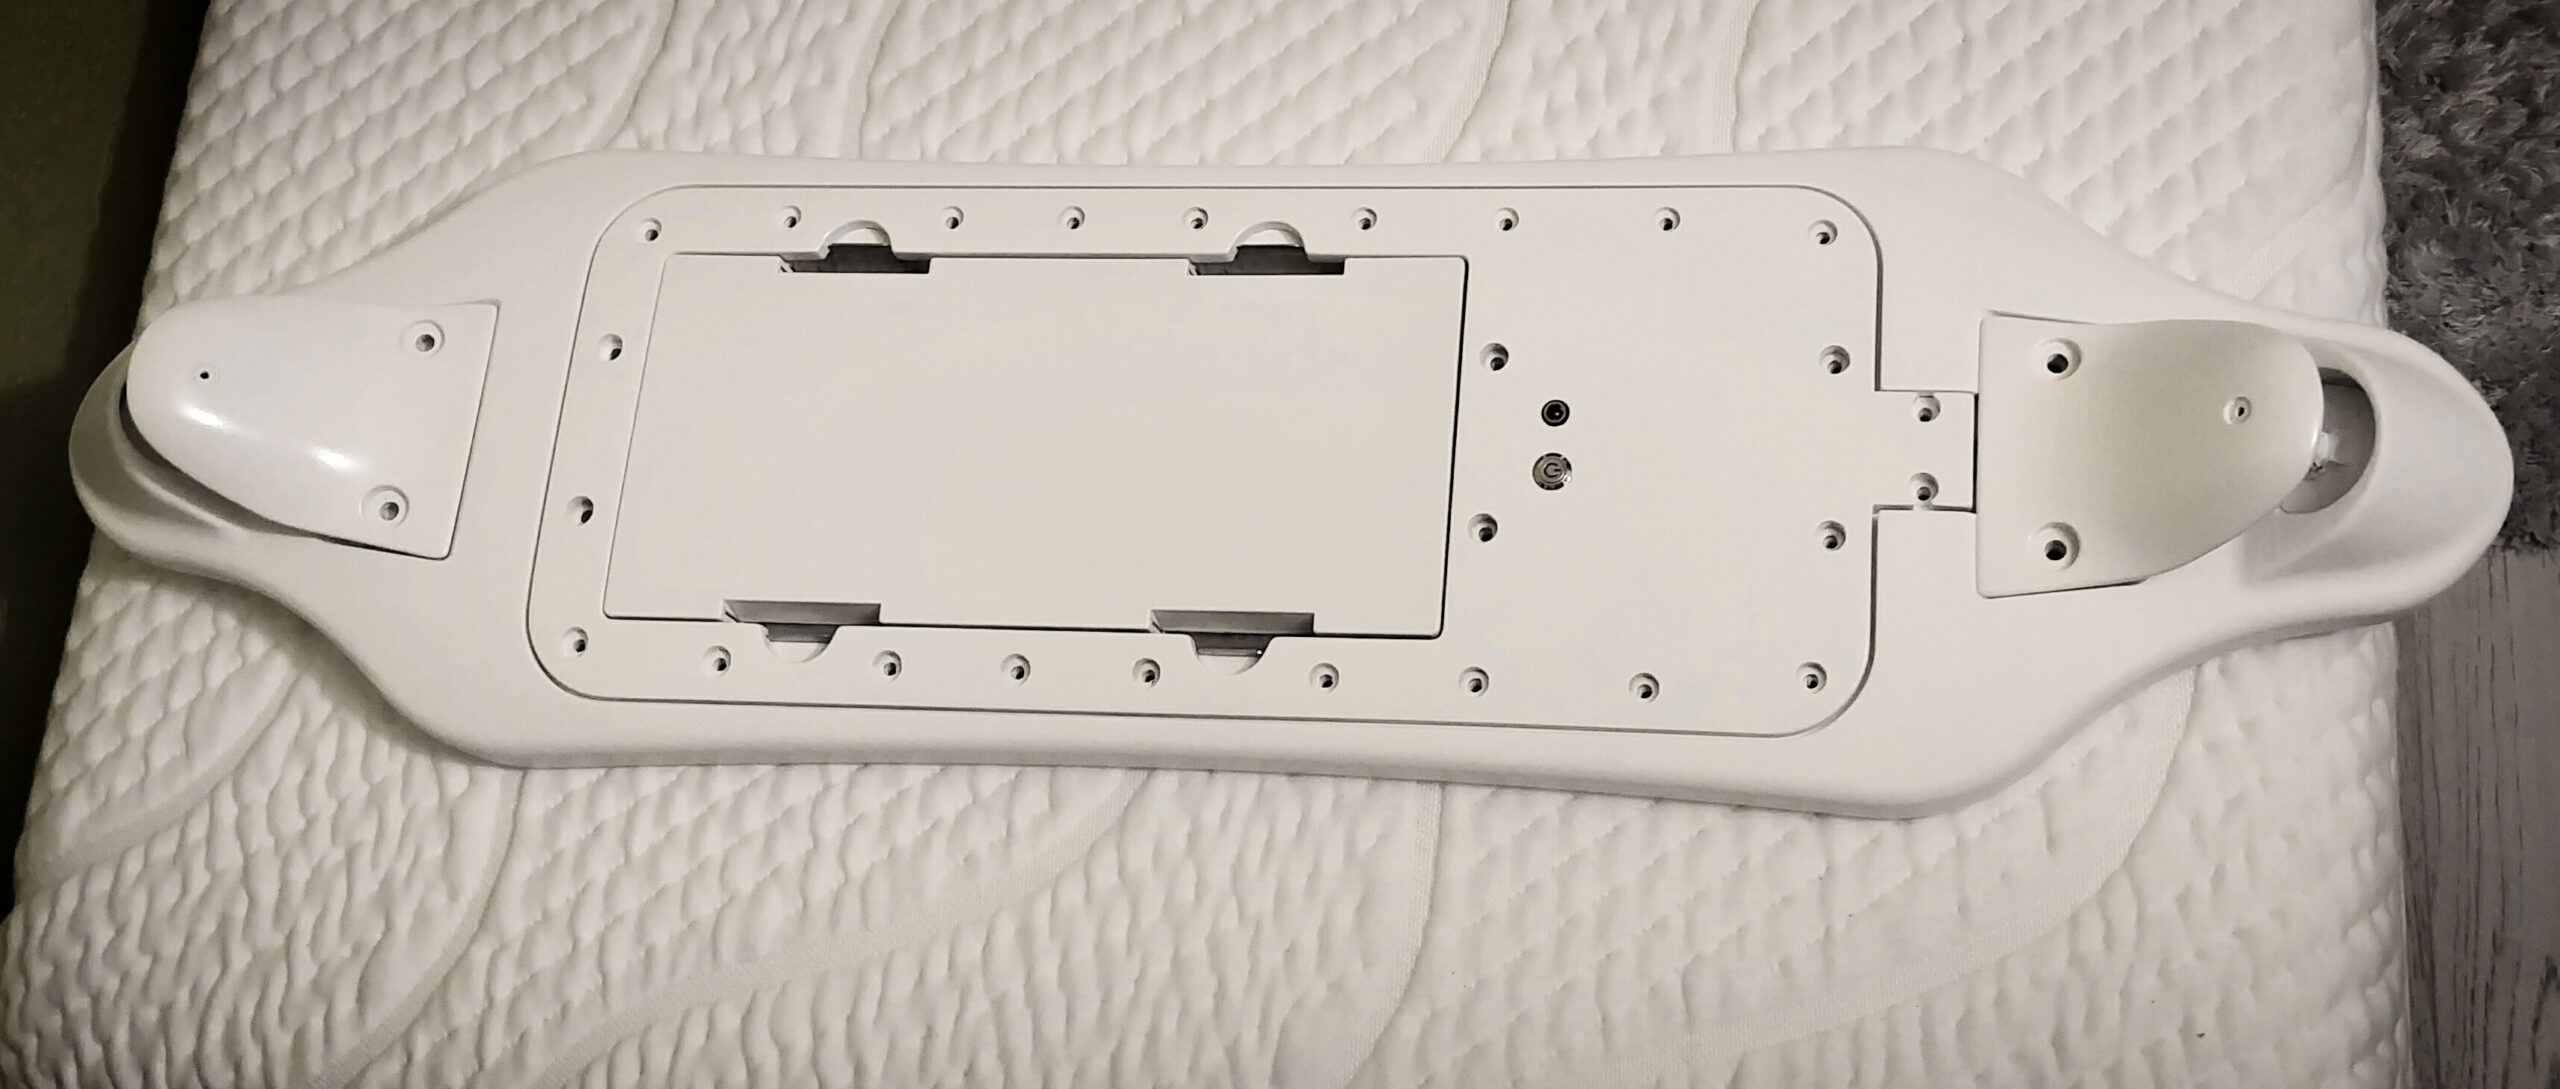
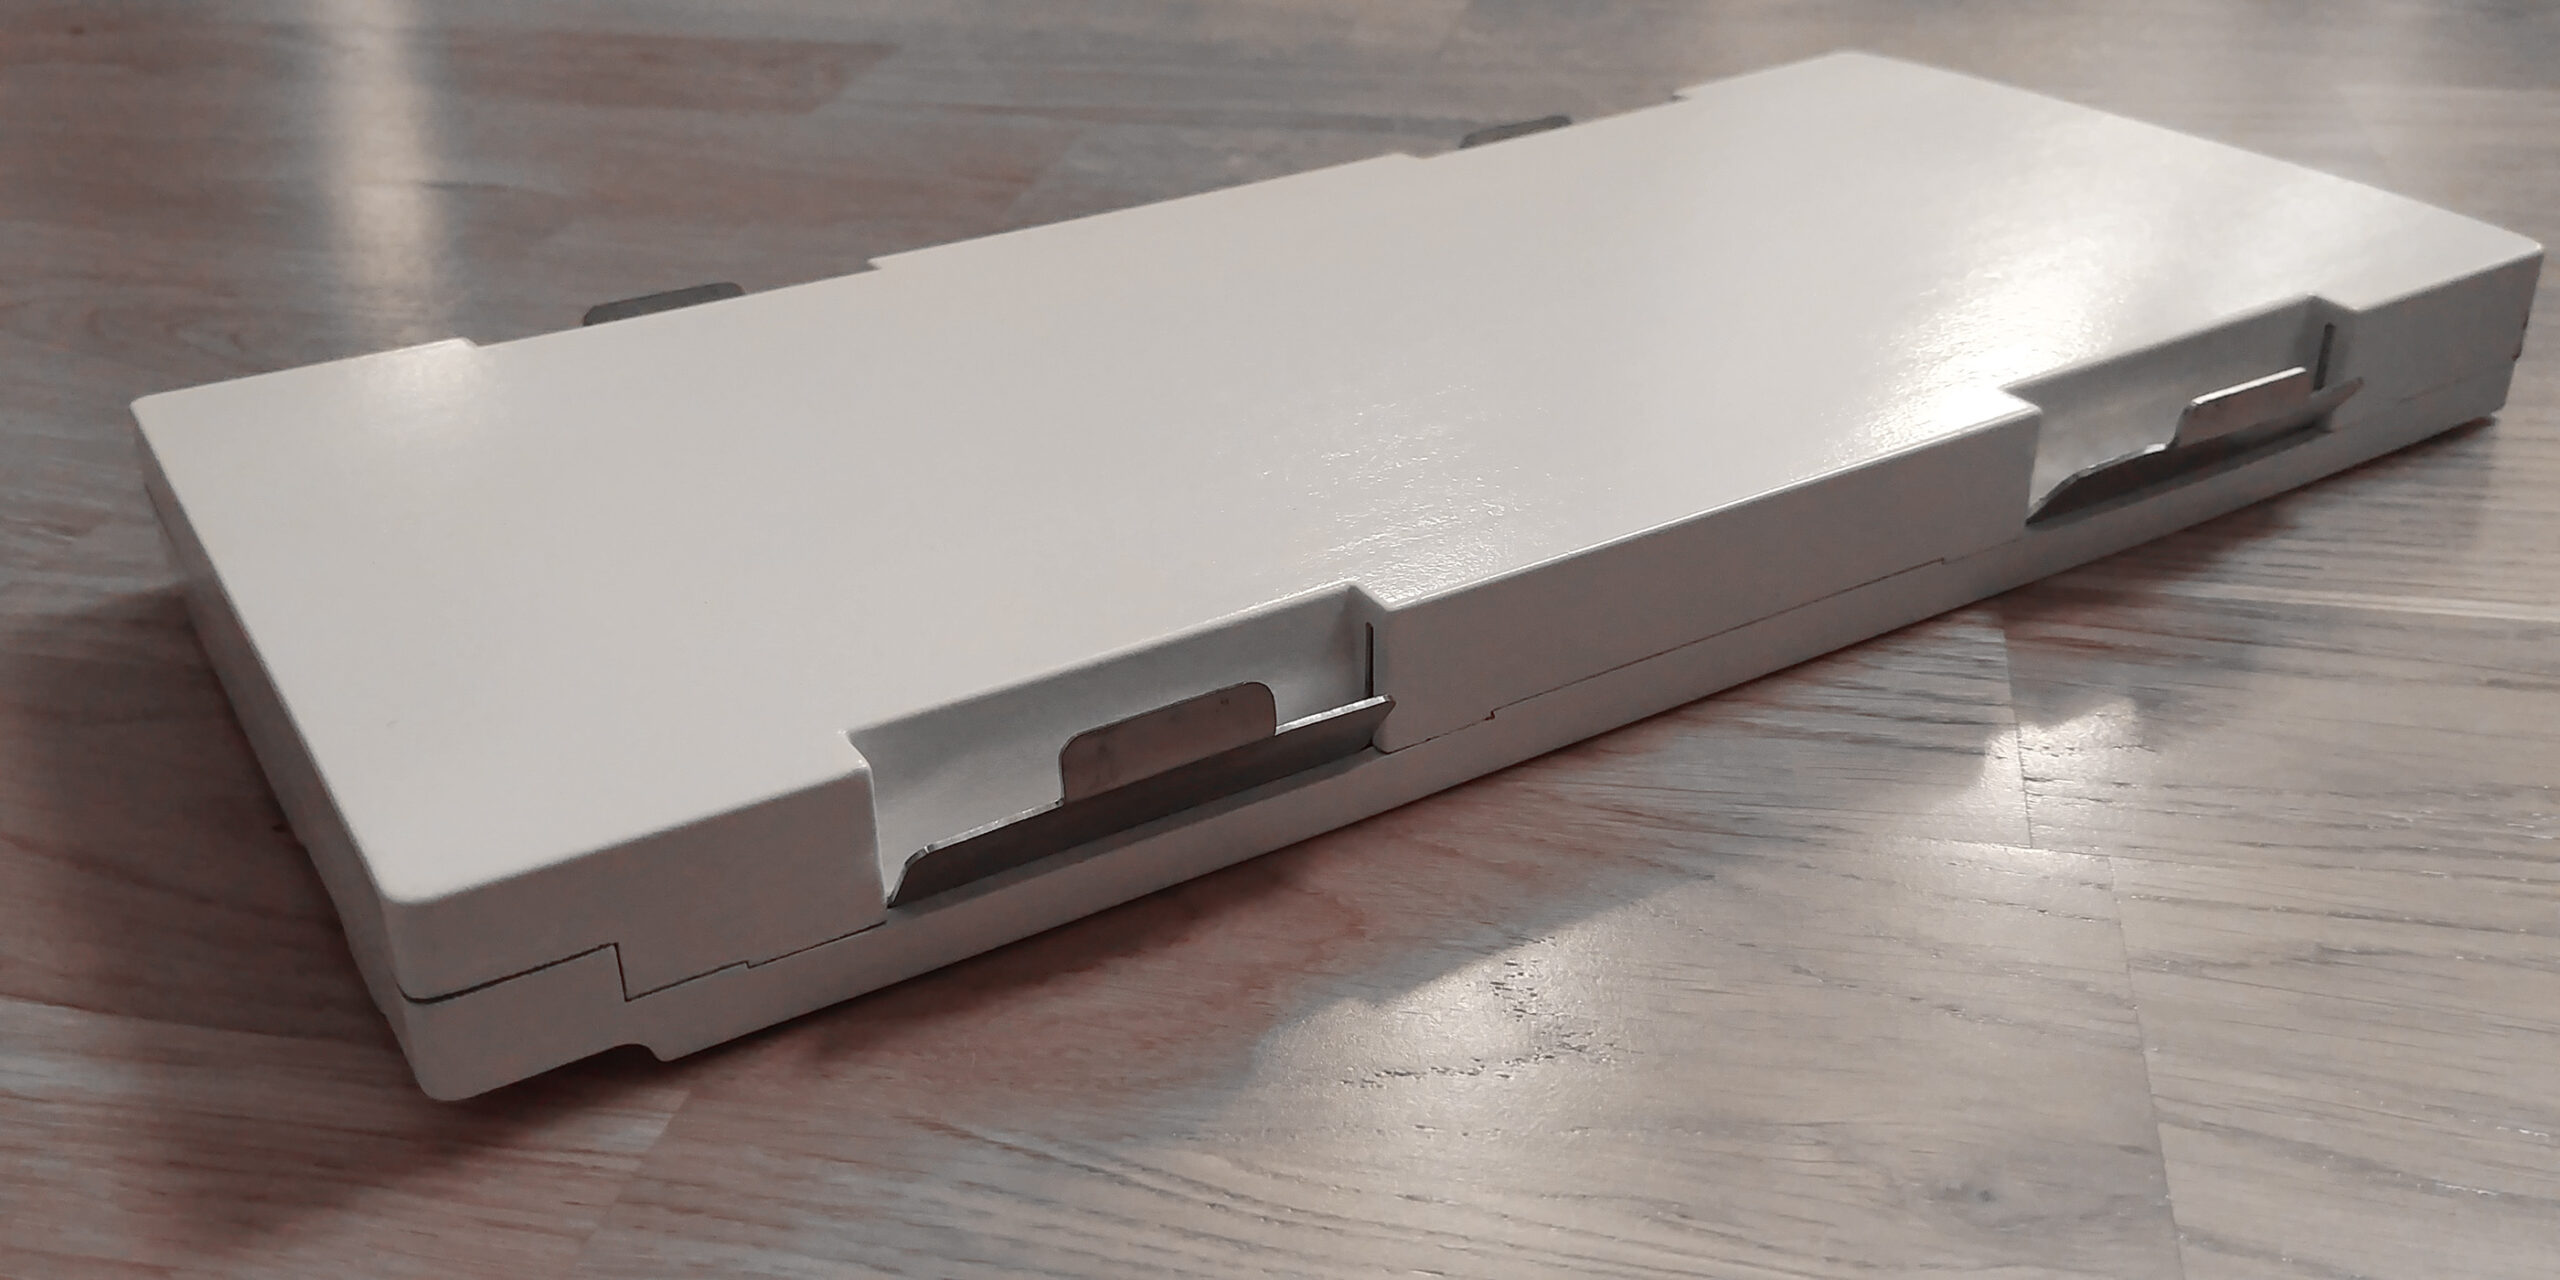
In a skateboard, not only trucks are integrated with the main body. Deck also has a place for a removable battery, which can be easily hidden in a backpack and replaced with a new one if needed.
At the time of designing the prototype, I did not care too much about placing the largest battery in the board, but rather focused on testing a few technological solutions that came to my mind.
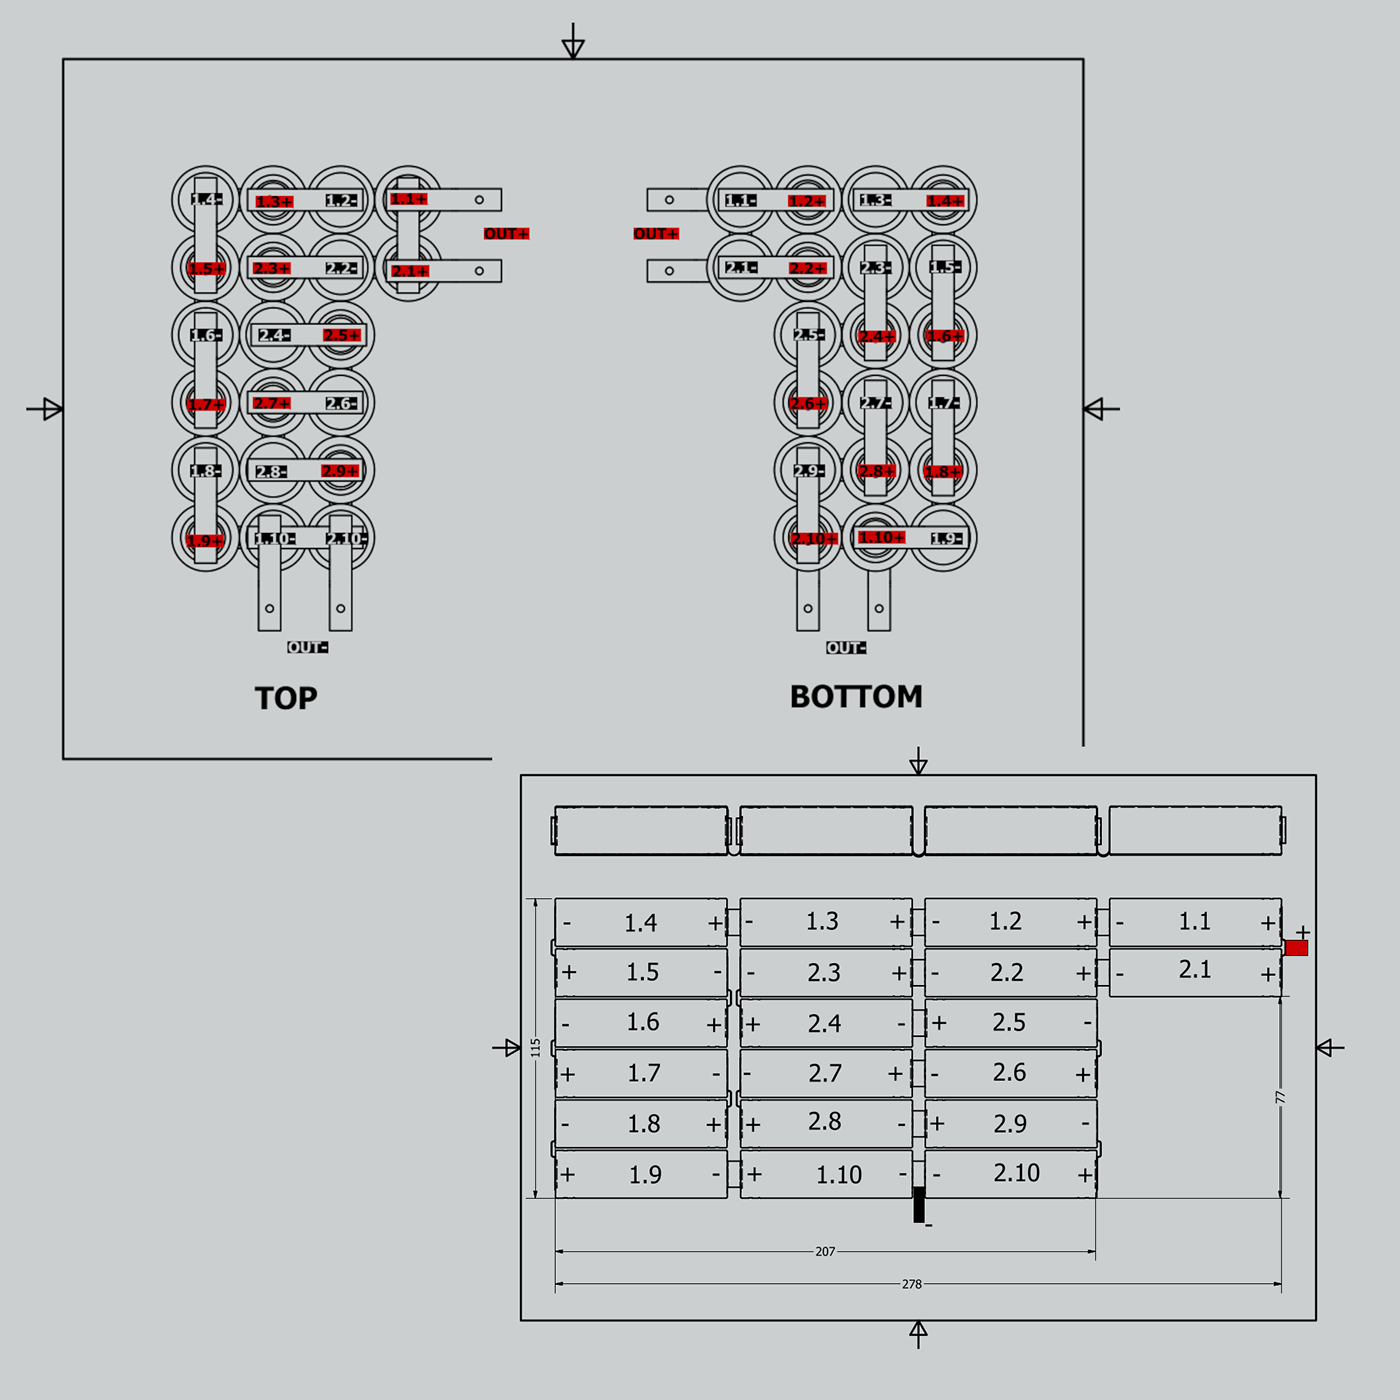
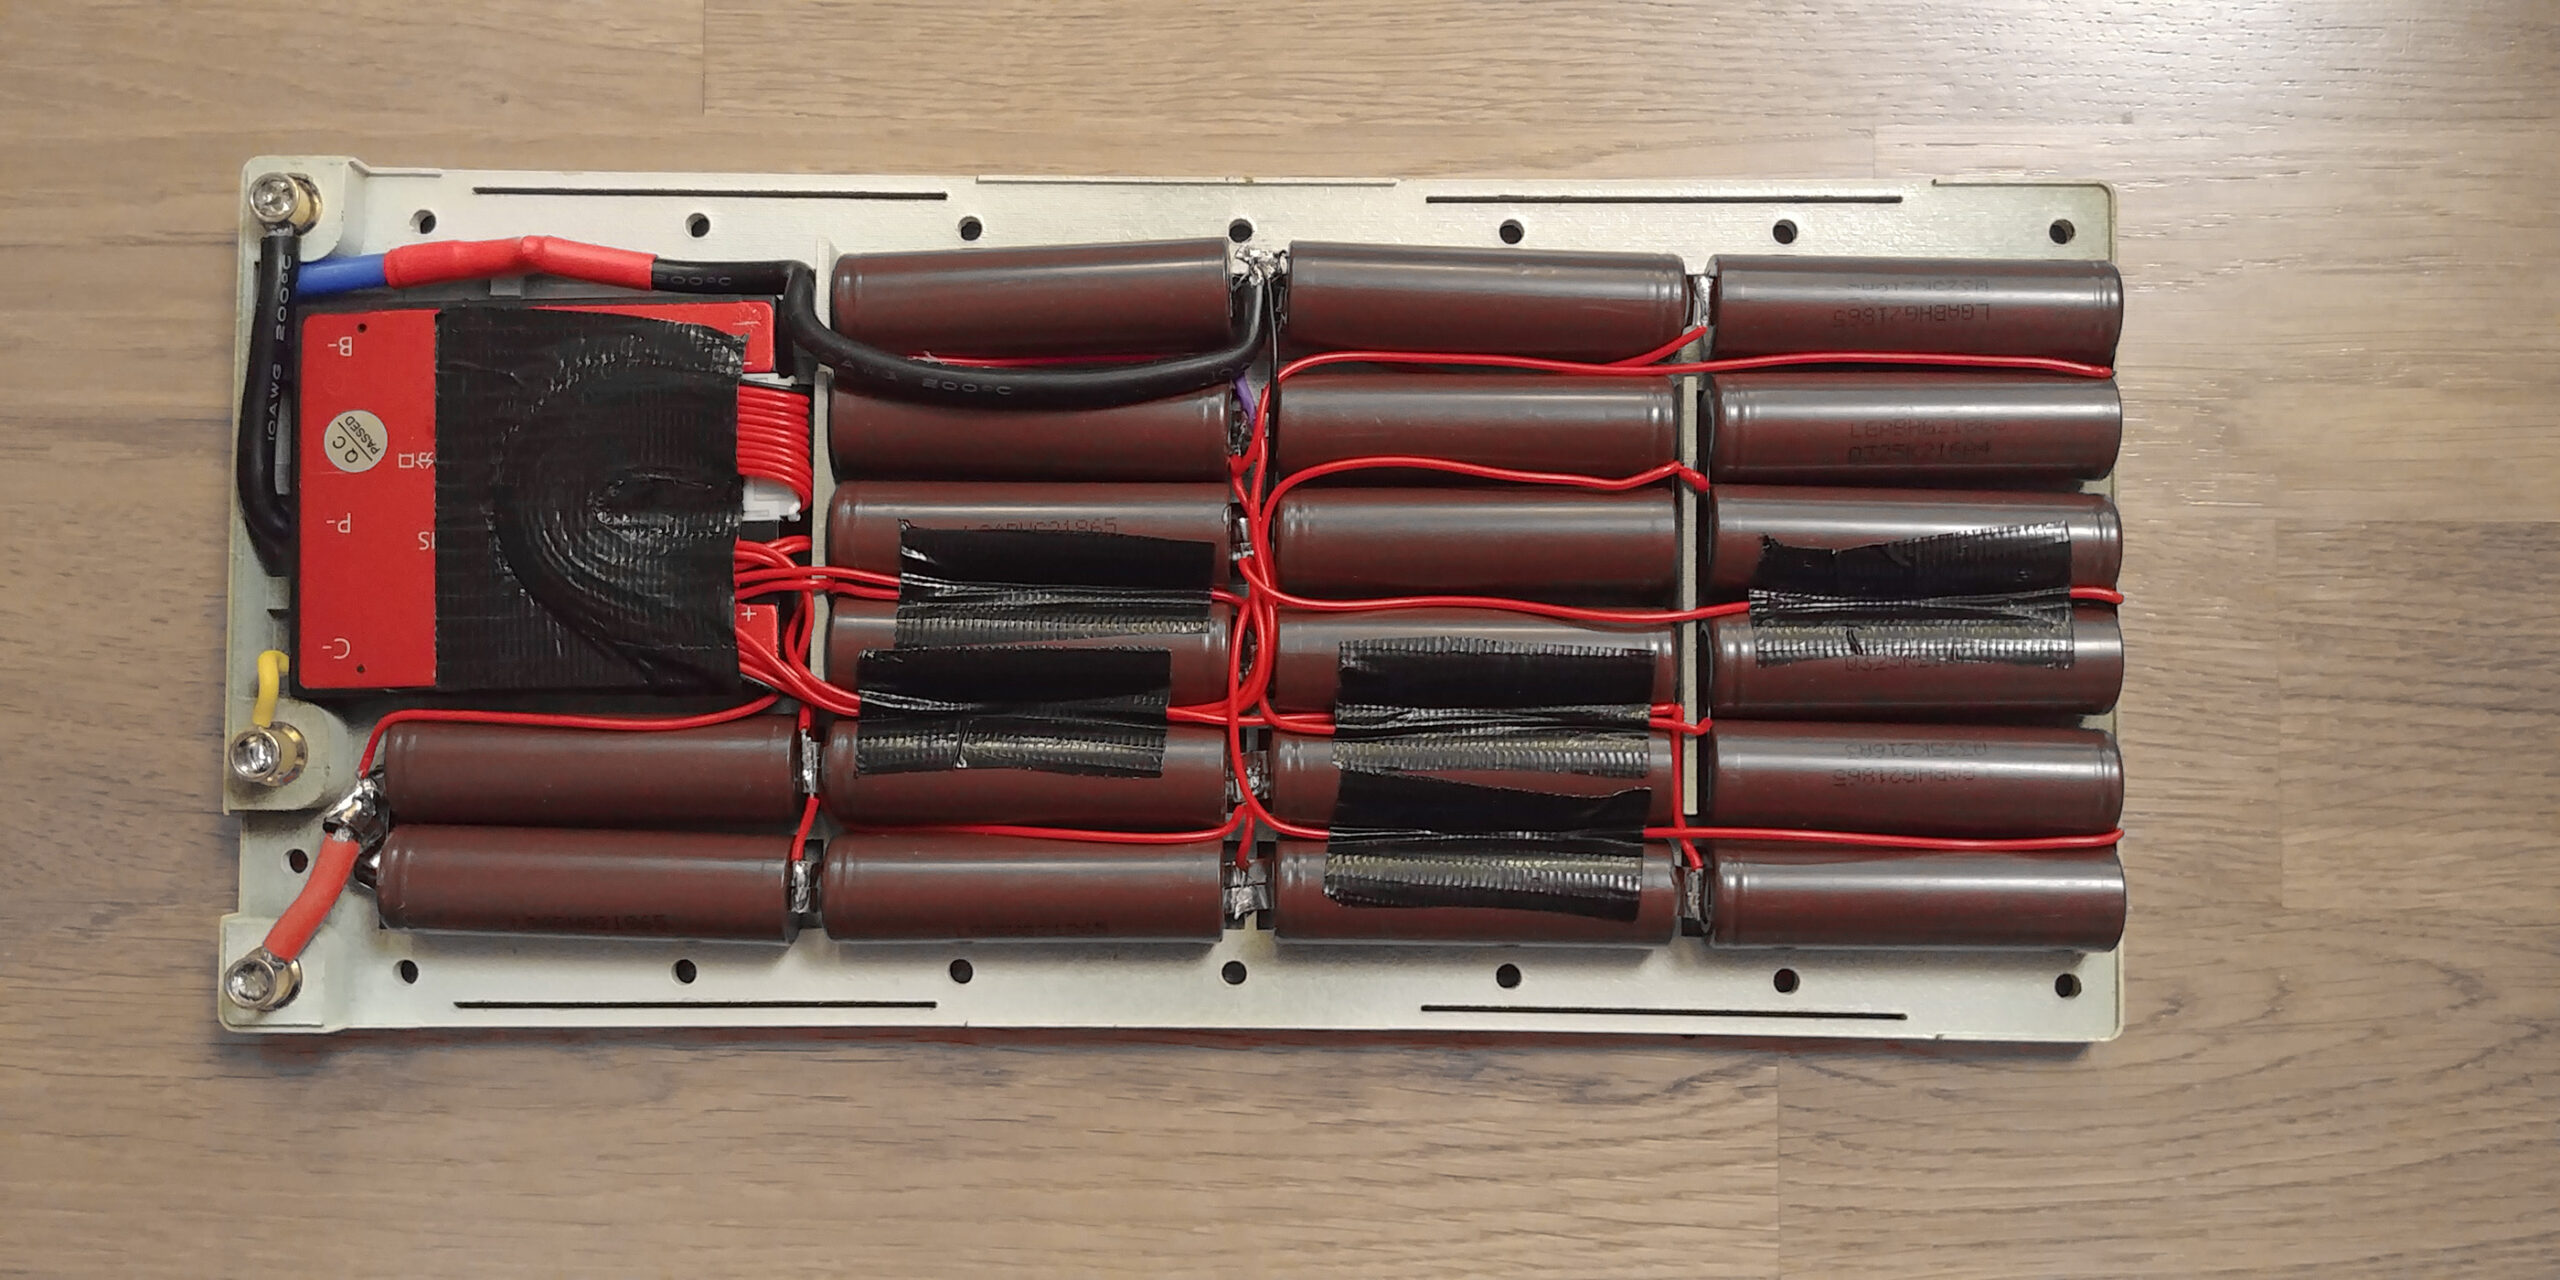
The battery is built in a 10s2p system, i.e. ten cells connected in series and then doubled to increase the capacity. For the construction, I used LG HG2 18650 Li-Ion batteries with a capacity of 3000mAh each. This means that the entire battery has a capacity of 222Wh. It is not a staggering value, but enough to achieve the desired acceleration and provide about 25 km (14 miles) of smooth driving. I know it’s not much, but remember it’s a prototype.
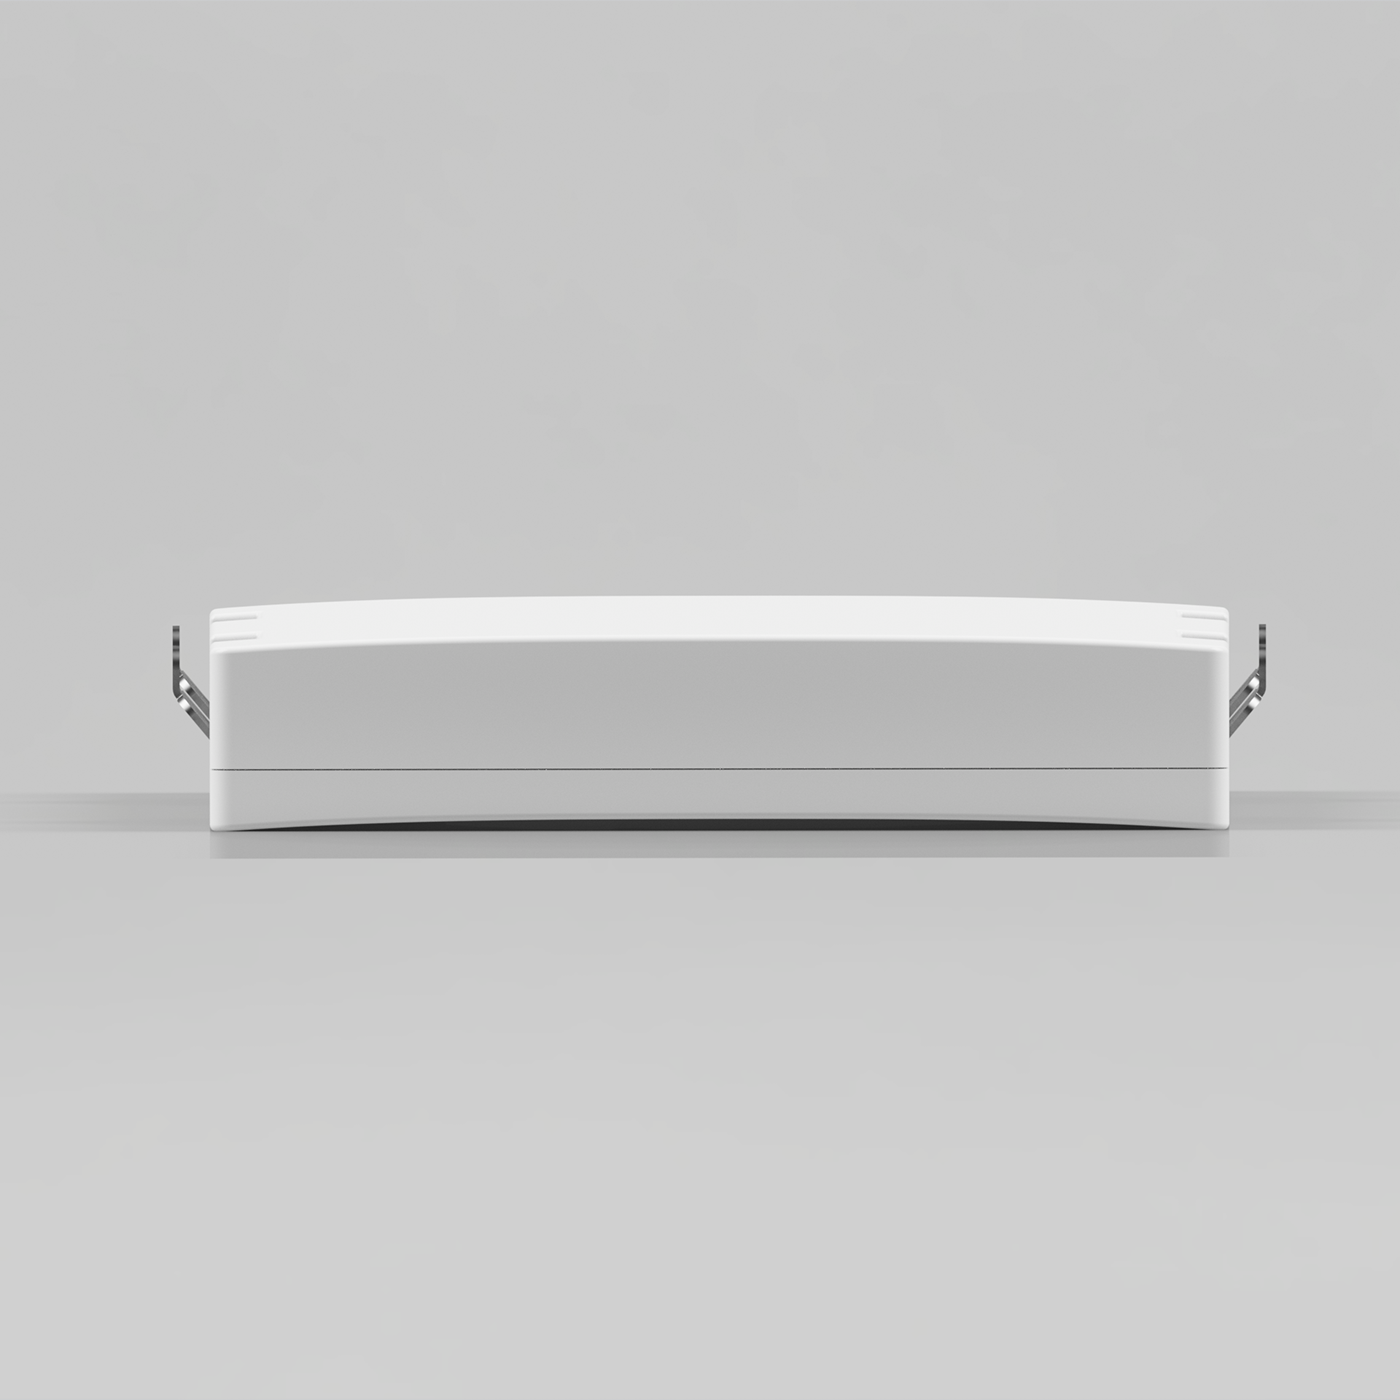
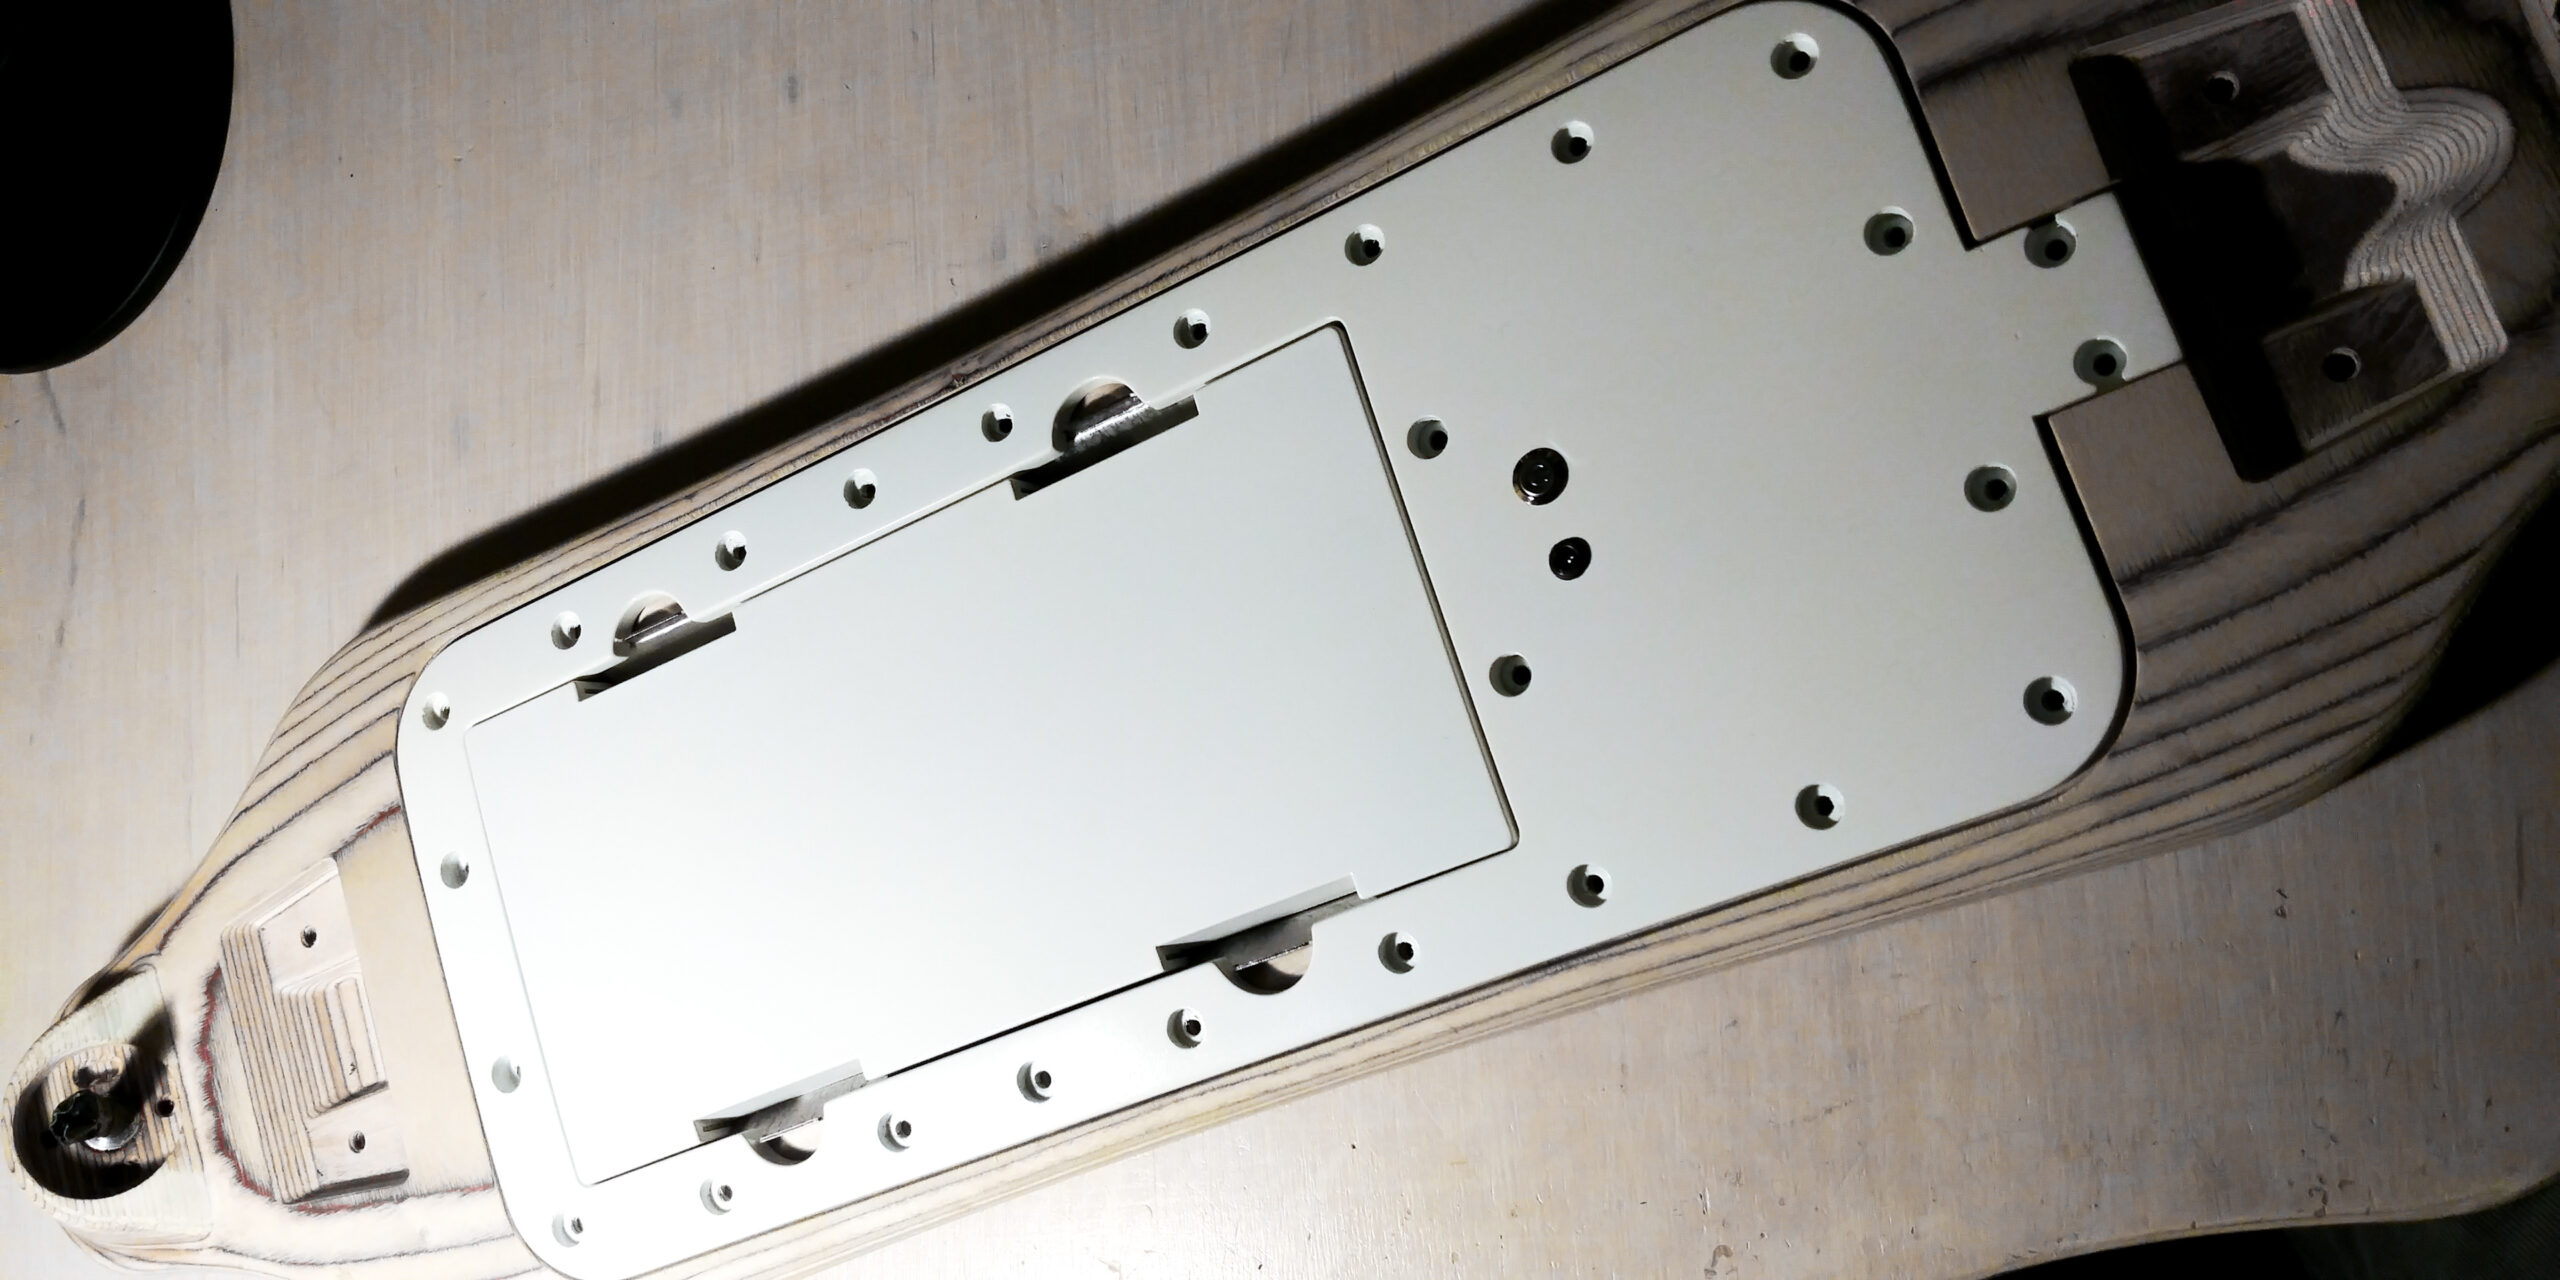
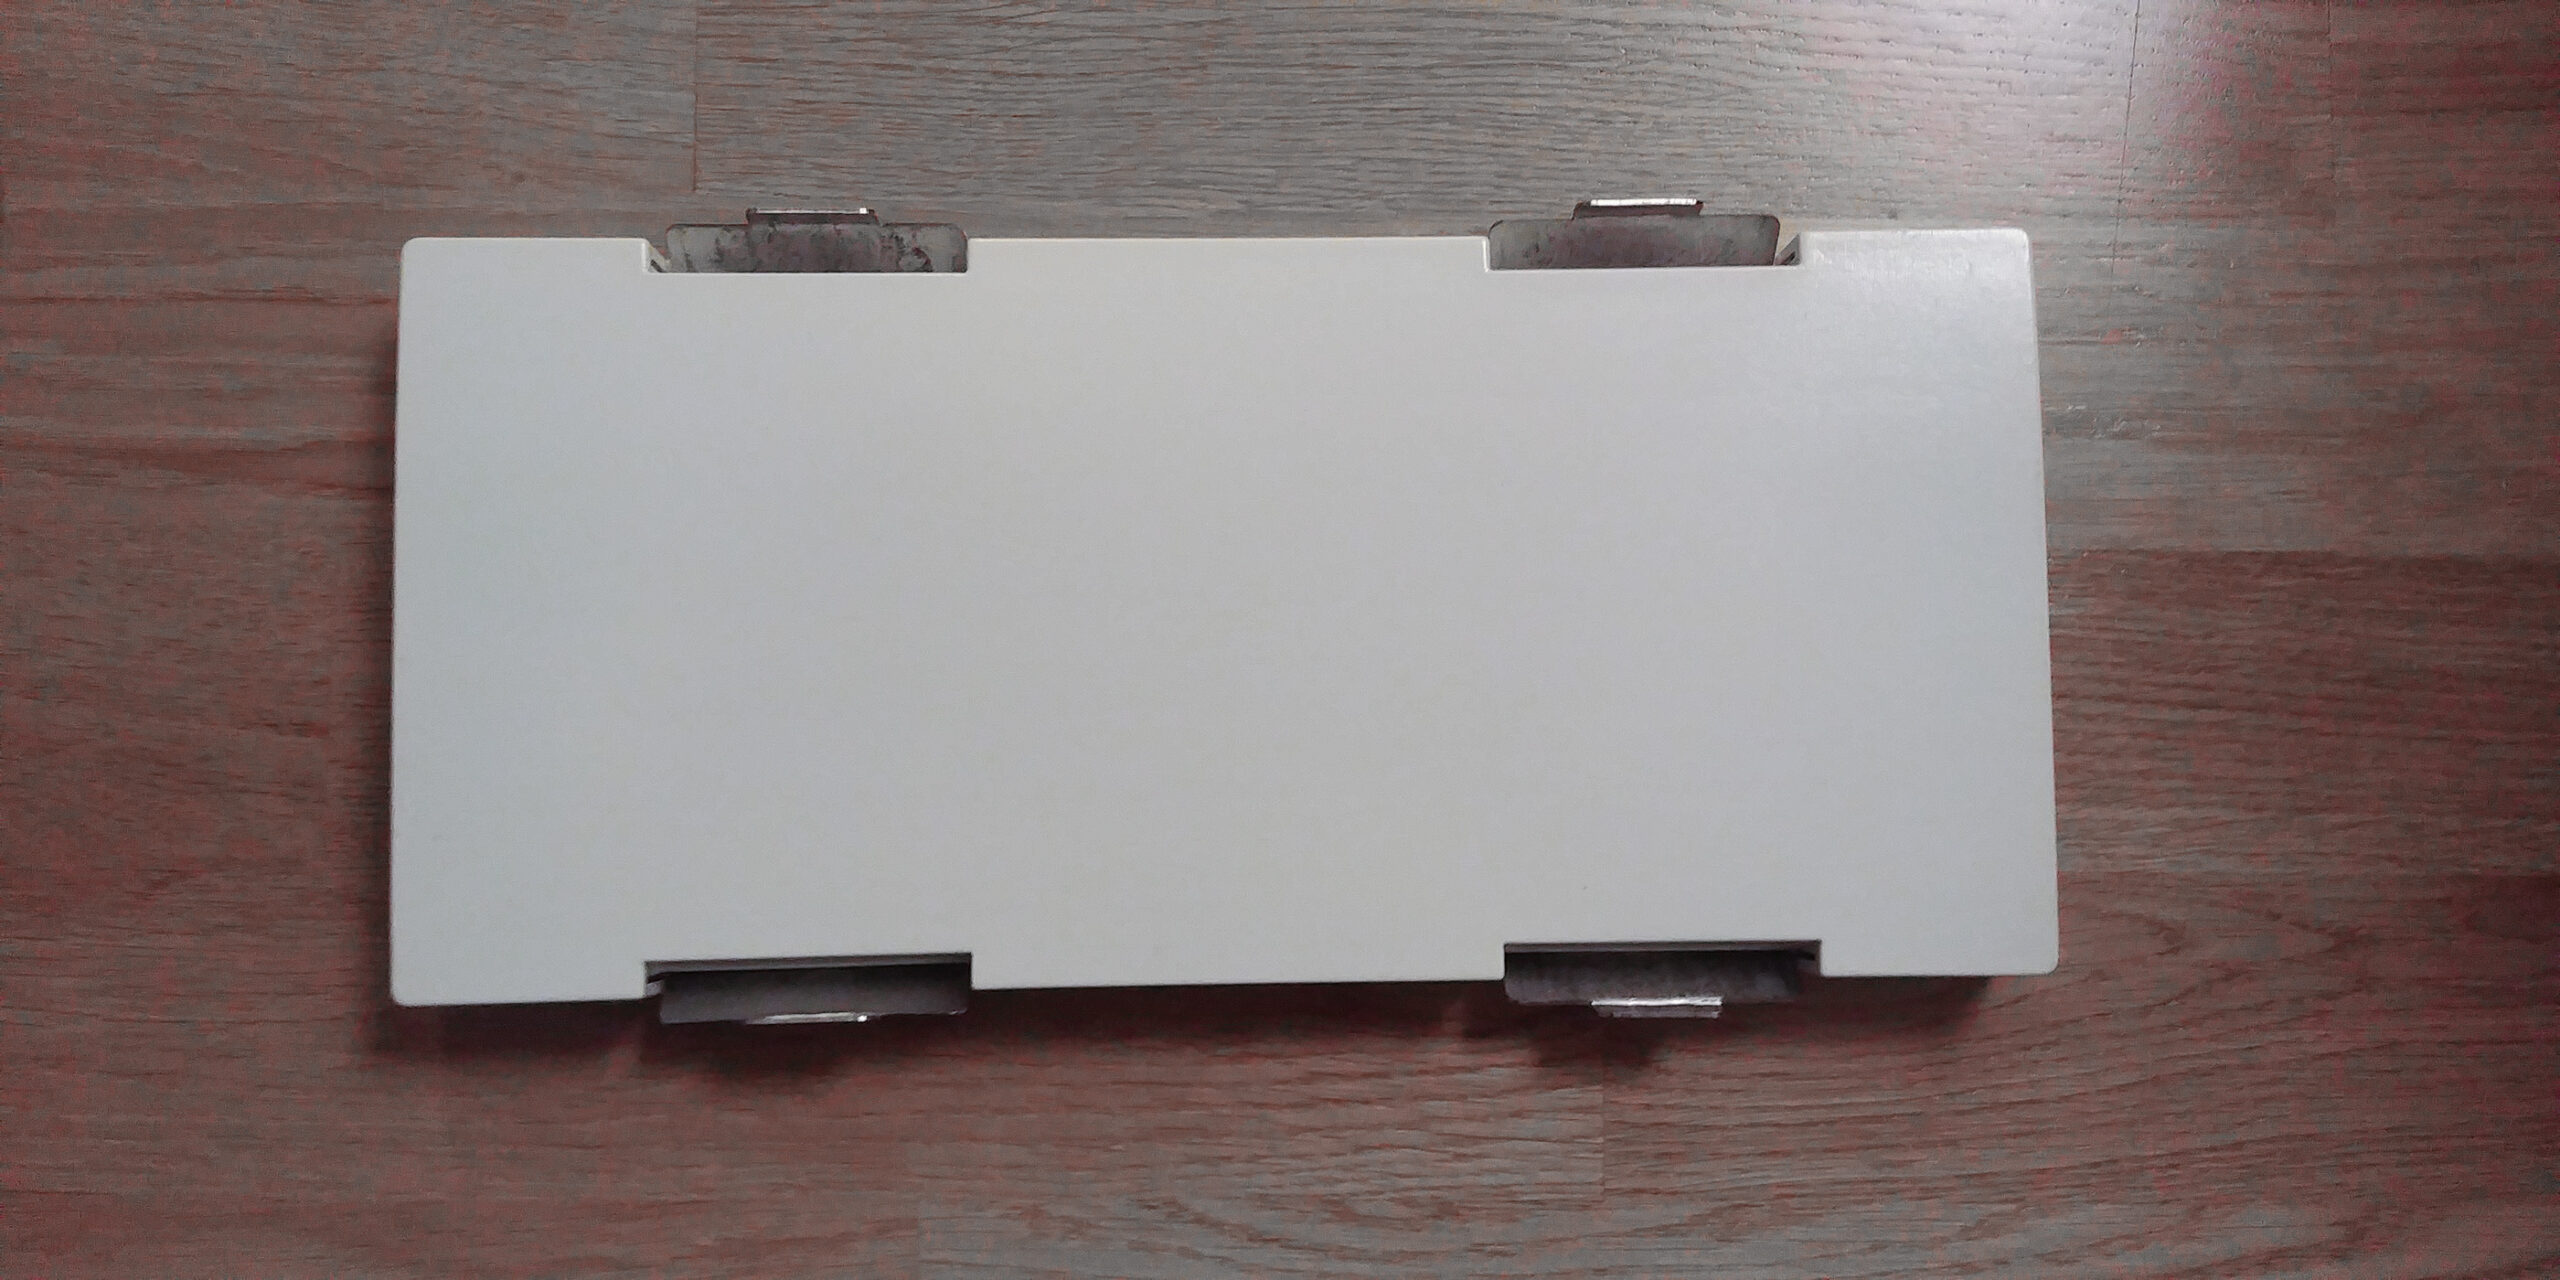
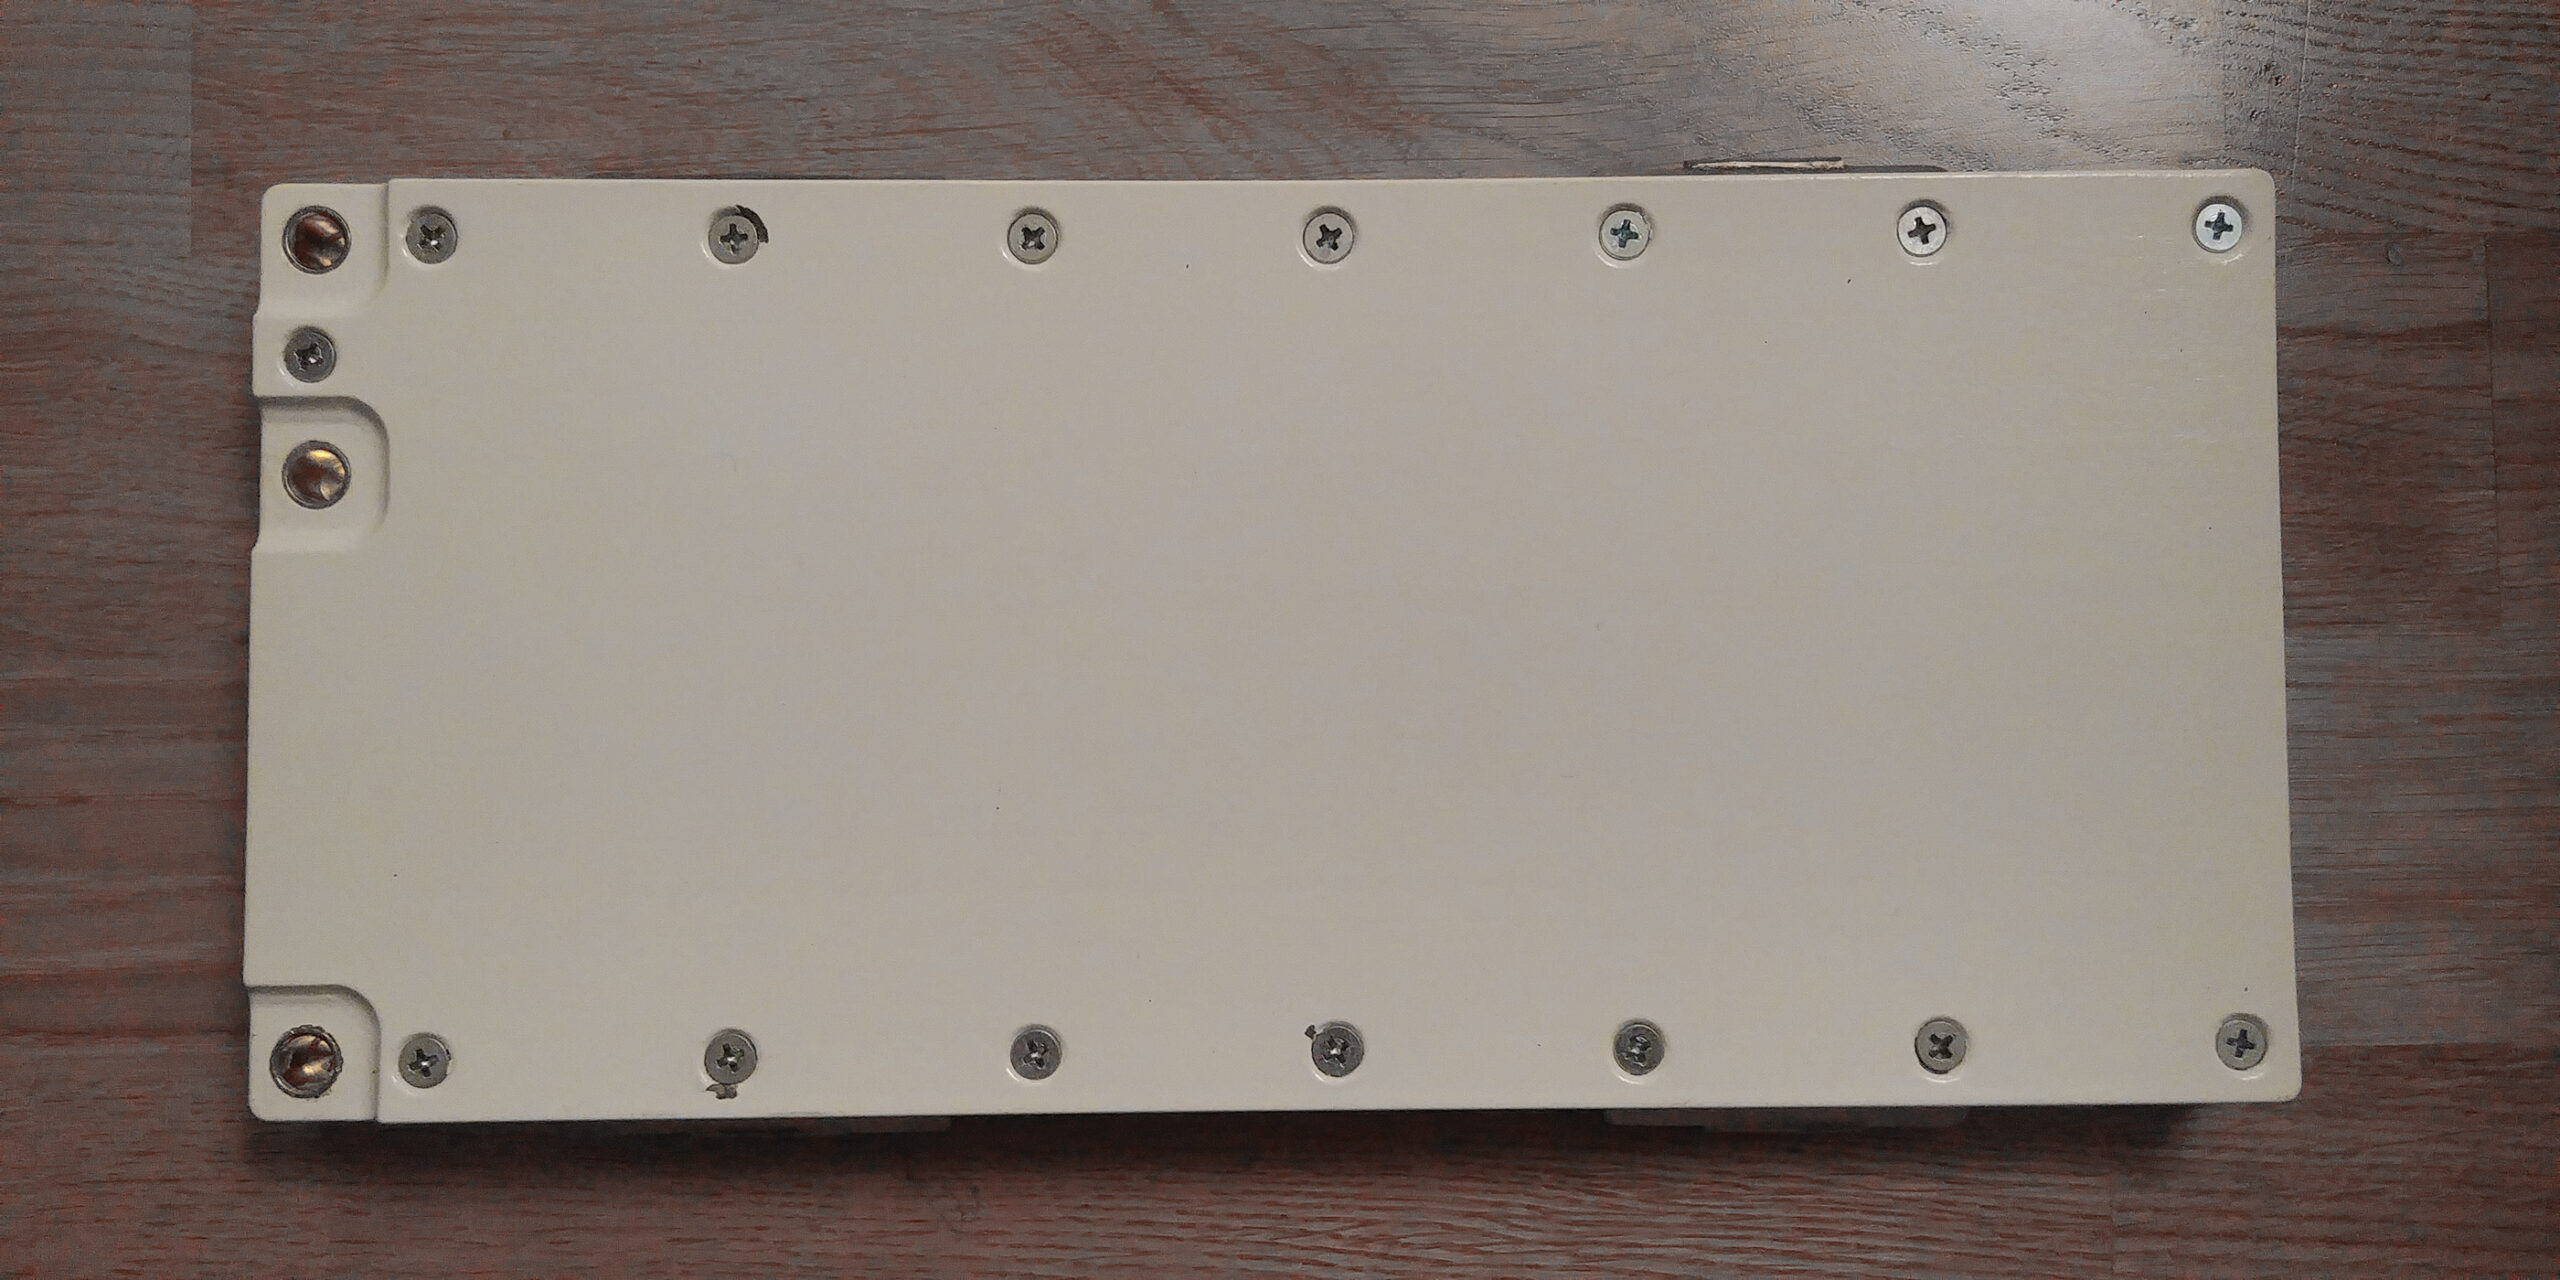
The battery is replaceable and its size fits the outline of an A4 sheet. This means that it fits in any laptop backpack. Its replacement is extremely simple thanks to the use of four spring steel latches. Battery replacement takes just several seconds.
The cross-sectional view shows that the battery casing is slightly curved. This is due to the fact that I wanted the board to be as thin as possible. The outline of the accumulator pack reflects the concave of the deck.
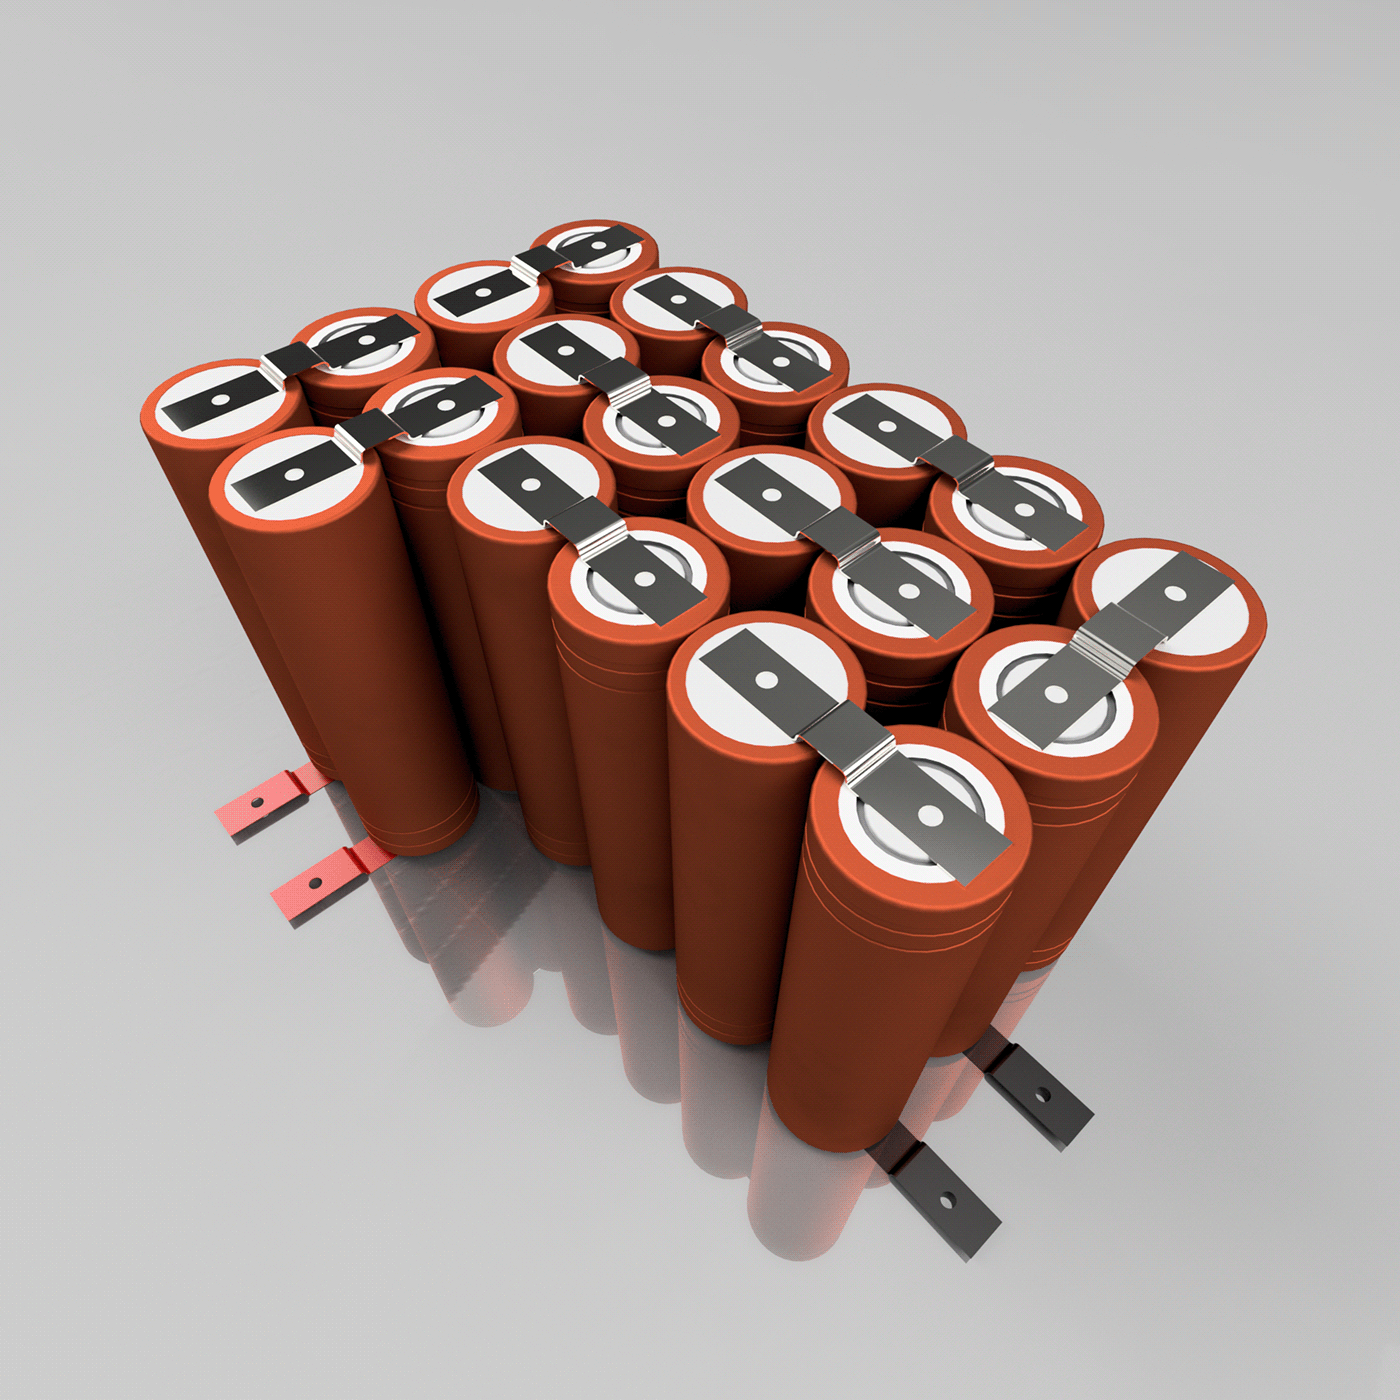
The battery was an interesting thing to do. Apart from the design of the casing itself, which had to fit perfectly to the outline of the board, the cells had to be placed in a specific way.
Each of the 18650 cells had to be welded together using a spot welder. For this, each of the batteries must be in a vertical orientation, otherwise I would not be able to reach the weld point with the electrodes. But in the end, the batteries were supposed to be placed flat to make the board as thin as possible. This task was not easy.
I decided to make something like origami. I arranged the batteries in such a way that after the welding process it was possible to fold the batteries flat and put them in to the box. Only after several dozen sketches I managed to find a few solutions that allowed it.
It is a fun brain teaser. The boundary conditions are: 10s2p battery, the length maximum 4 cells, the width is maximum 6 cell (to fit in A4 format), the + and – electrodes of the package must be as close as possible to the BMS system. How would you do that? My suggestion is in the last picture, but maybe some of you have a better idea.
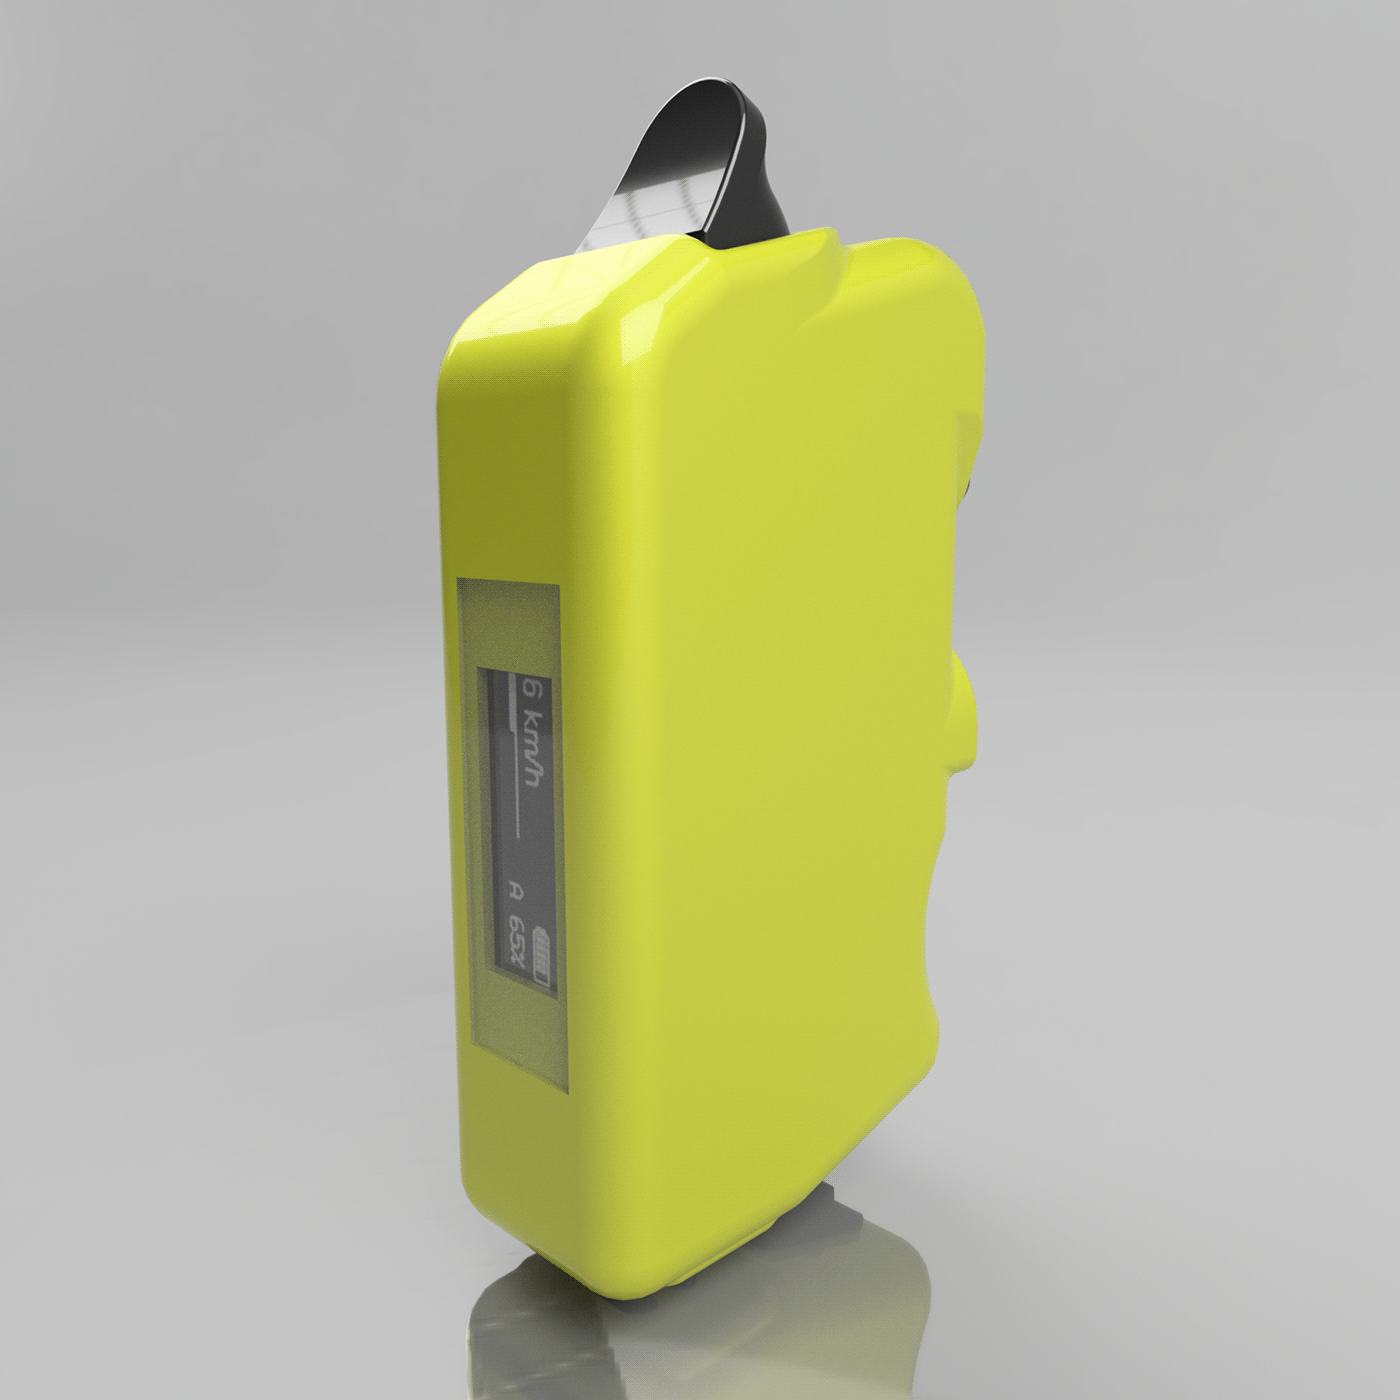
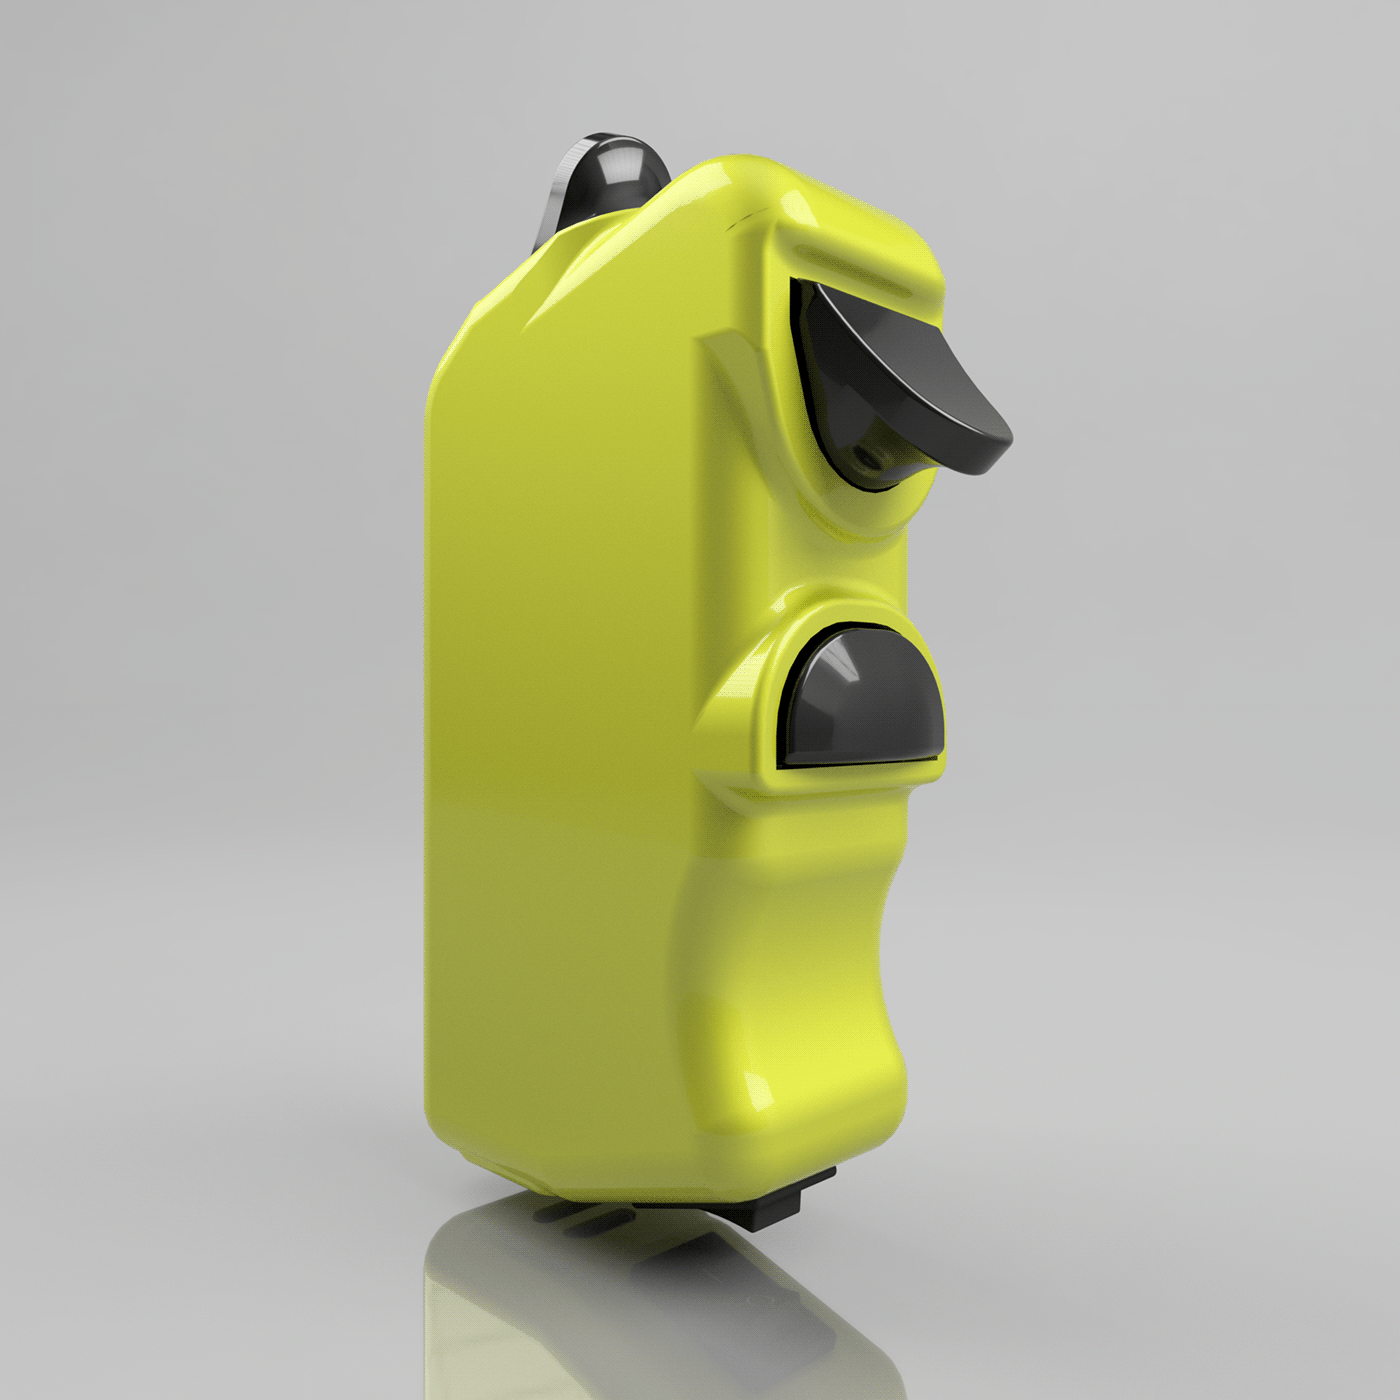
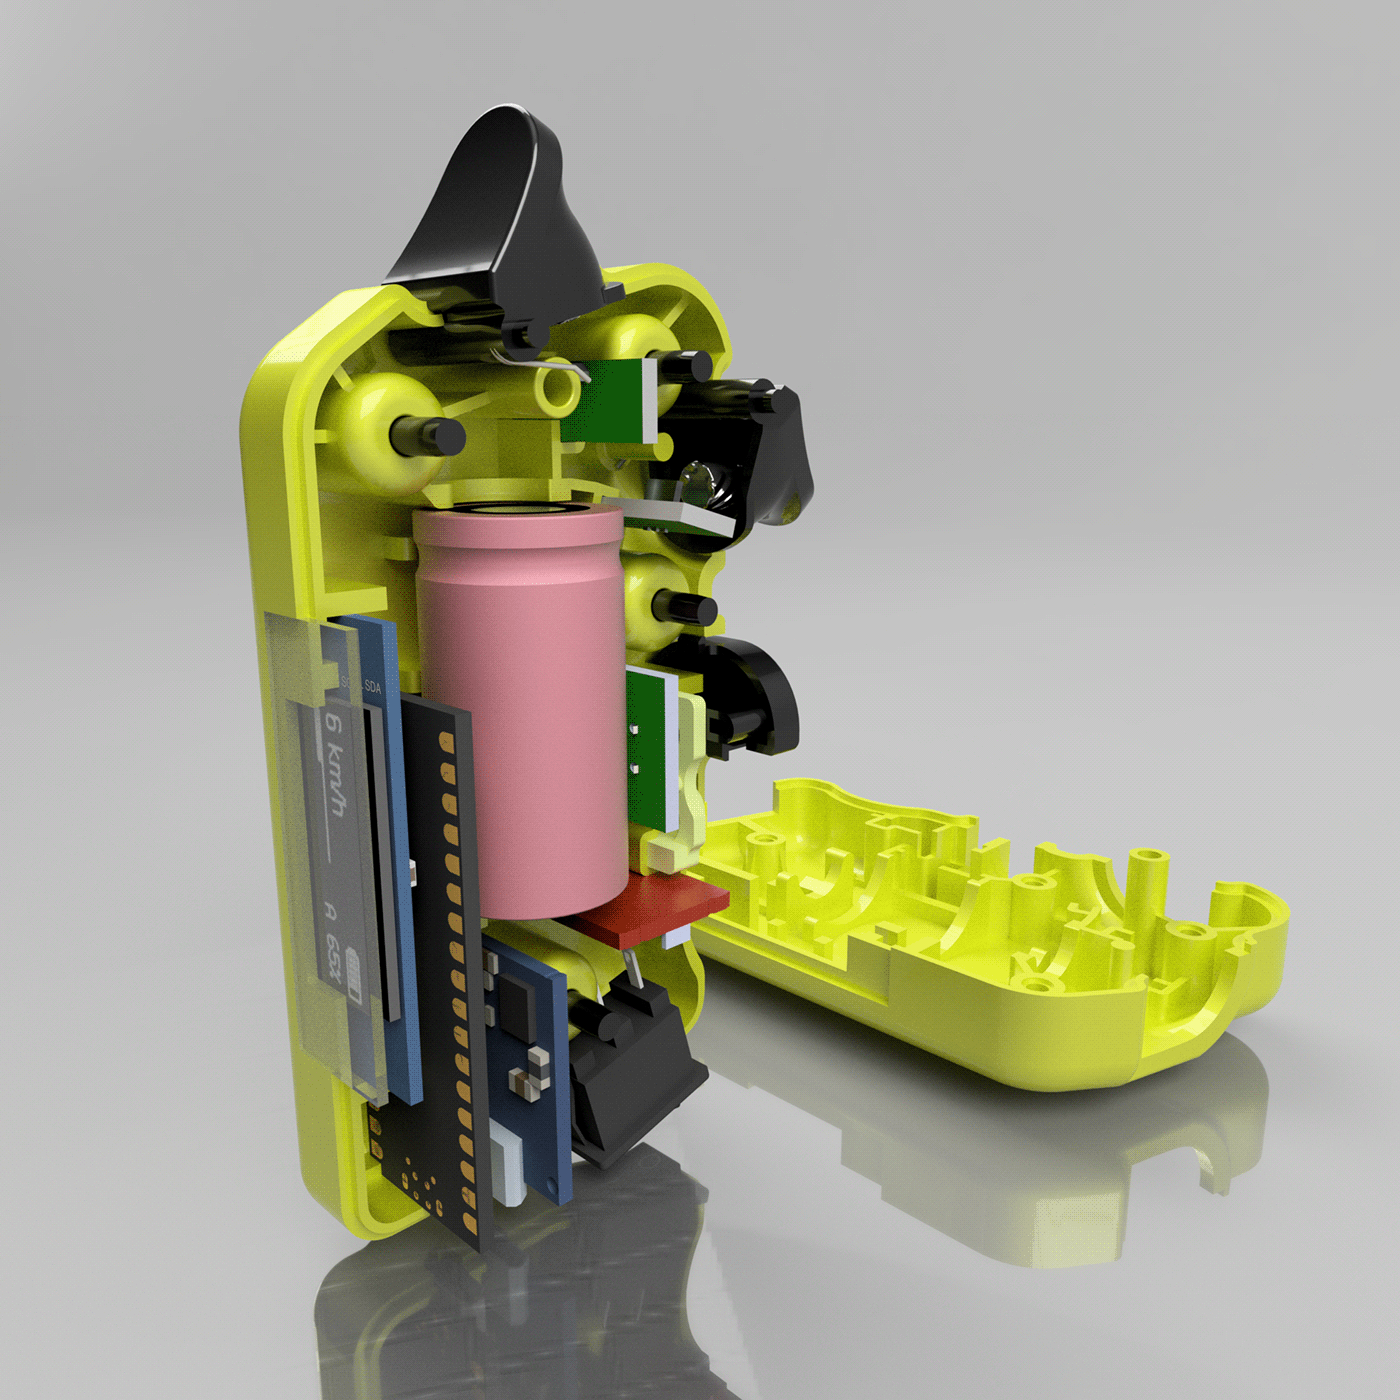
Simultaneously with the URBAN project I was developing transmitter for electric skateboards using VESC6 ESC was created. Briefly, it uses Bluetooth Low Energy (LE) technology and is based on the Nordic Semiconductor nRF52832 microcontroller, mainly due to its compatibility with the new Bluetooth 5.0 specification.
The controller is equipped with an OLED 128x32px SSD1306 display used to display information about the electric skateboard’s operating parameters, such as:
- current speed
- current throttle and brake position
- activation of the safety button, preventing accidental starting of the engines
- the charge level of the electric skateboard
- controller charge level
To read the position of the gas throttle and brake, two sensors were used, the principle of which is based on the classic Hall effect. Their output voltage is approximately proportional to the magnetic field strength in which they are placed. In the controller, the source of the magnetic field are two neodymium magnets located in the throttle and braking sticks.
The controller is powered by a 900mAh lithium-ion battery with a rated voltage of 3.7V, size 18350. To charge the battery I placed in the controller, a charger with an input voltage of 5V. A DC-DC voltage converter from 3.3V to 5V was used to power the development board with the nRF52832 microcontroller on it.
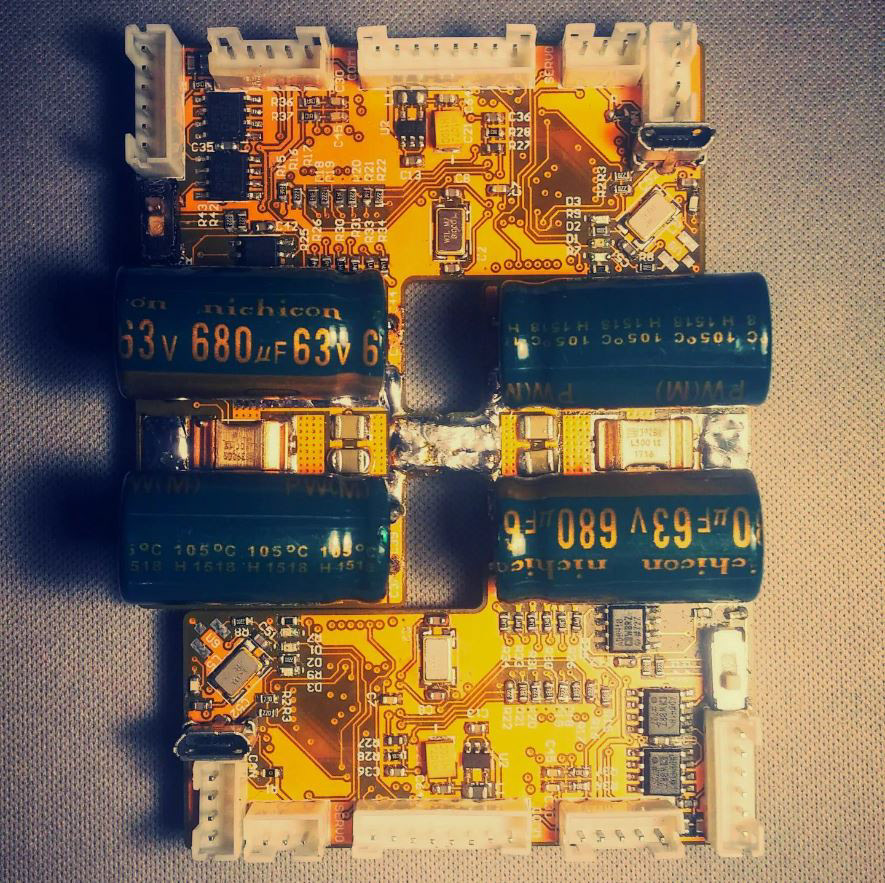
The skateboard has an identical development board with the same nRF52832 microcontroller connected to the VESC6 via the UART port. Thanks to this I could use standard VESC protocol to communicate transmitter with electronic speed controller.
Product prototyping
As I said before during the prototyping of the URBAN project, I wanted to control the engines with FOC to mainly to make electric skateboard as quiet as possible.
At the time I was in the construction phase, VESC6 was not yet as widely available as it is now. One of the members of the electric skateboard community made PCBs and I managed to buy some of them from him and assemble these components.
After 3D design was done it was time for first stage of prototyping. So in the pictures you can see cnc machined deck made on 5-axi milling machine. Deck is made from plywood so it’s pretty stiff. If you like flexible deck I suppose riding on this prototype wouldn’t be a big pleasure for you. But again, remember, this prototype is focused on showing rather unconventional way of making esk8… just focus your eyes on place where trucks should be 😀 Work on driving comfort was to be postponed to a later stage of design work, which unfortunately never happened. Maybe in the future…
There is also a place in the body for connectors for the battery and for the necessary cables. This solution allows you to detach and replace the battery pack in just a few seconds.
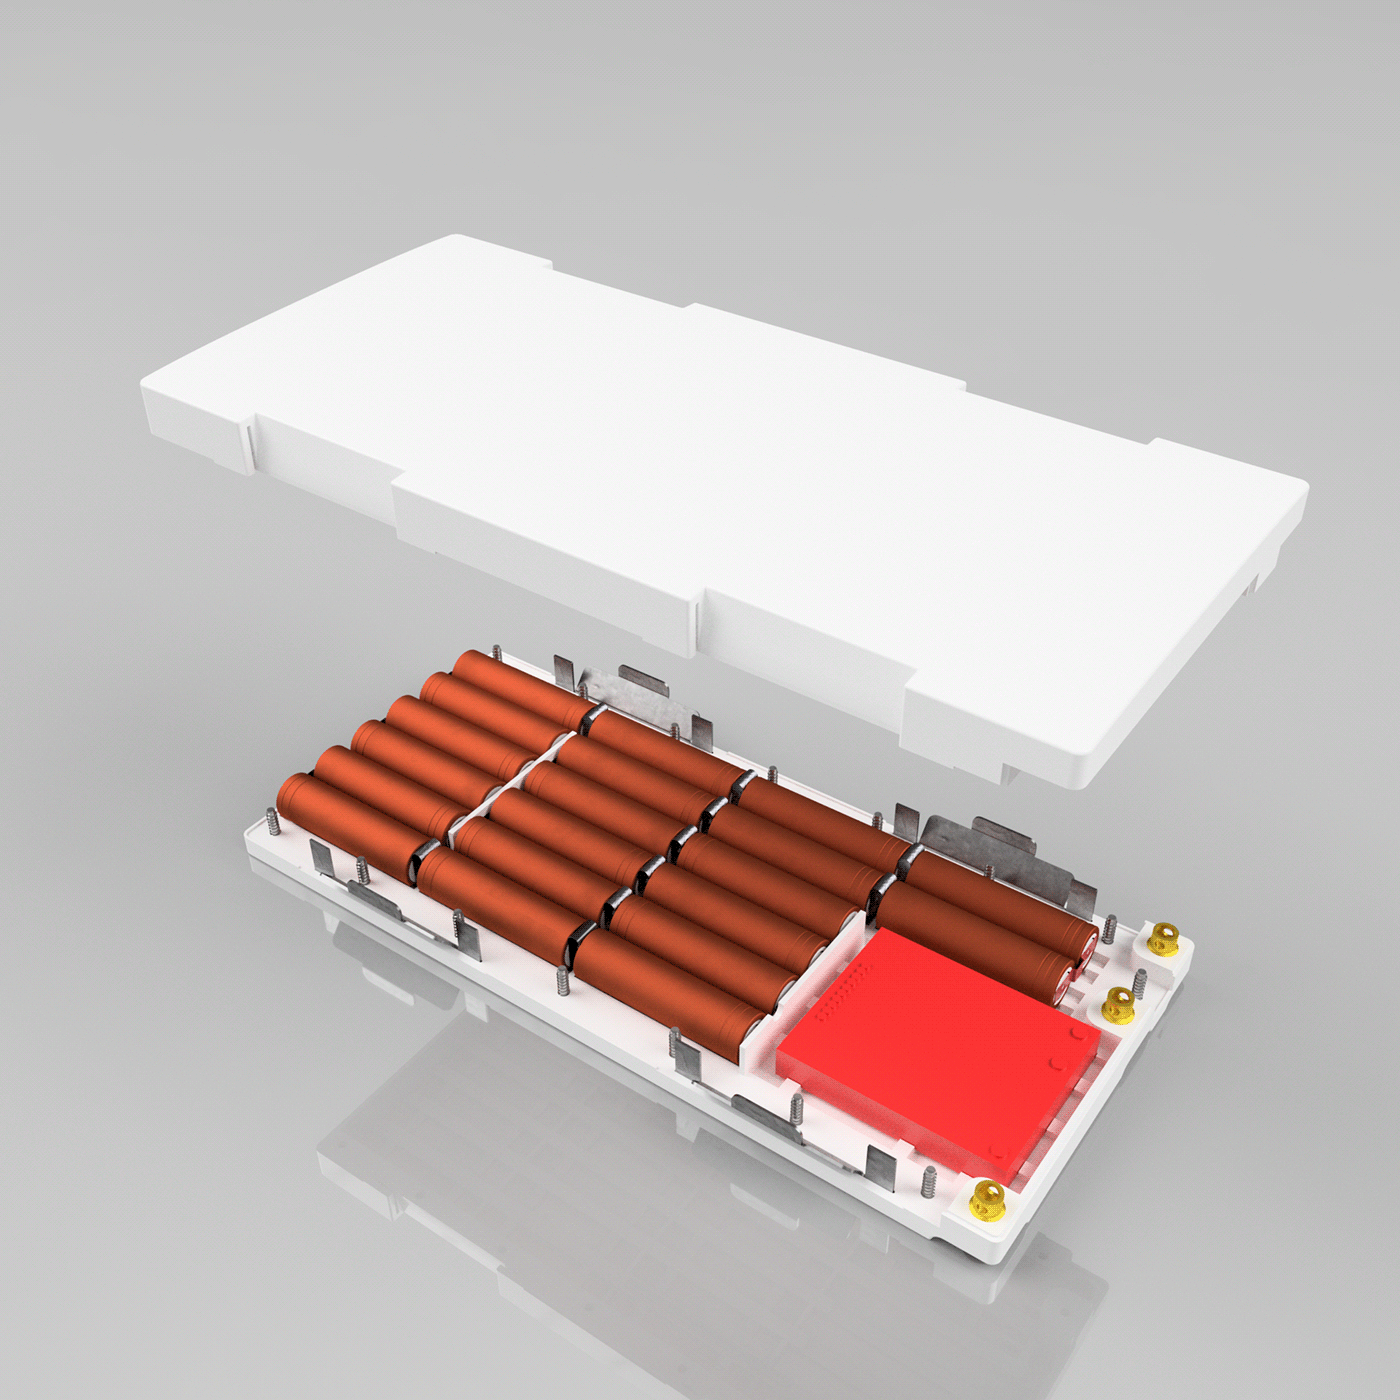
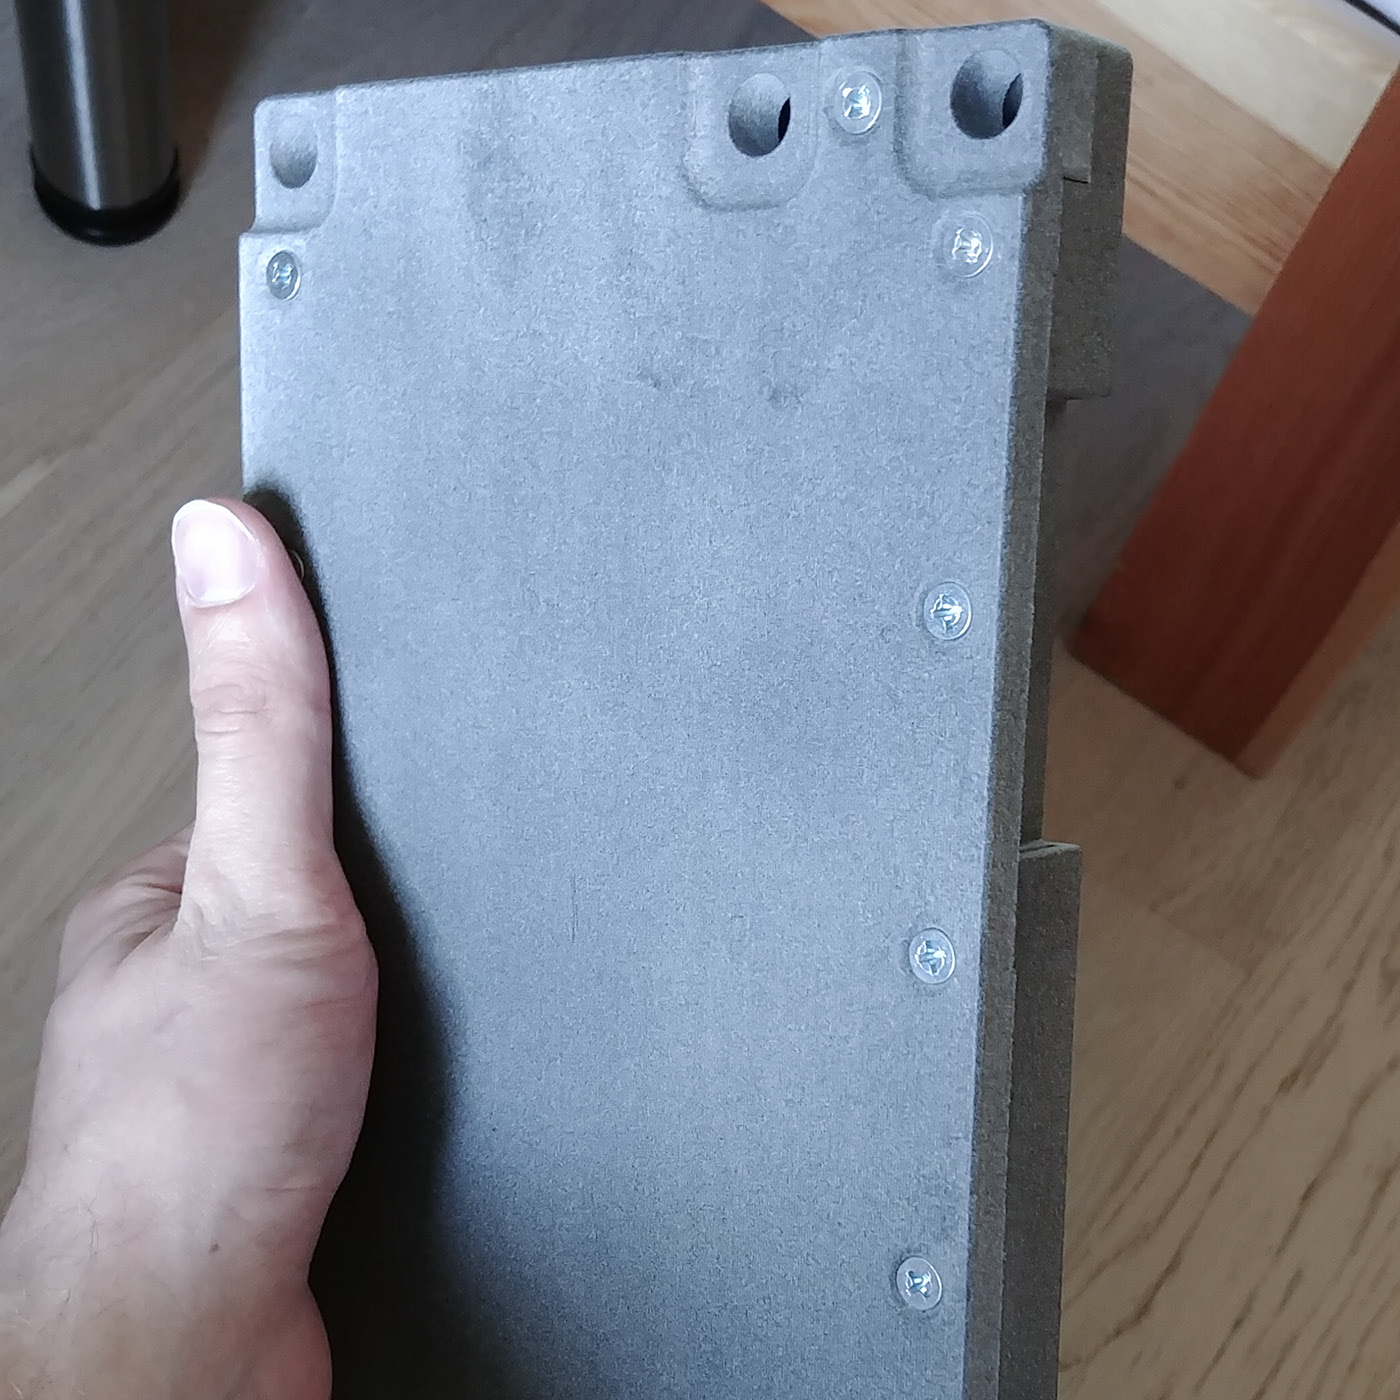
As you can see in below picture, some of URBAN project elements where 3d printed. One of them is the battery box.
To make it strong despite the thin walls and to avoid the visibility of the print layers on the outer surface (because I remind you that this housing is not a cuboid and has a more complex shape), instead of FDM printing, in this case it was better to use a print from a printer based on MJF technology. This method, developed by HP, involves sintering the plastic powder, in this case PA12.
As you can see in the photos, the battery casing is not the only printed element of the prototype. Also, the electronics cover / component of the battery latches and a component of the original truck design were made in additive technology. This time I used FDM type printing and Fiberlogy Easy PET-G material, which probably some of the enthusiasts of 3d printing know very well 🦾
At this stage I was already very excited because it was slowly starting to resemble a esk8
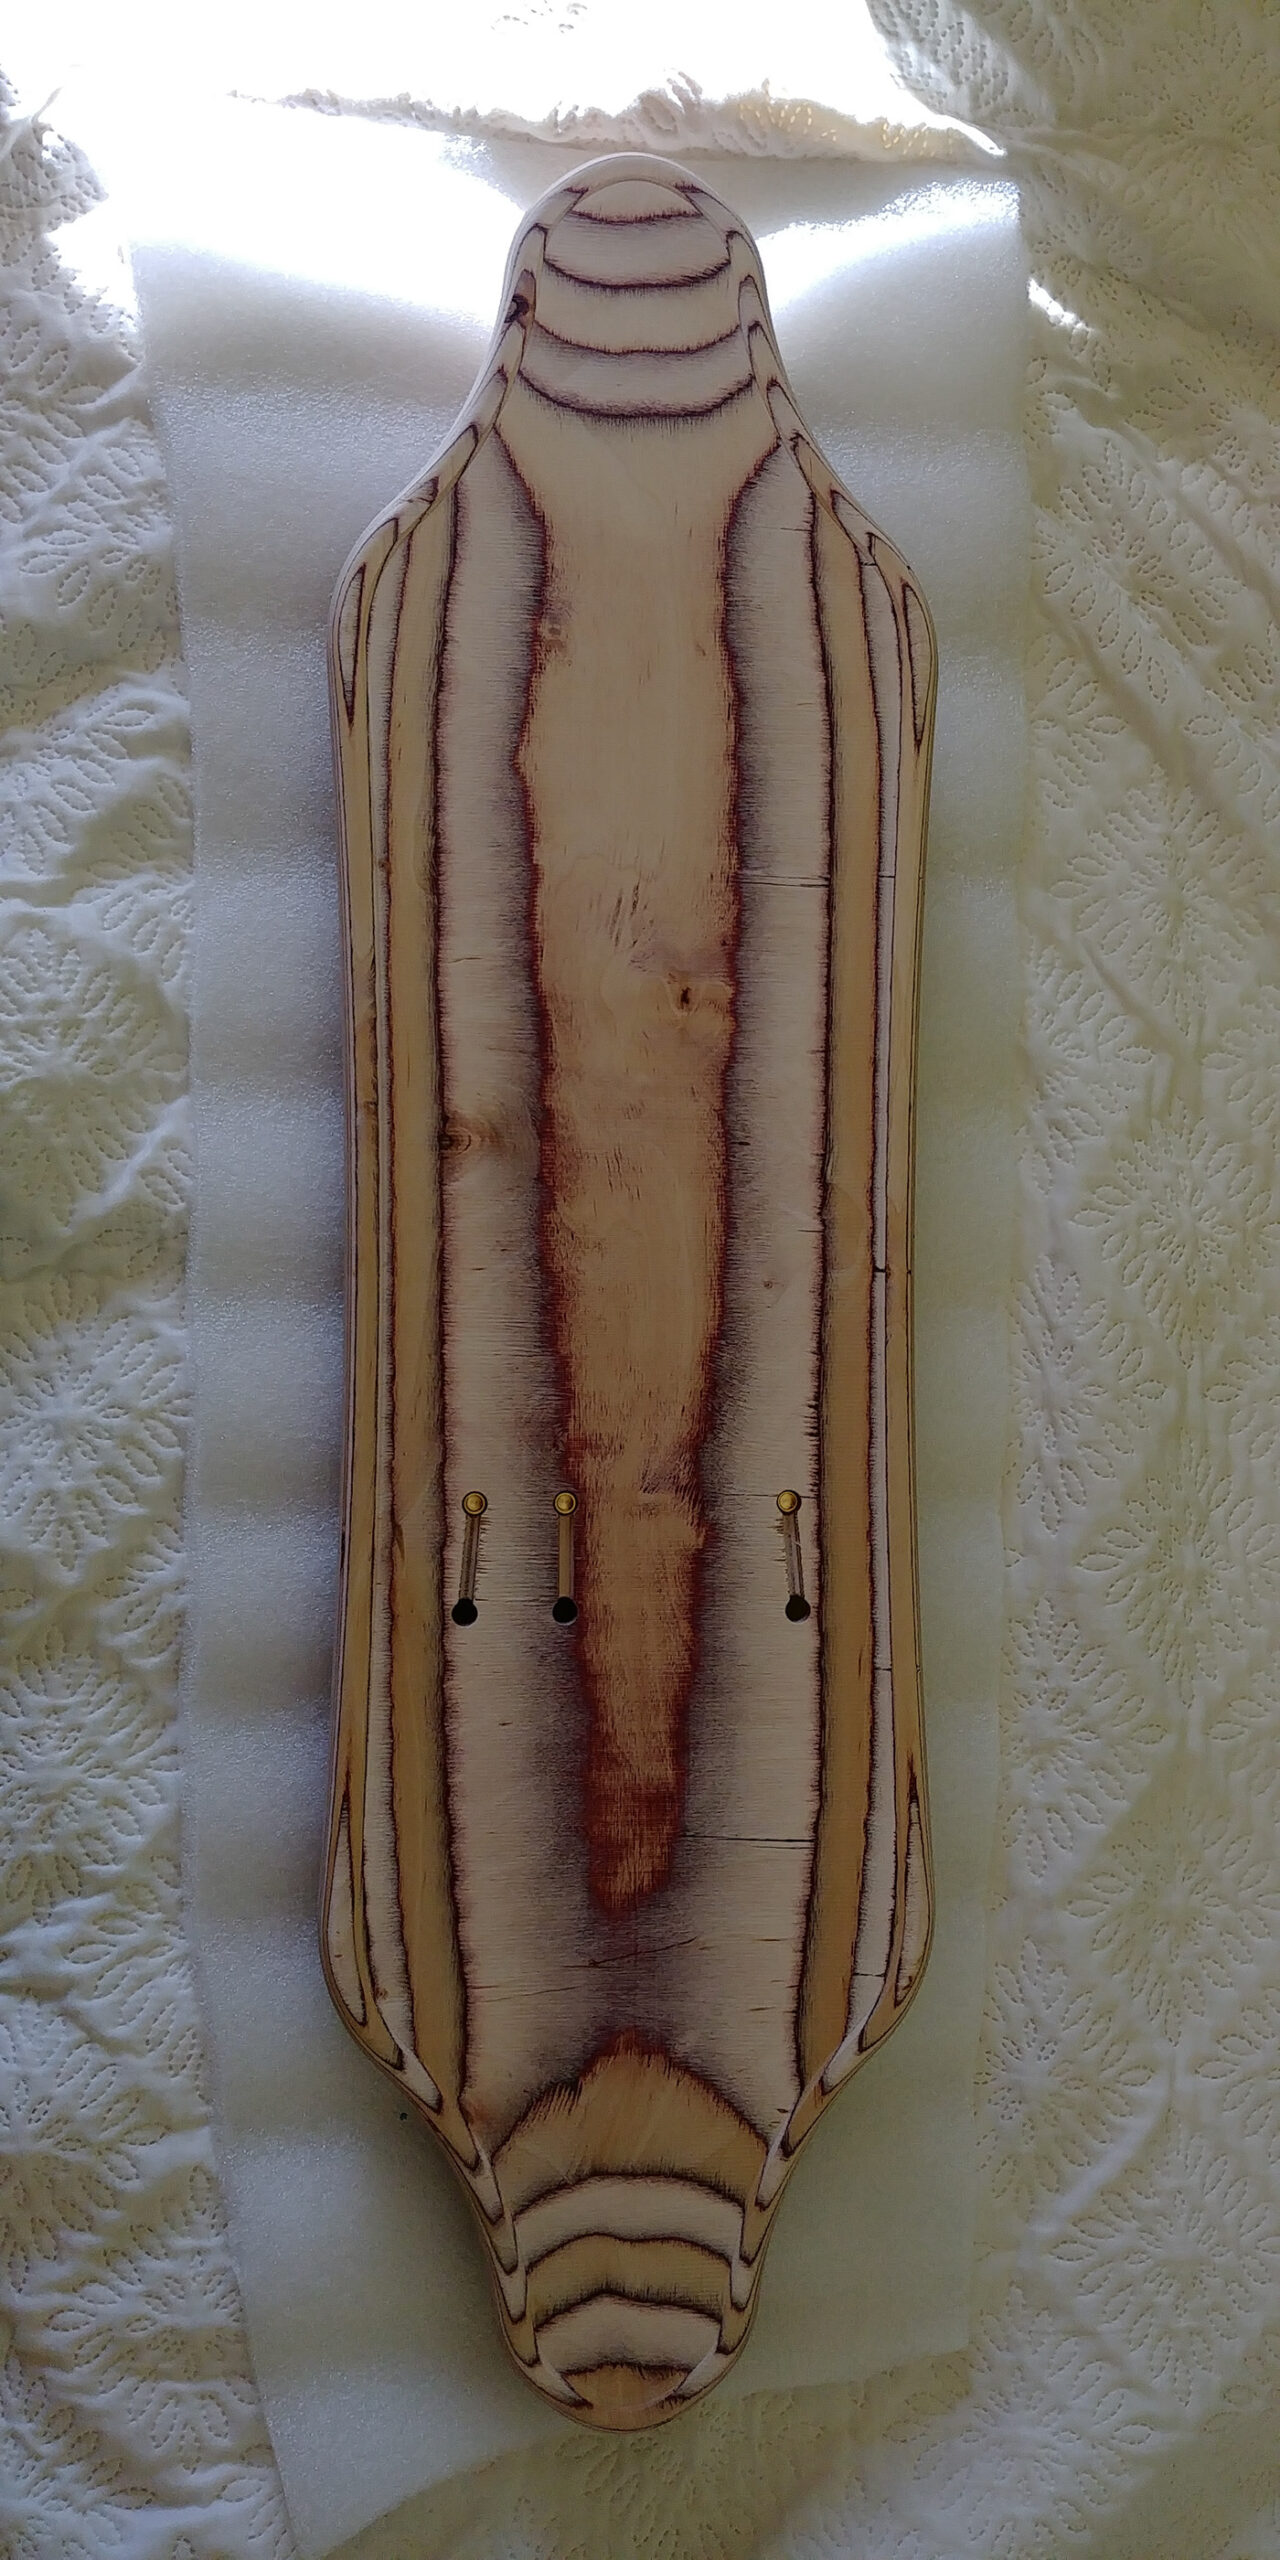
Next step – painted prototype of wooden deck. I decide to make it simple using just white base and transparent shiny finish.
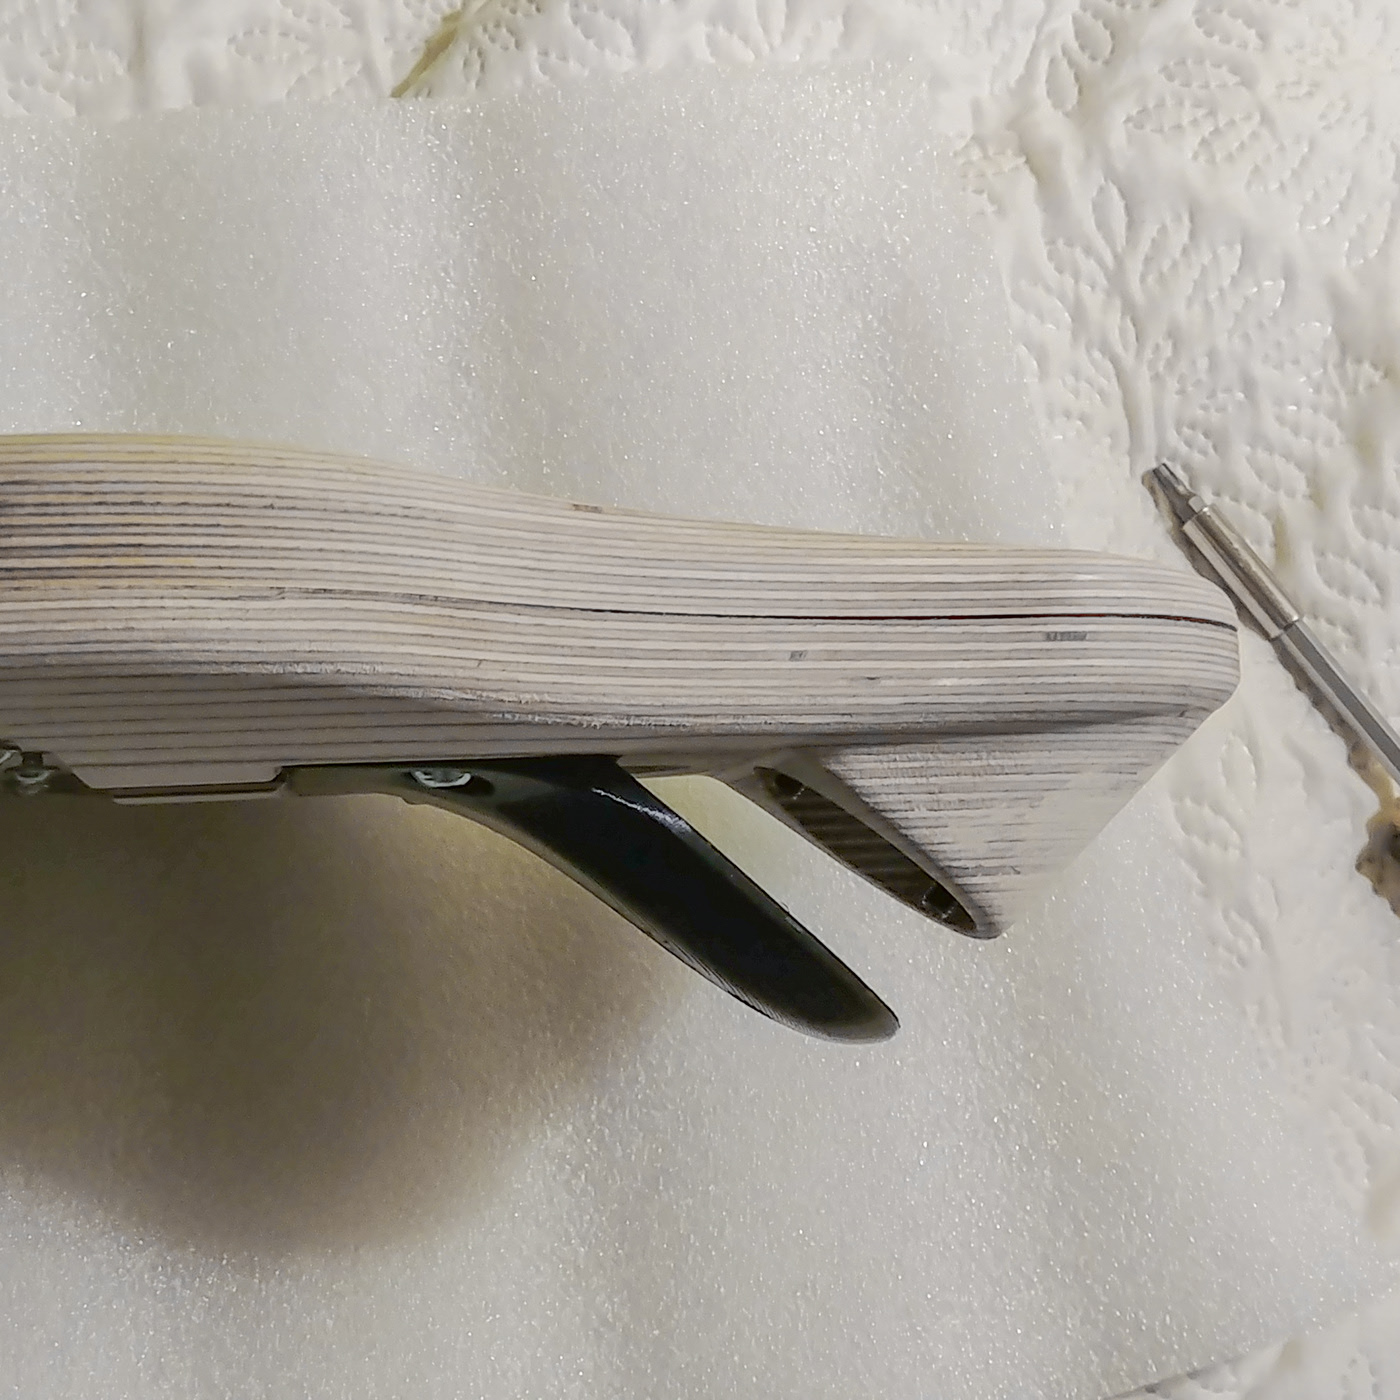
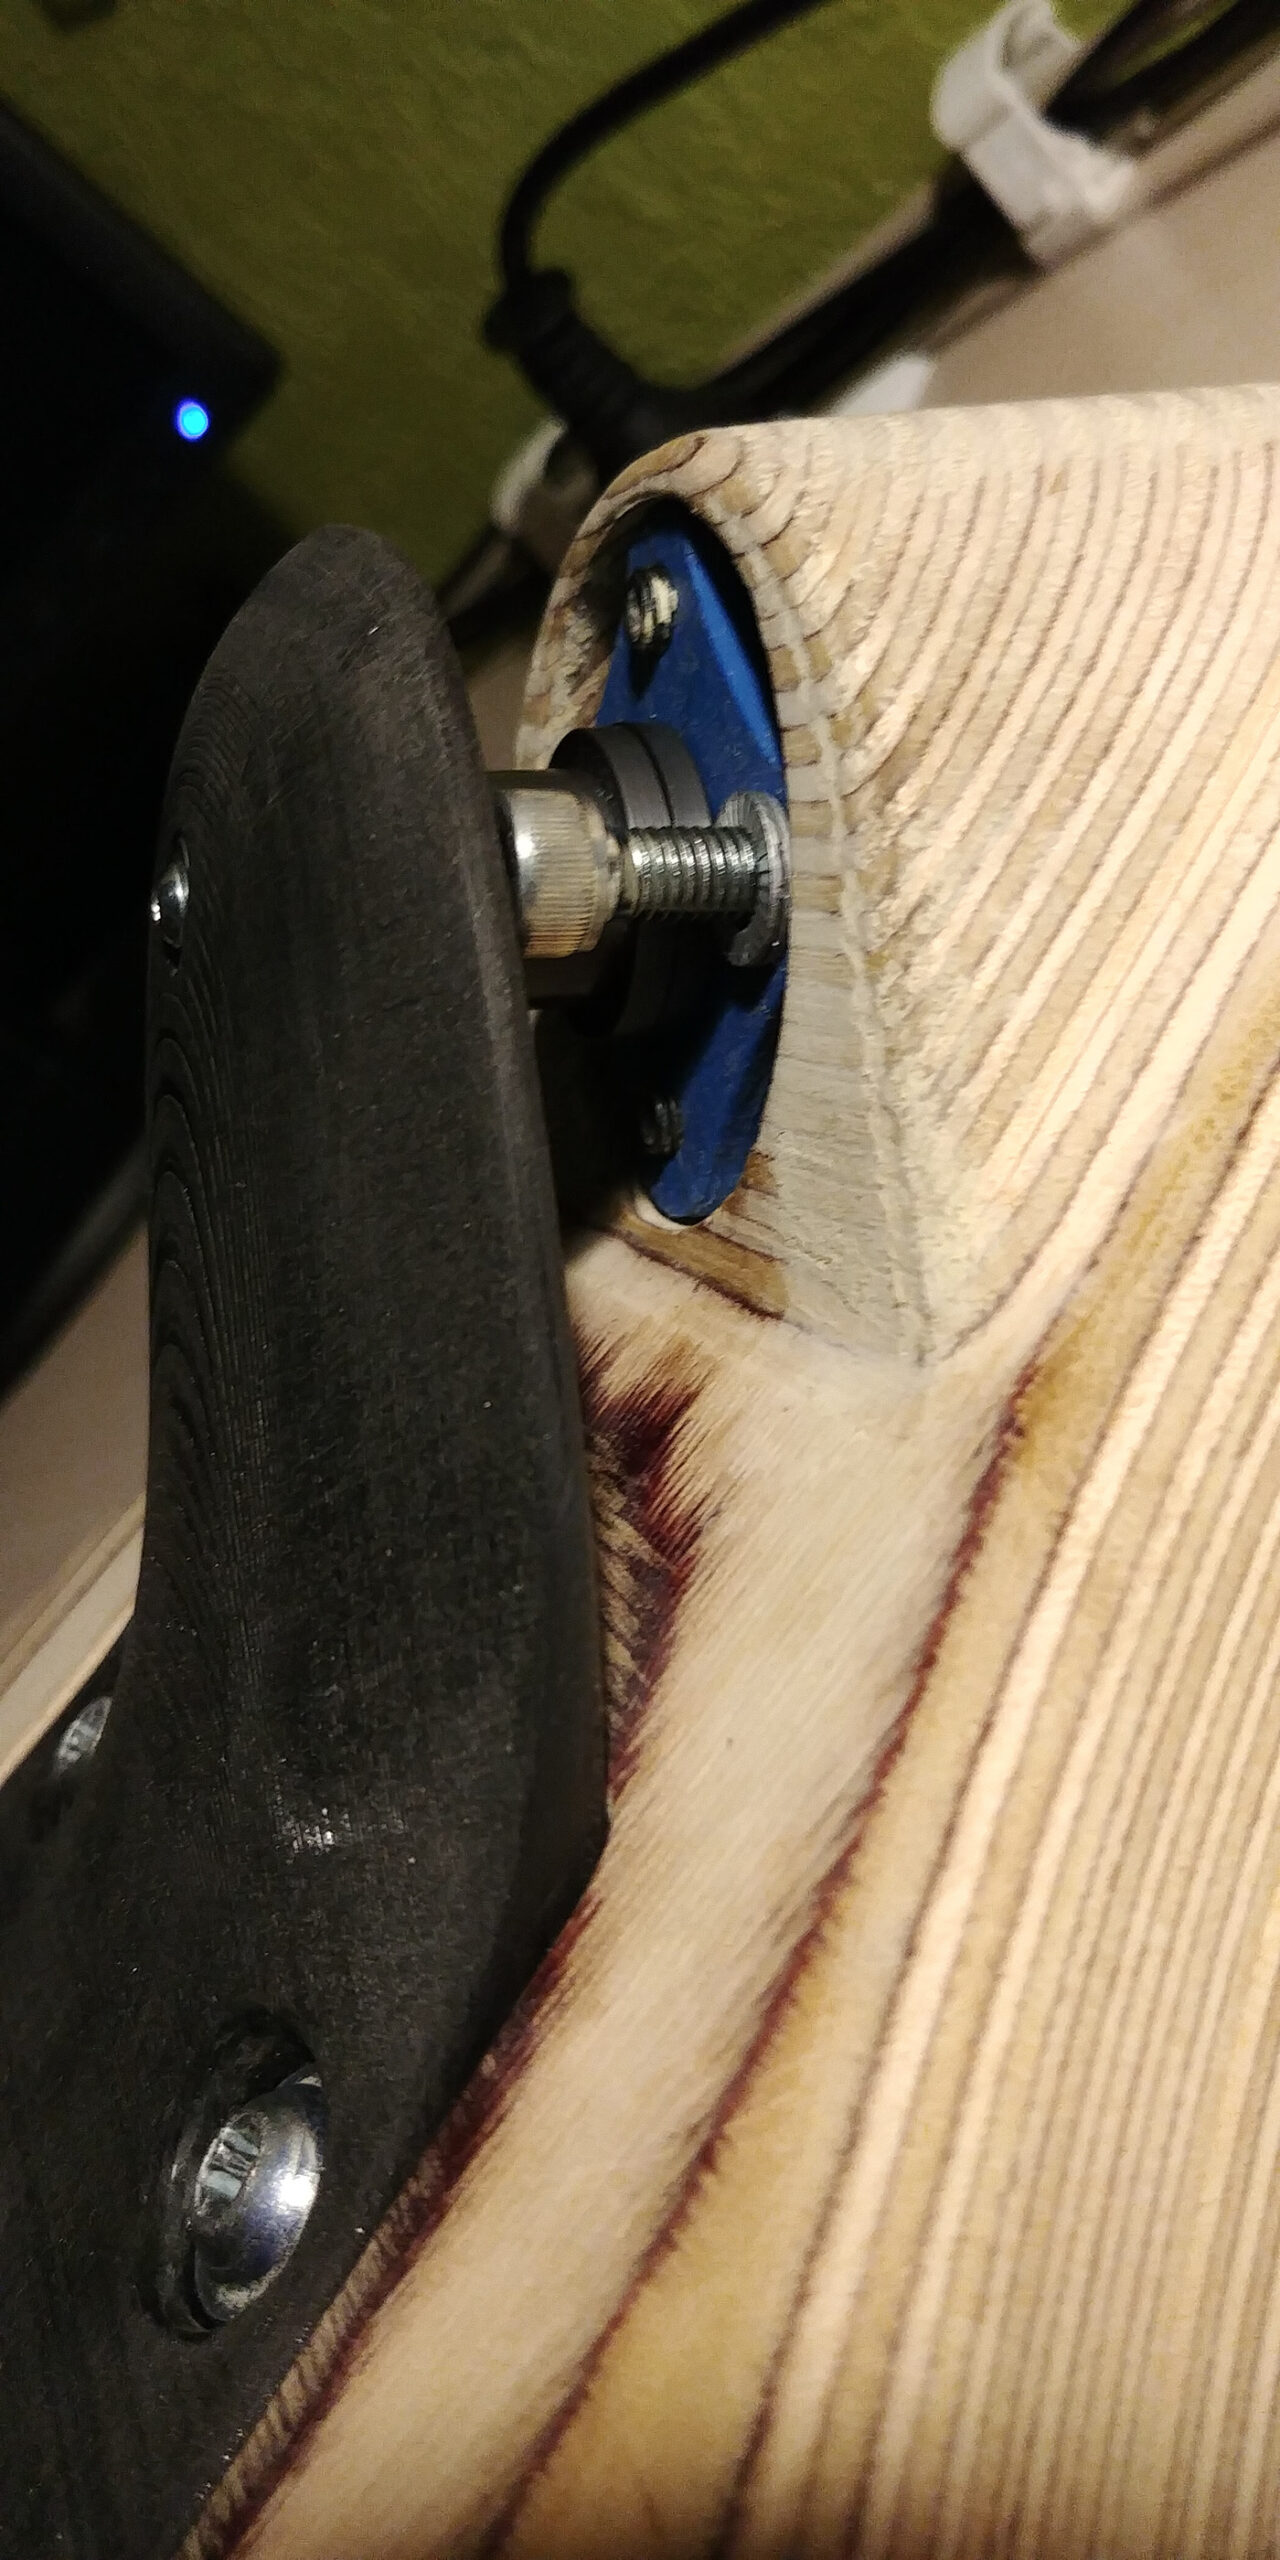
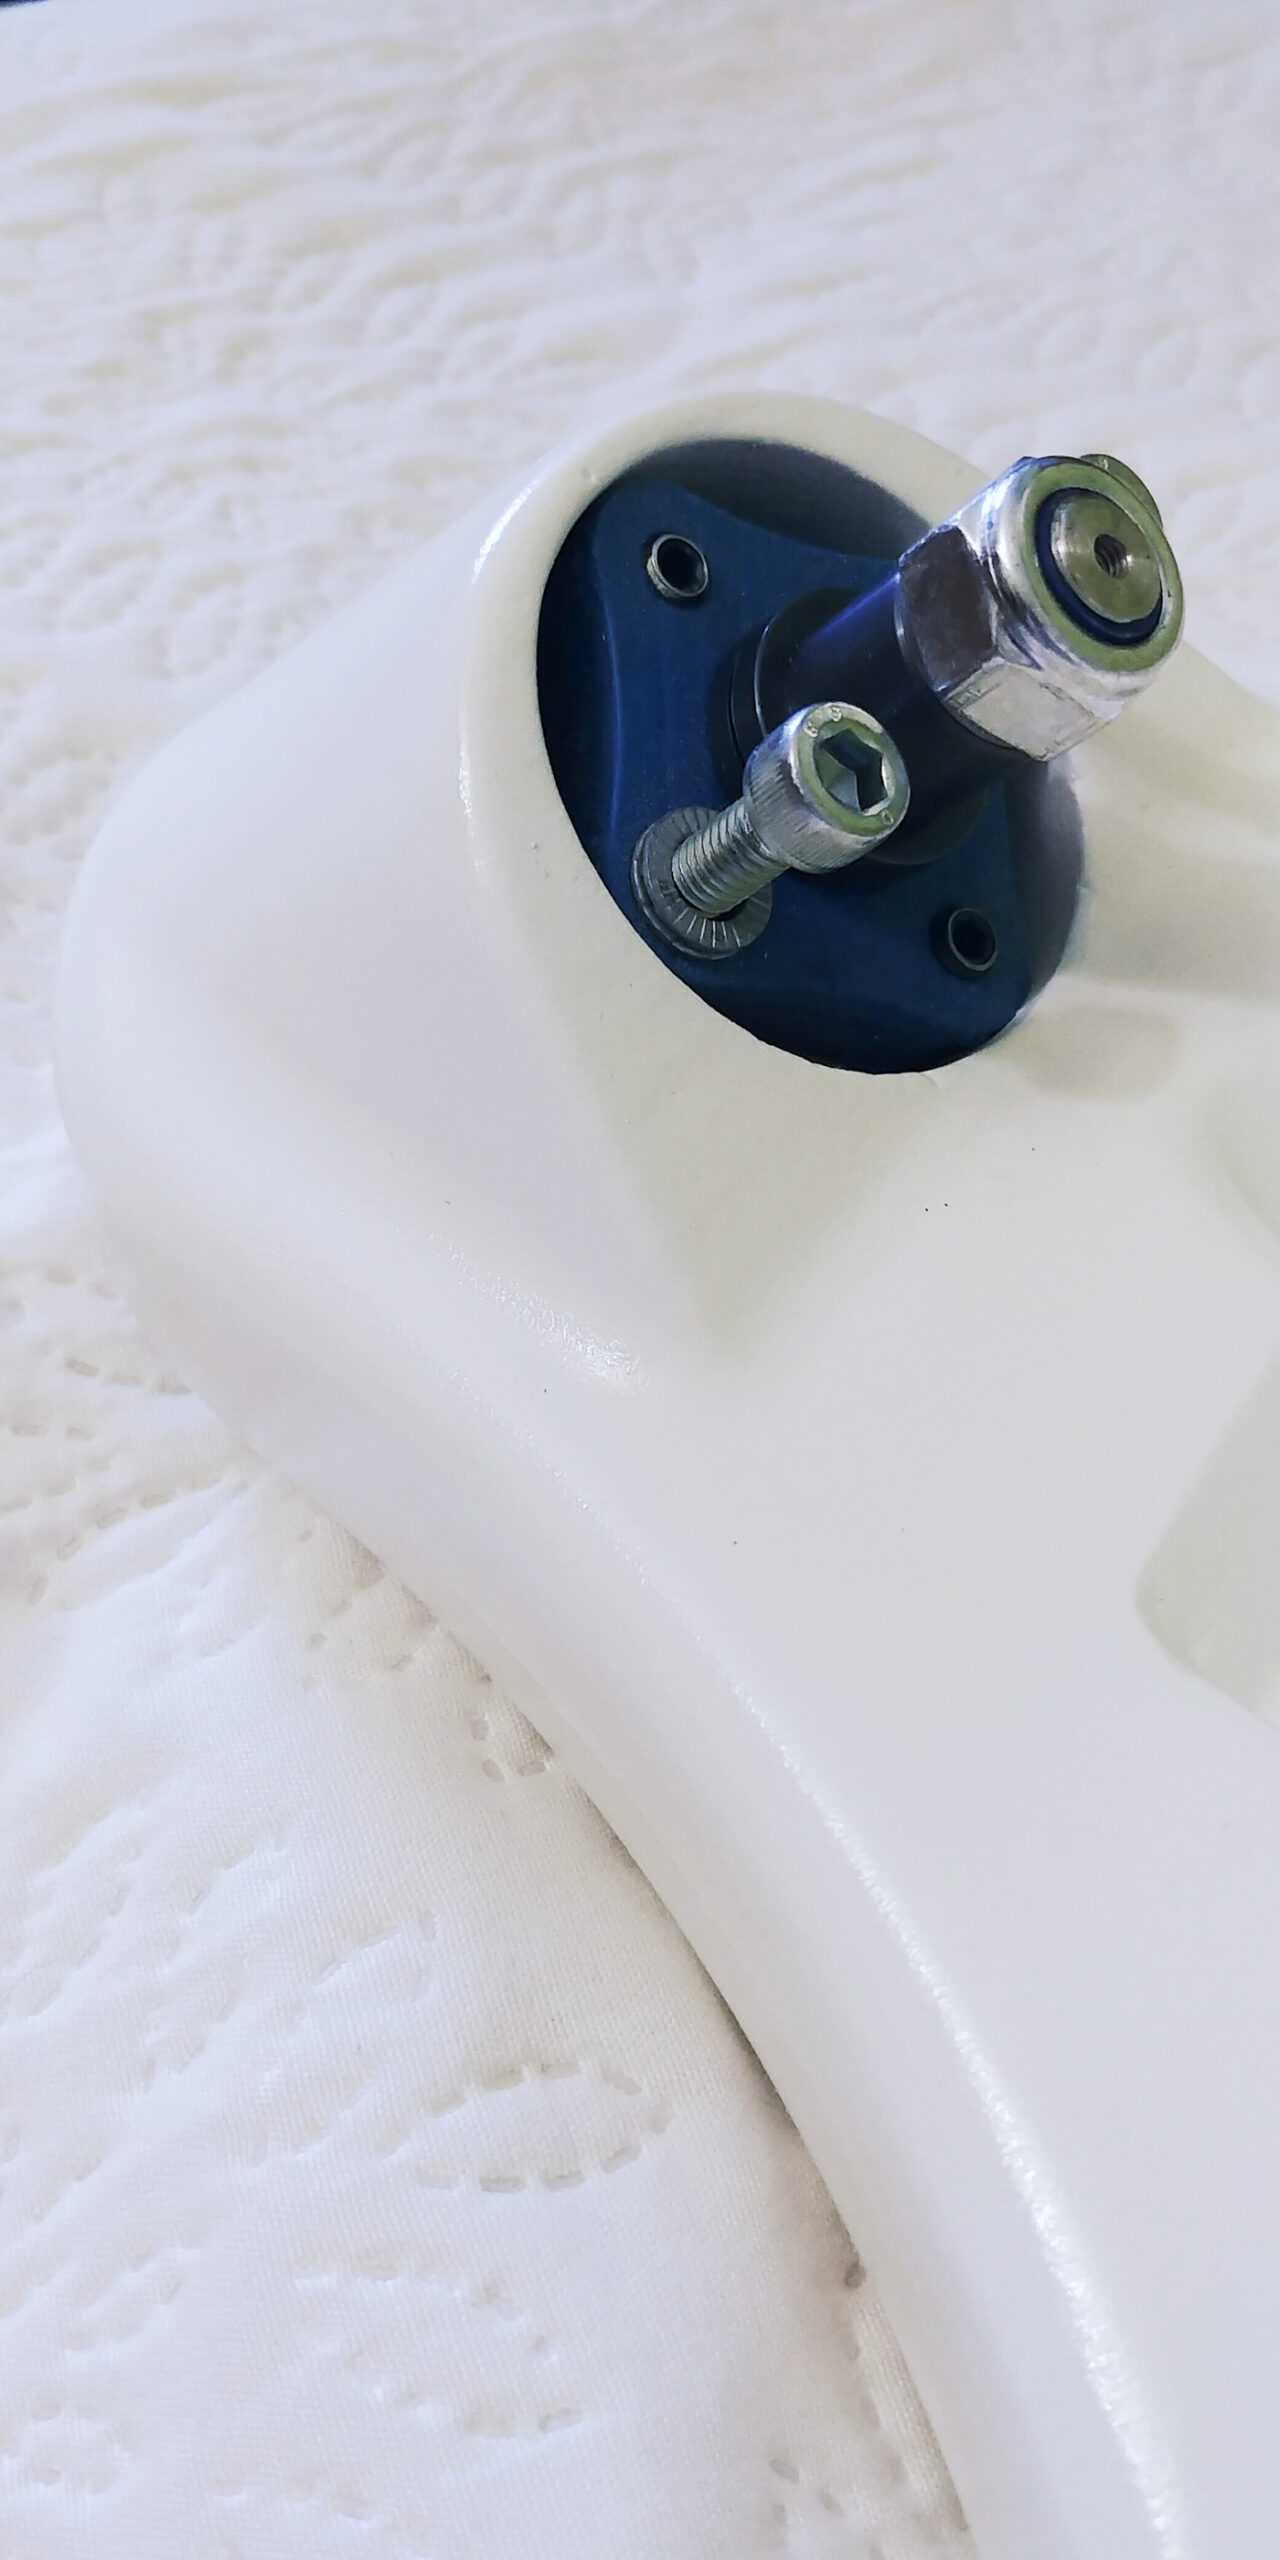
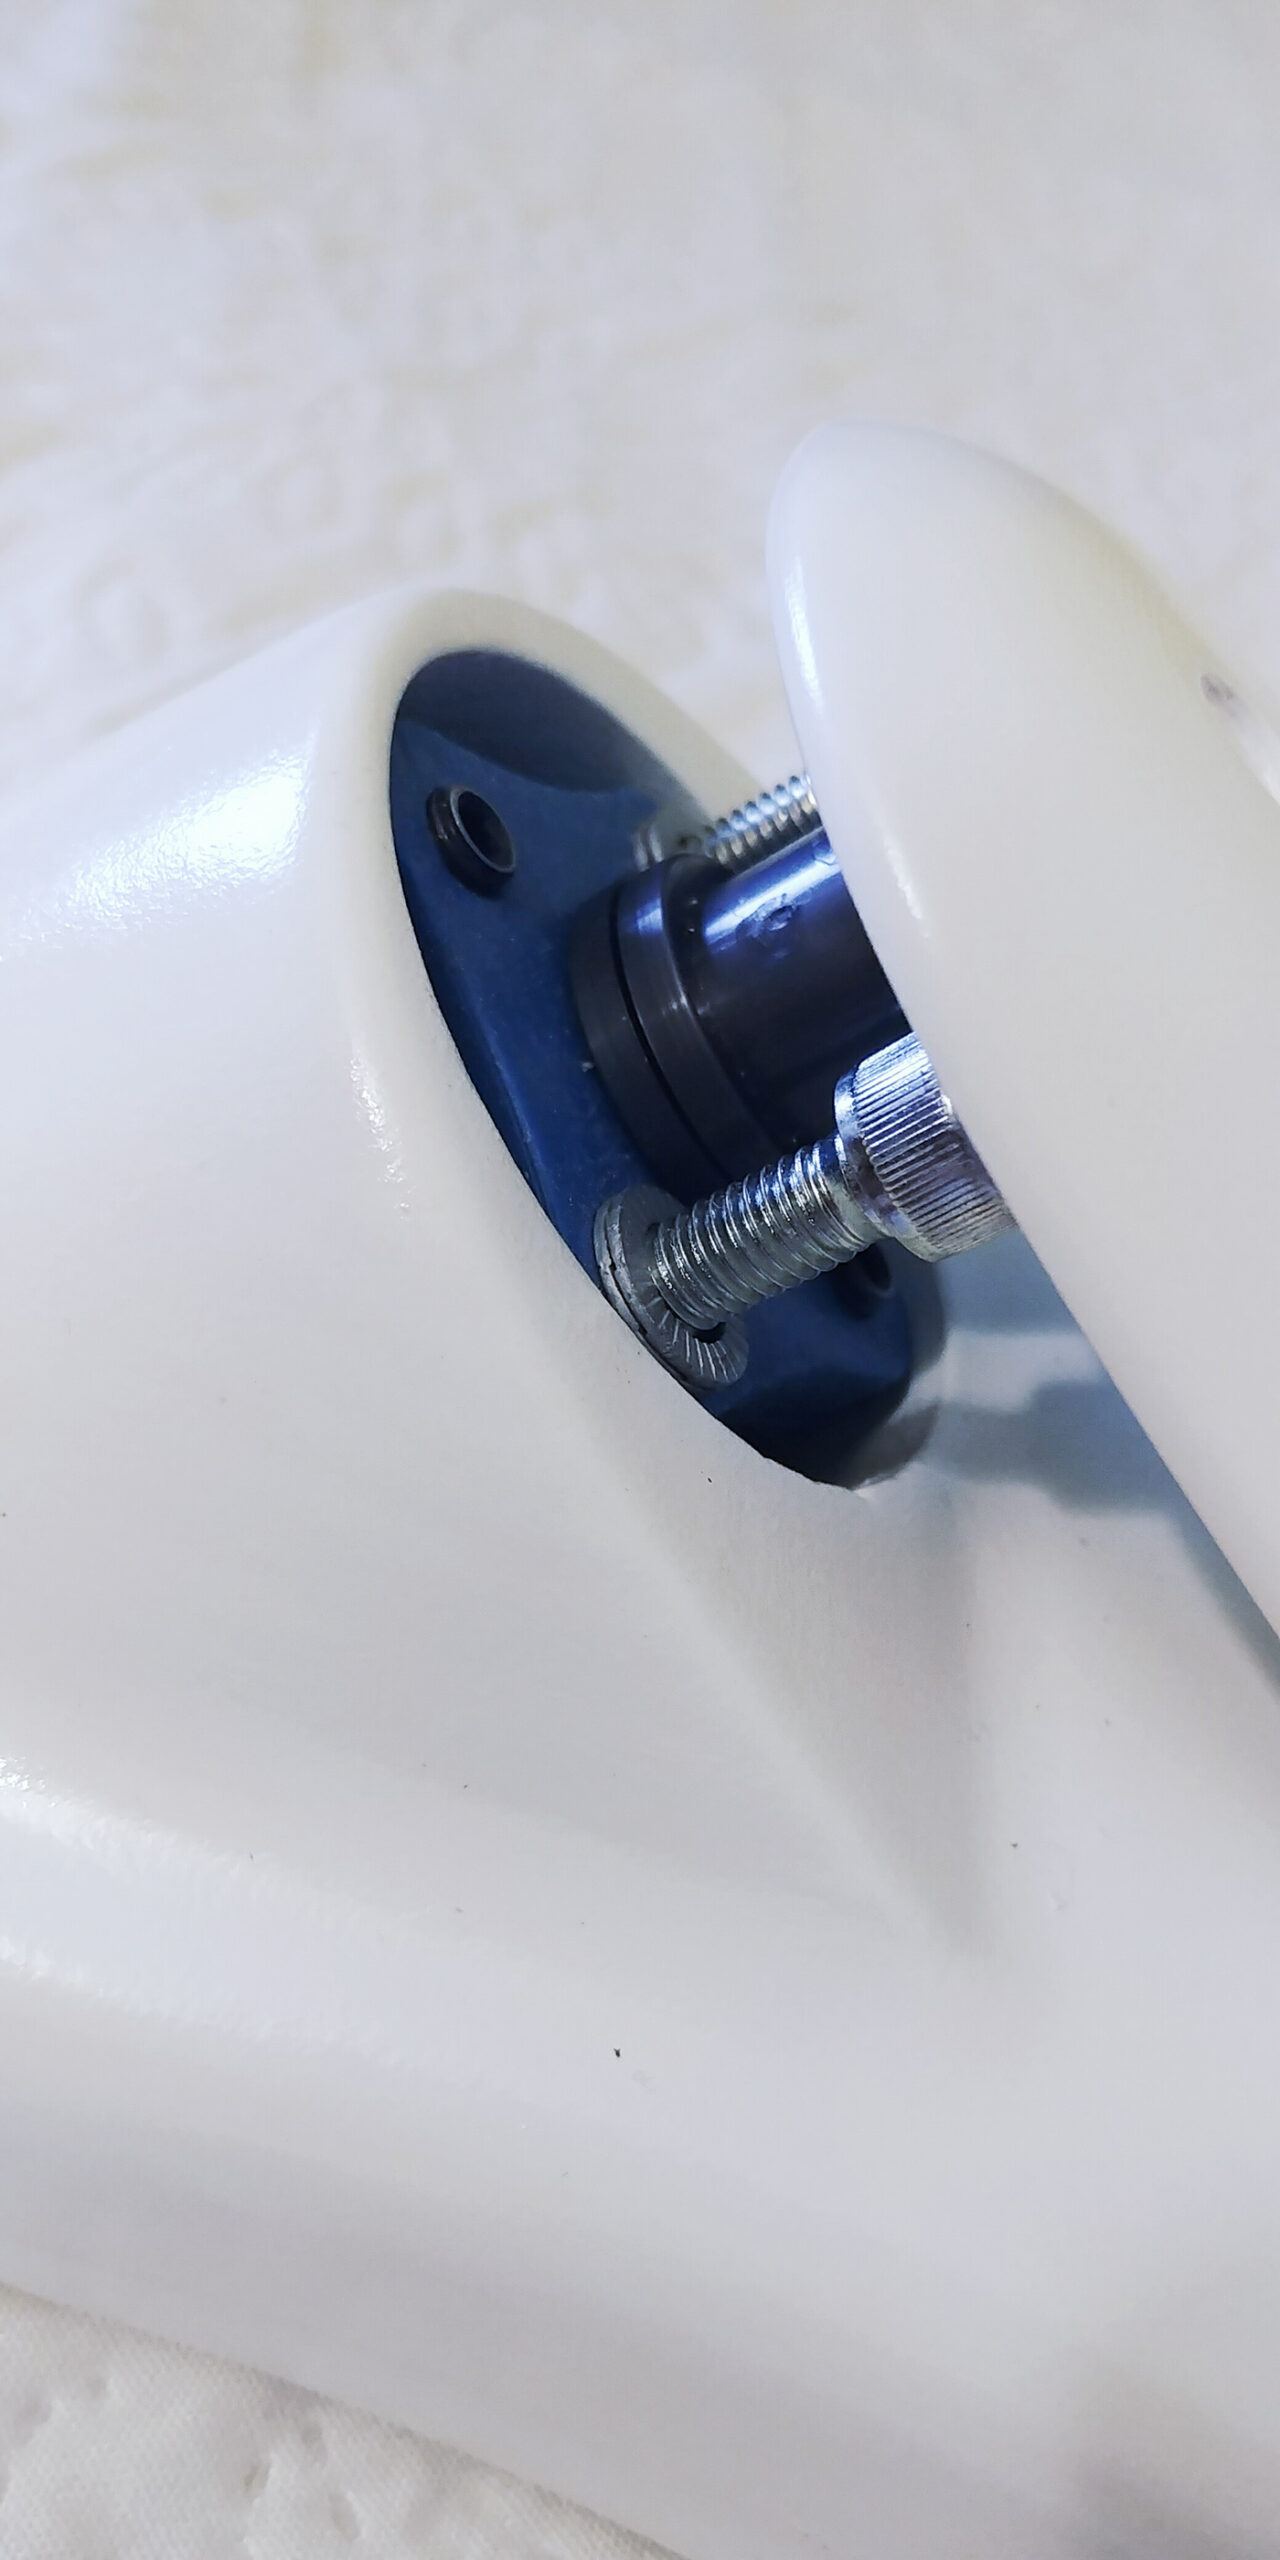
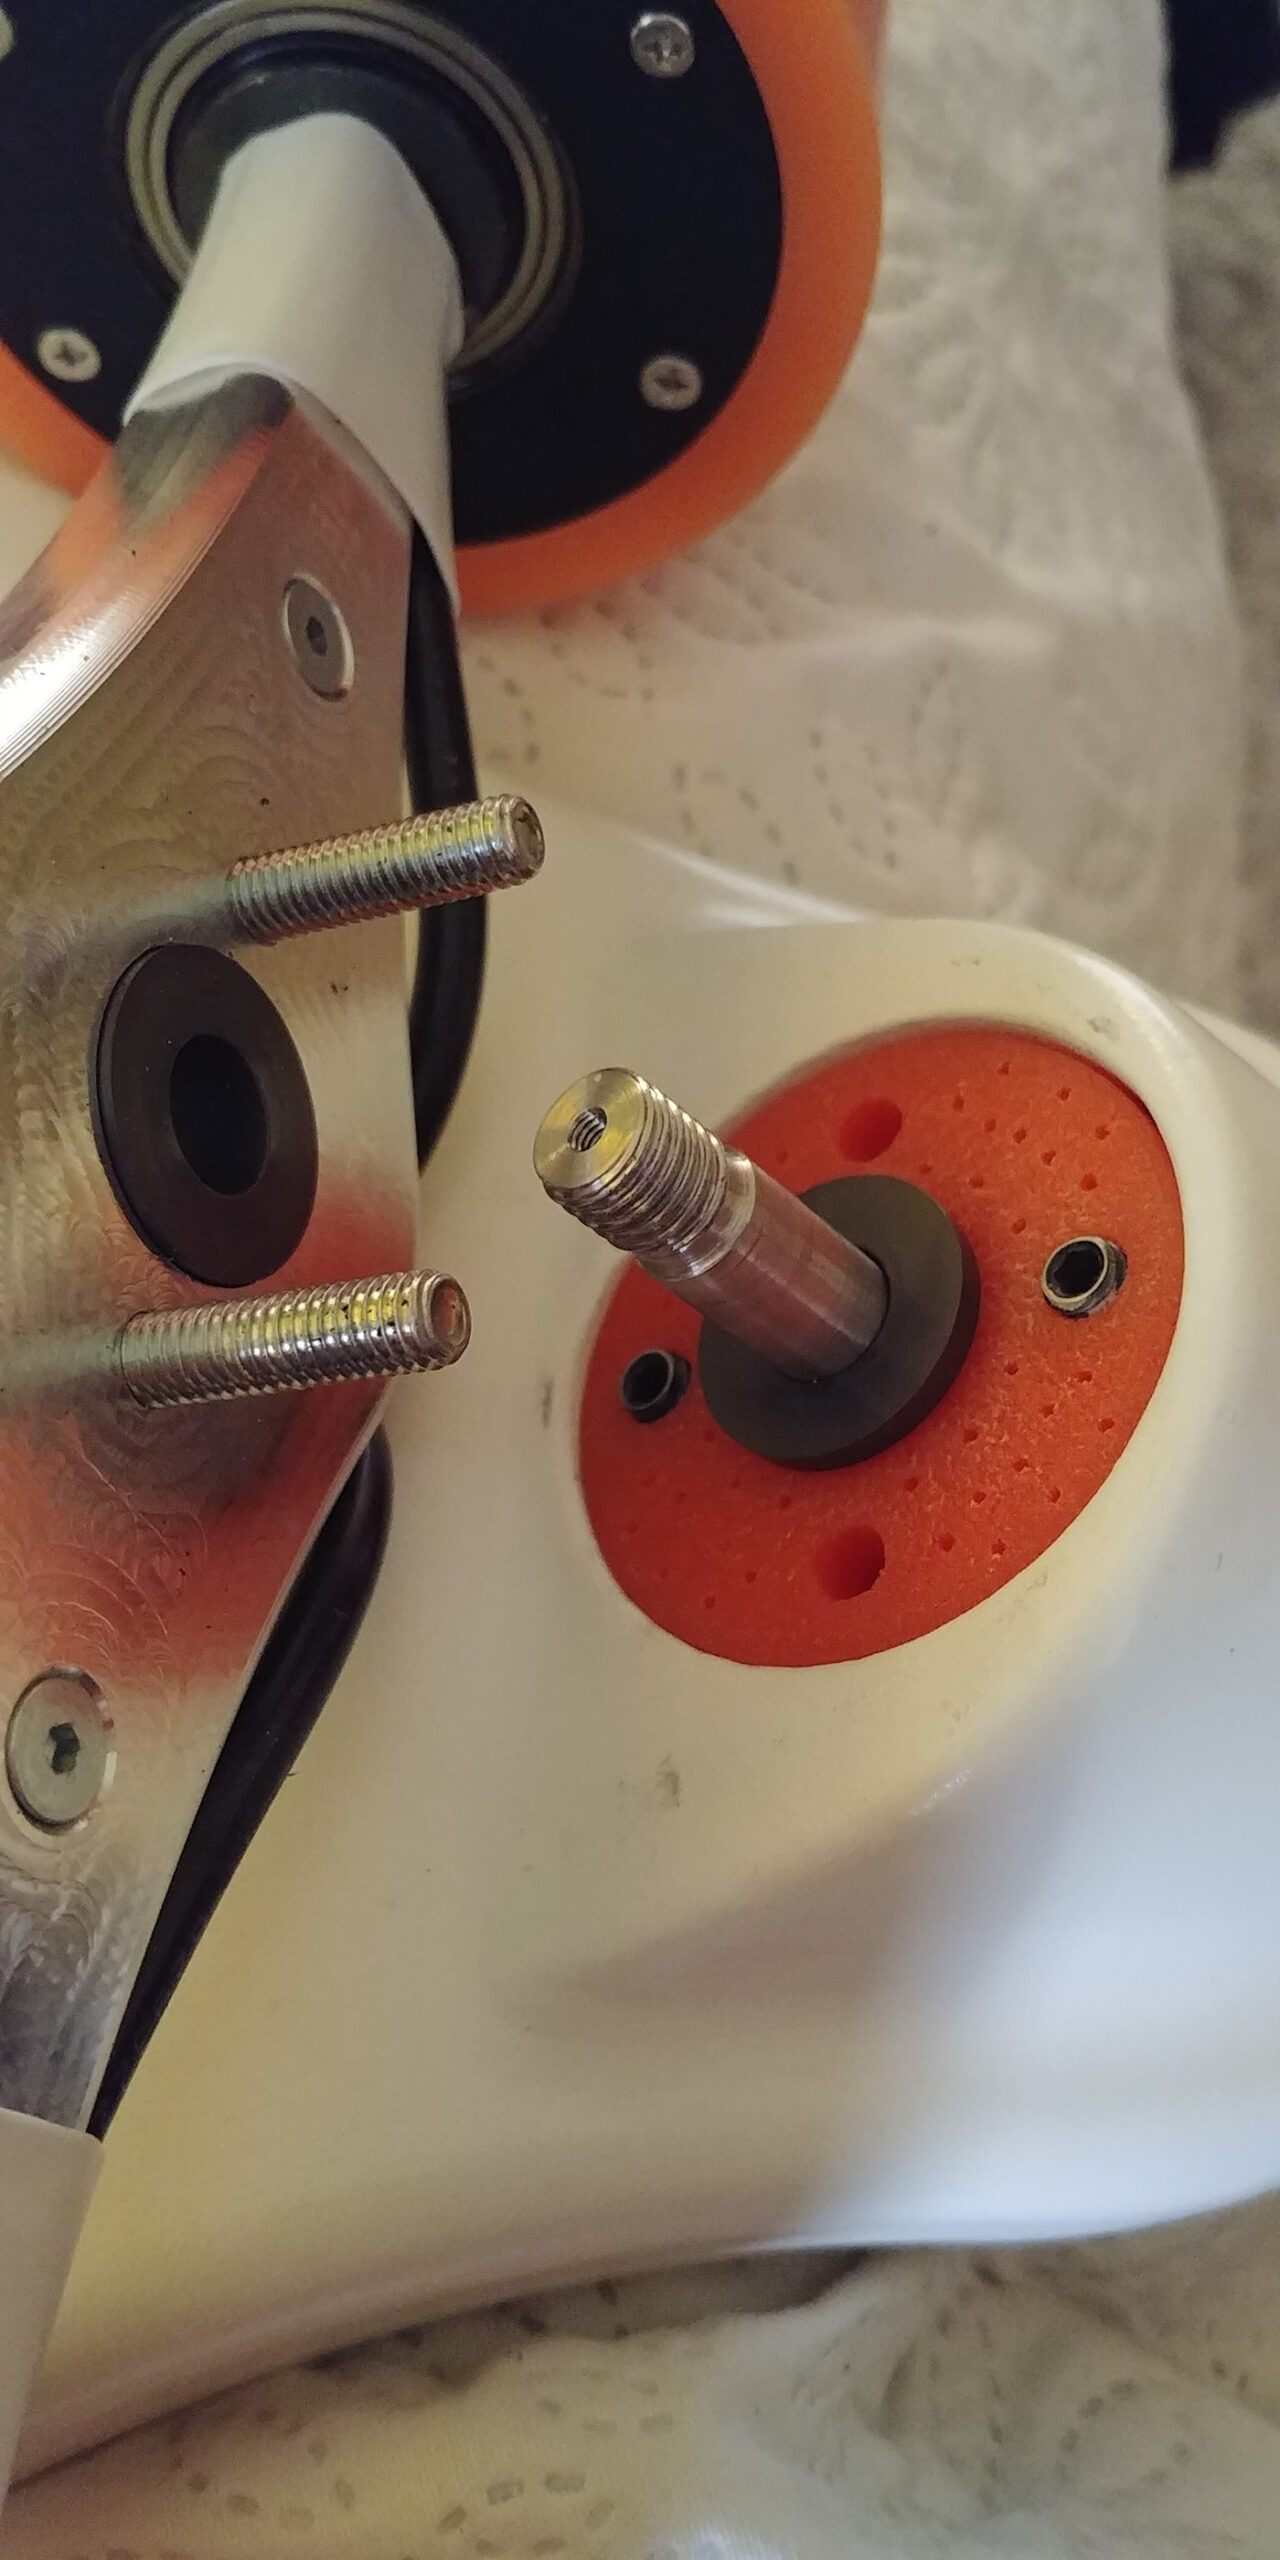
For URBAN project, I had to design new types of trucks that would fit the mounts integrated into the deck. Their design allows for a significant lowering of the center of gravity, which improves the driving experience.
Both elements were milled from the 6061 alloy, which is valued for combining high corrosion resistance with very good mechanical properties.
In the prototype, I used standard 90mm polyurethane wheels and a brushless 9055 sensored hub motors. Each motor has approximately 1kW of peak power.
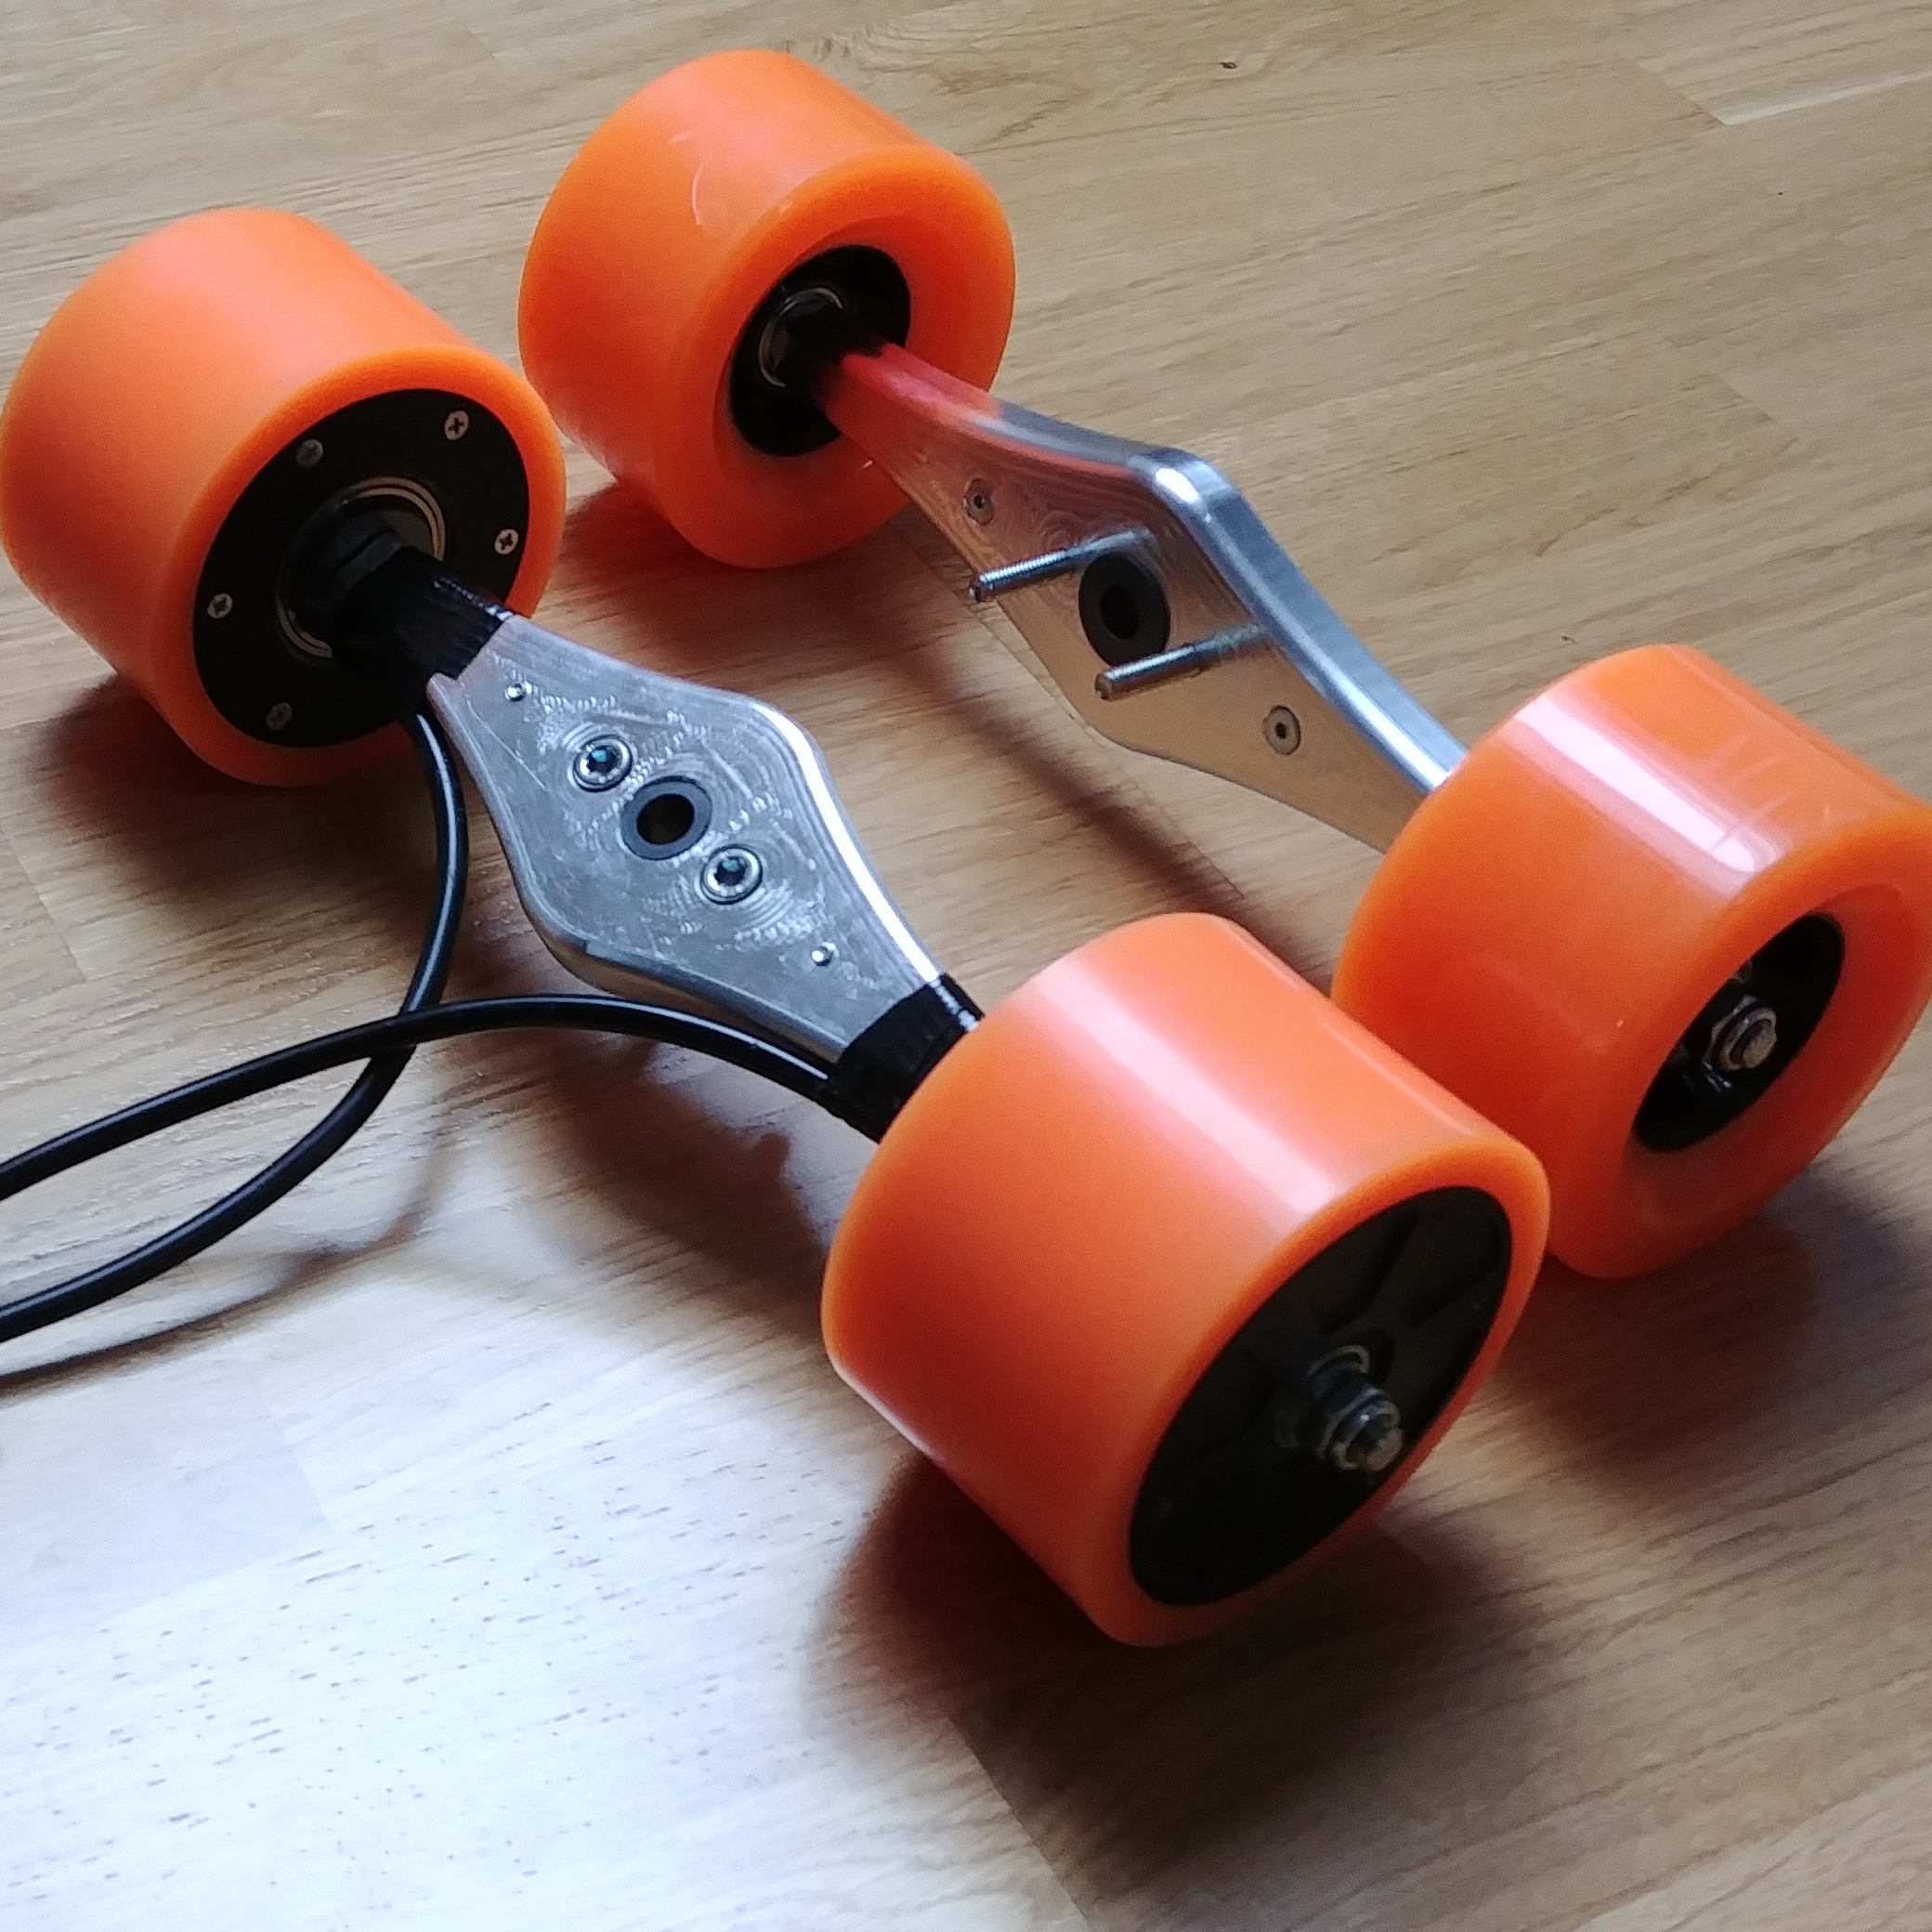
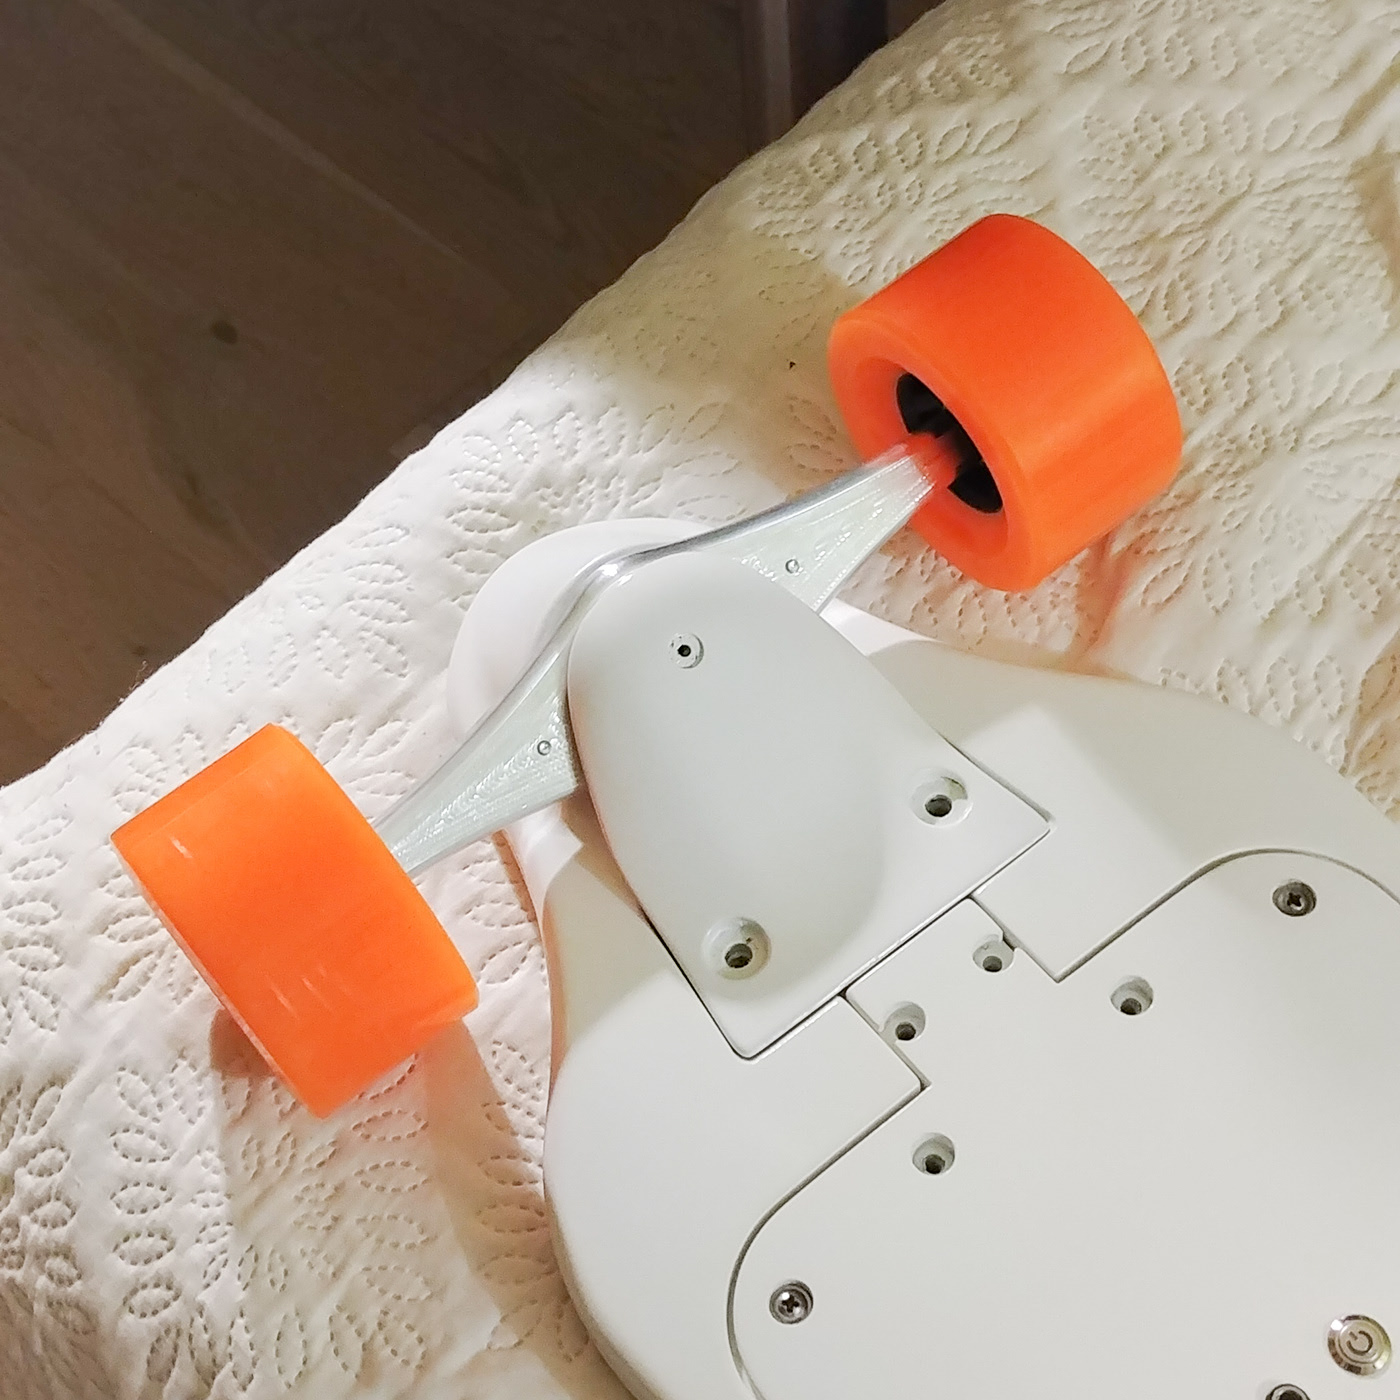
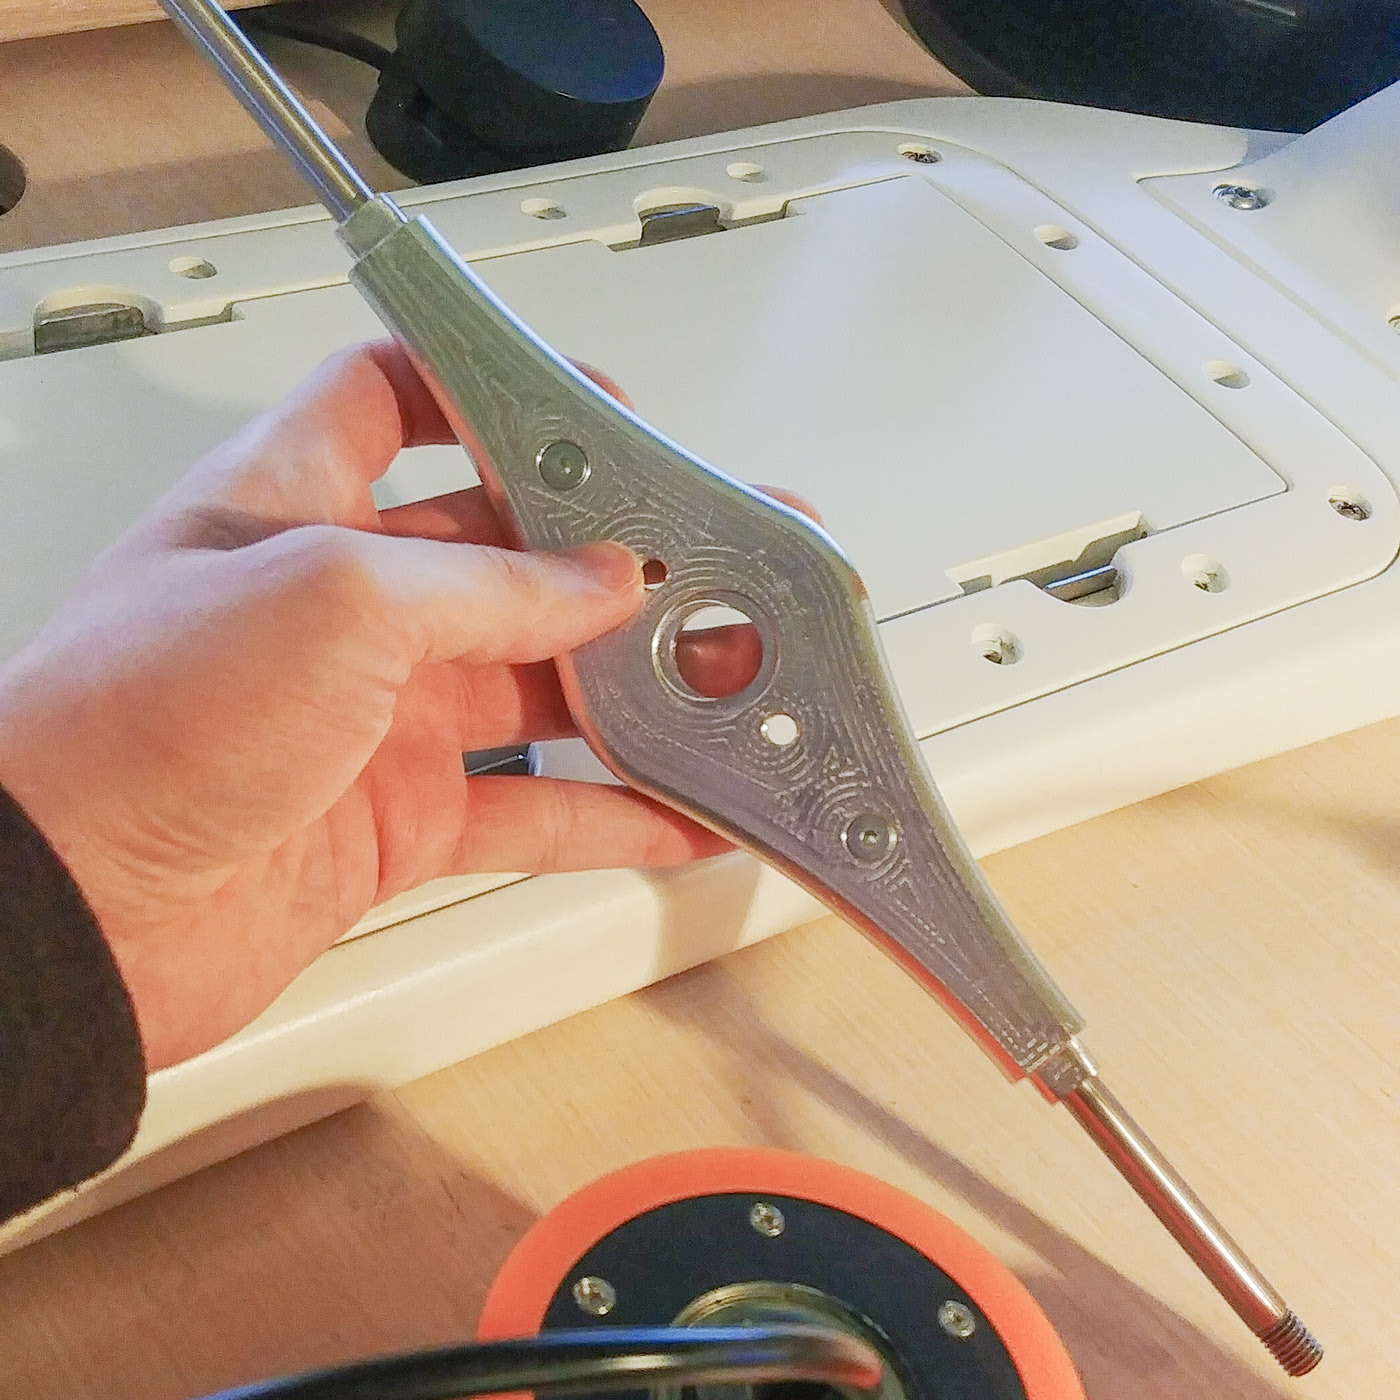
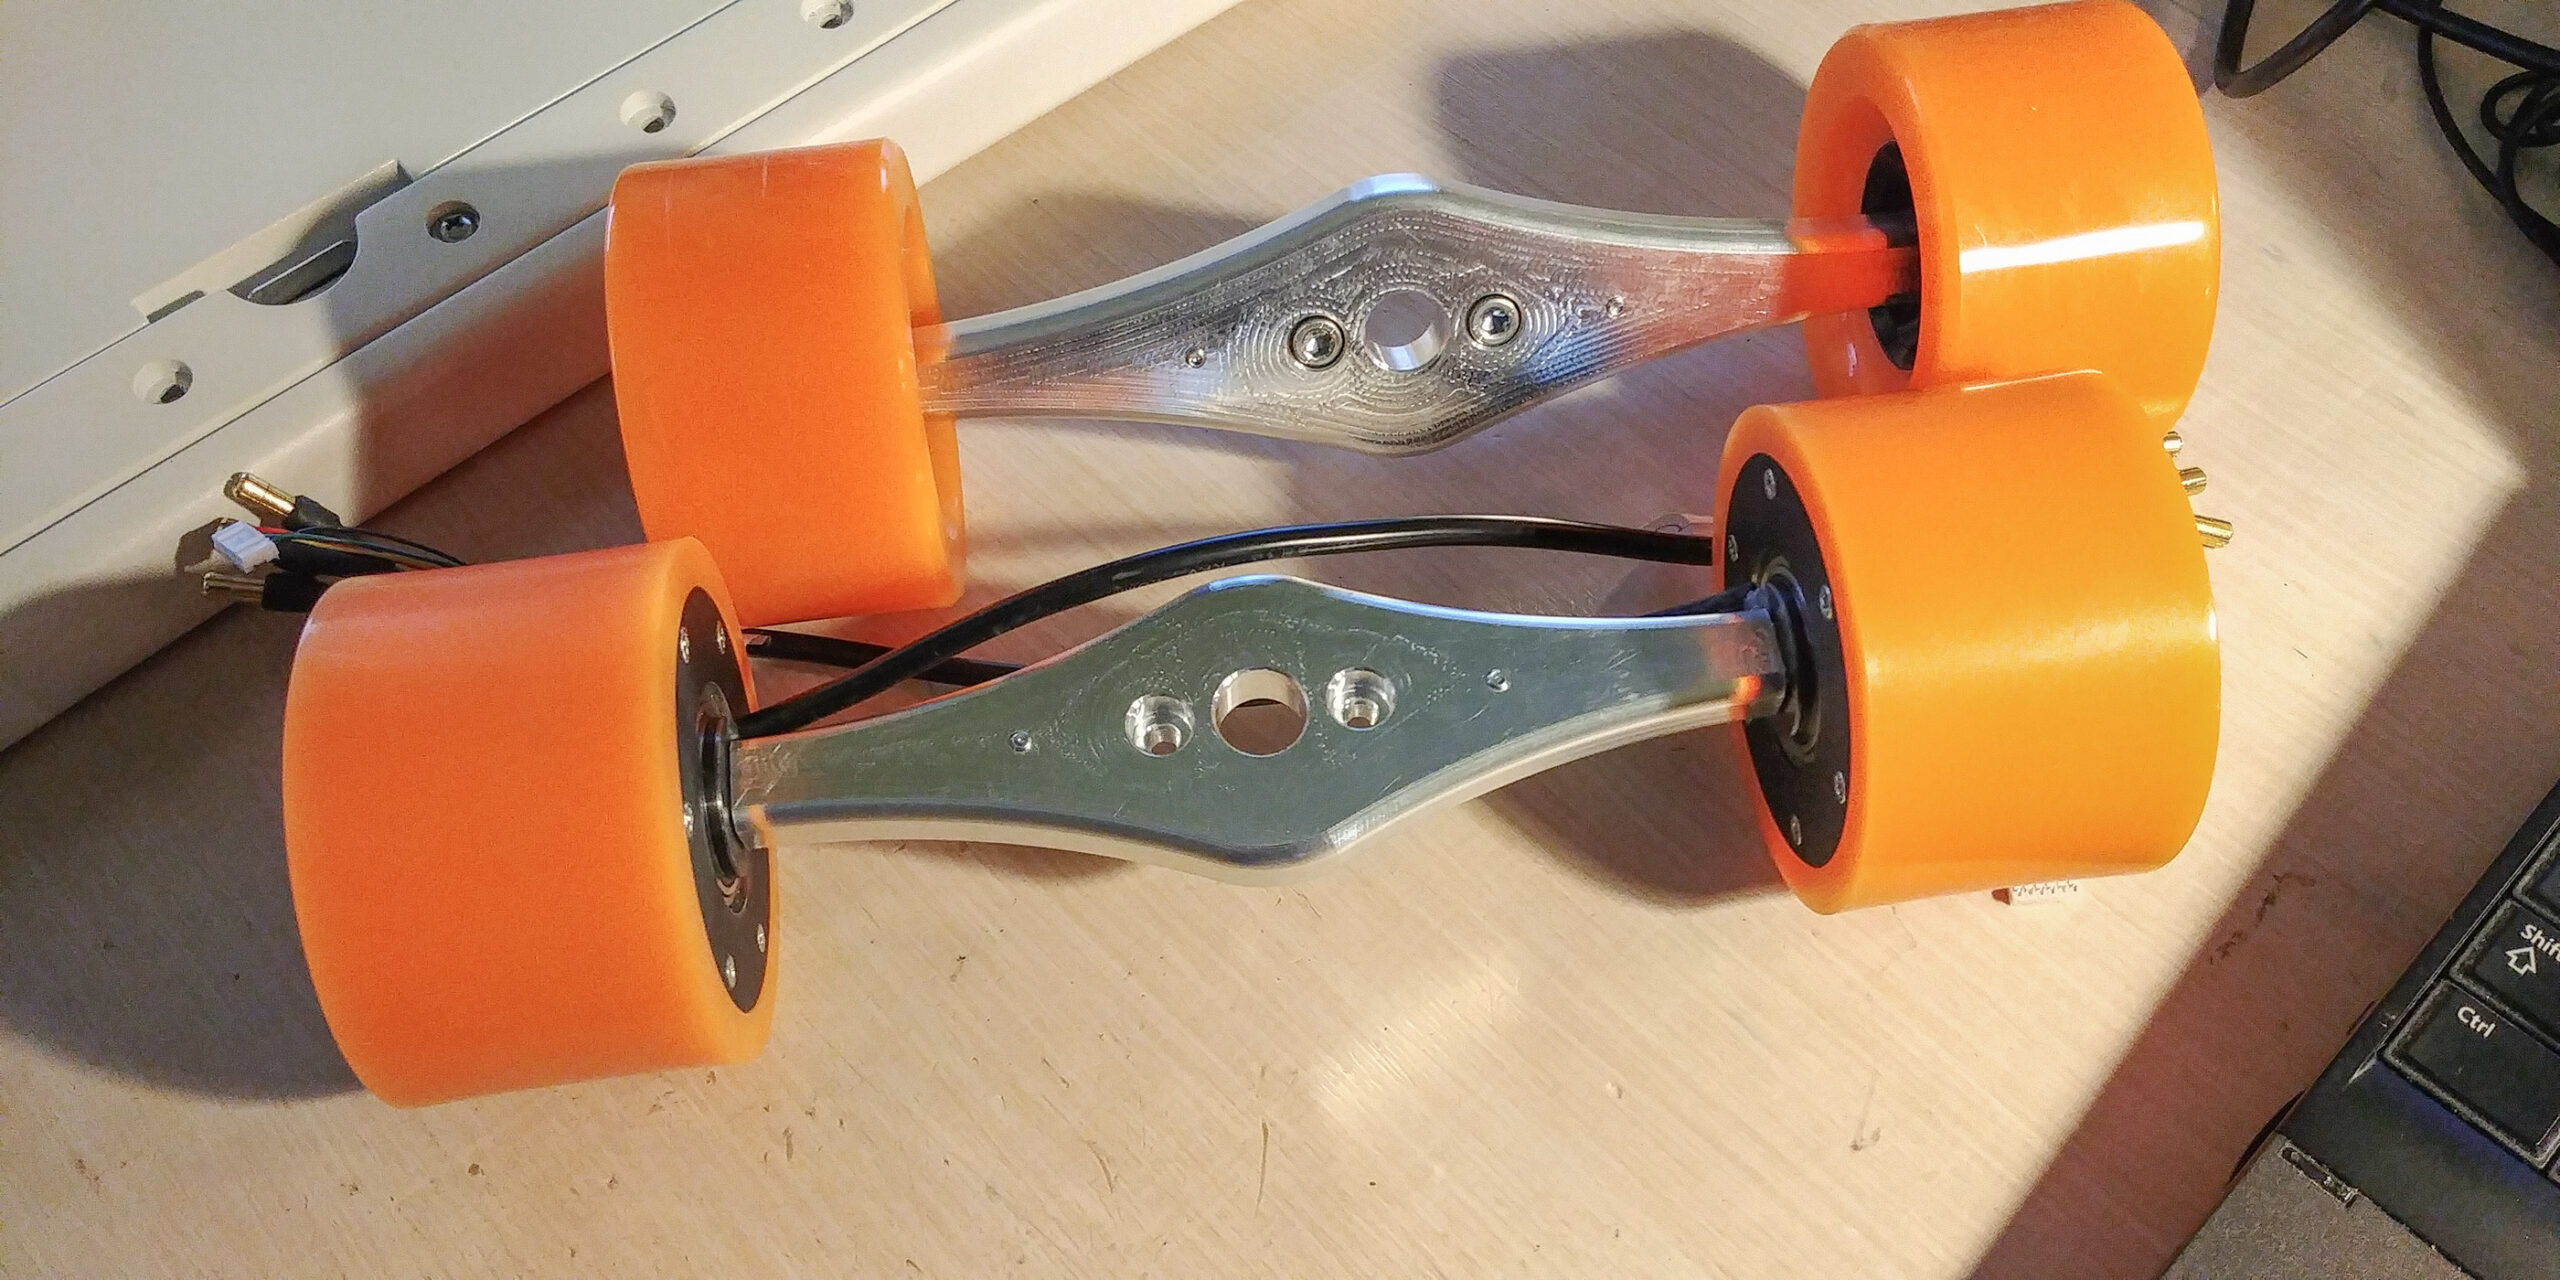
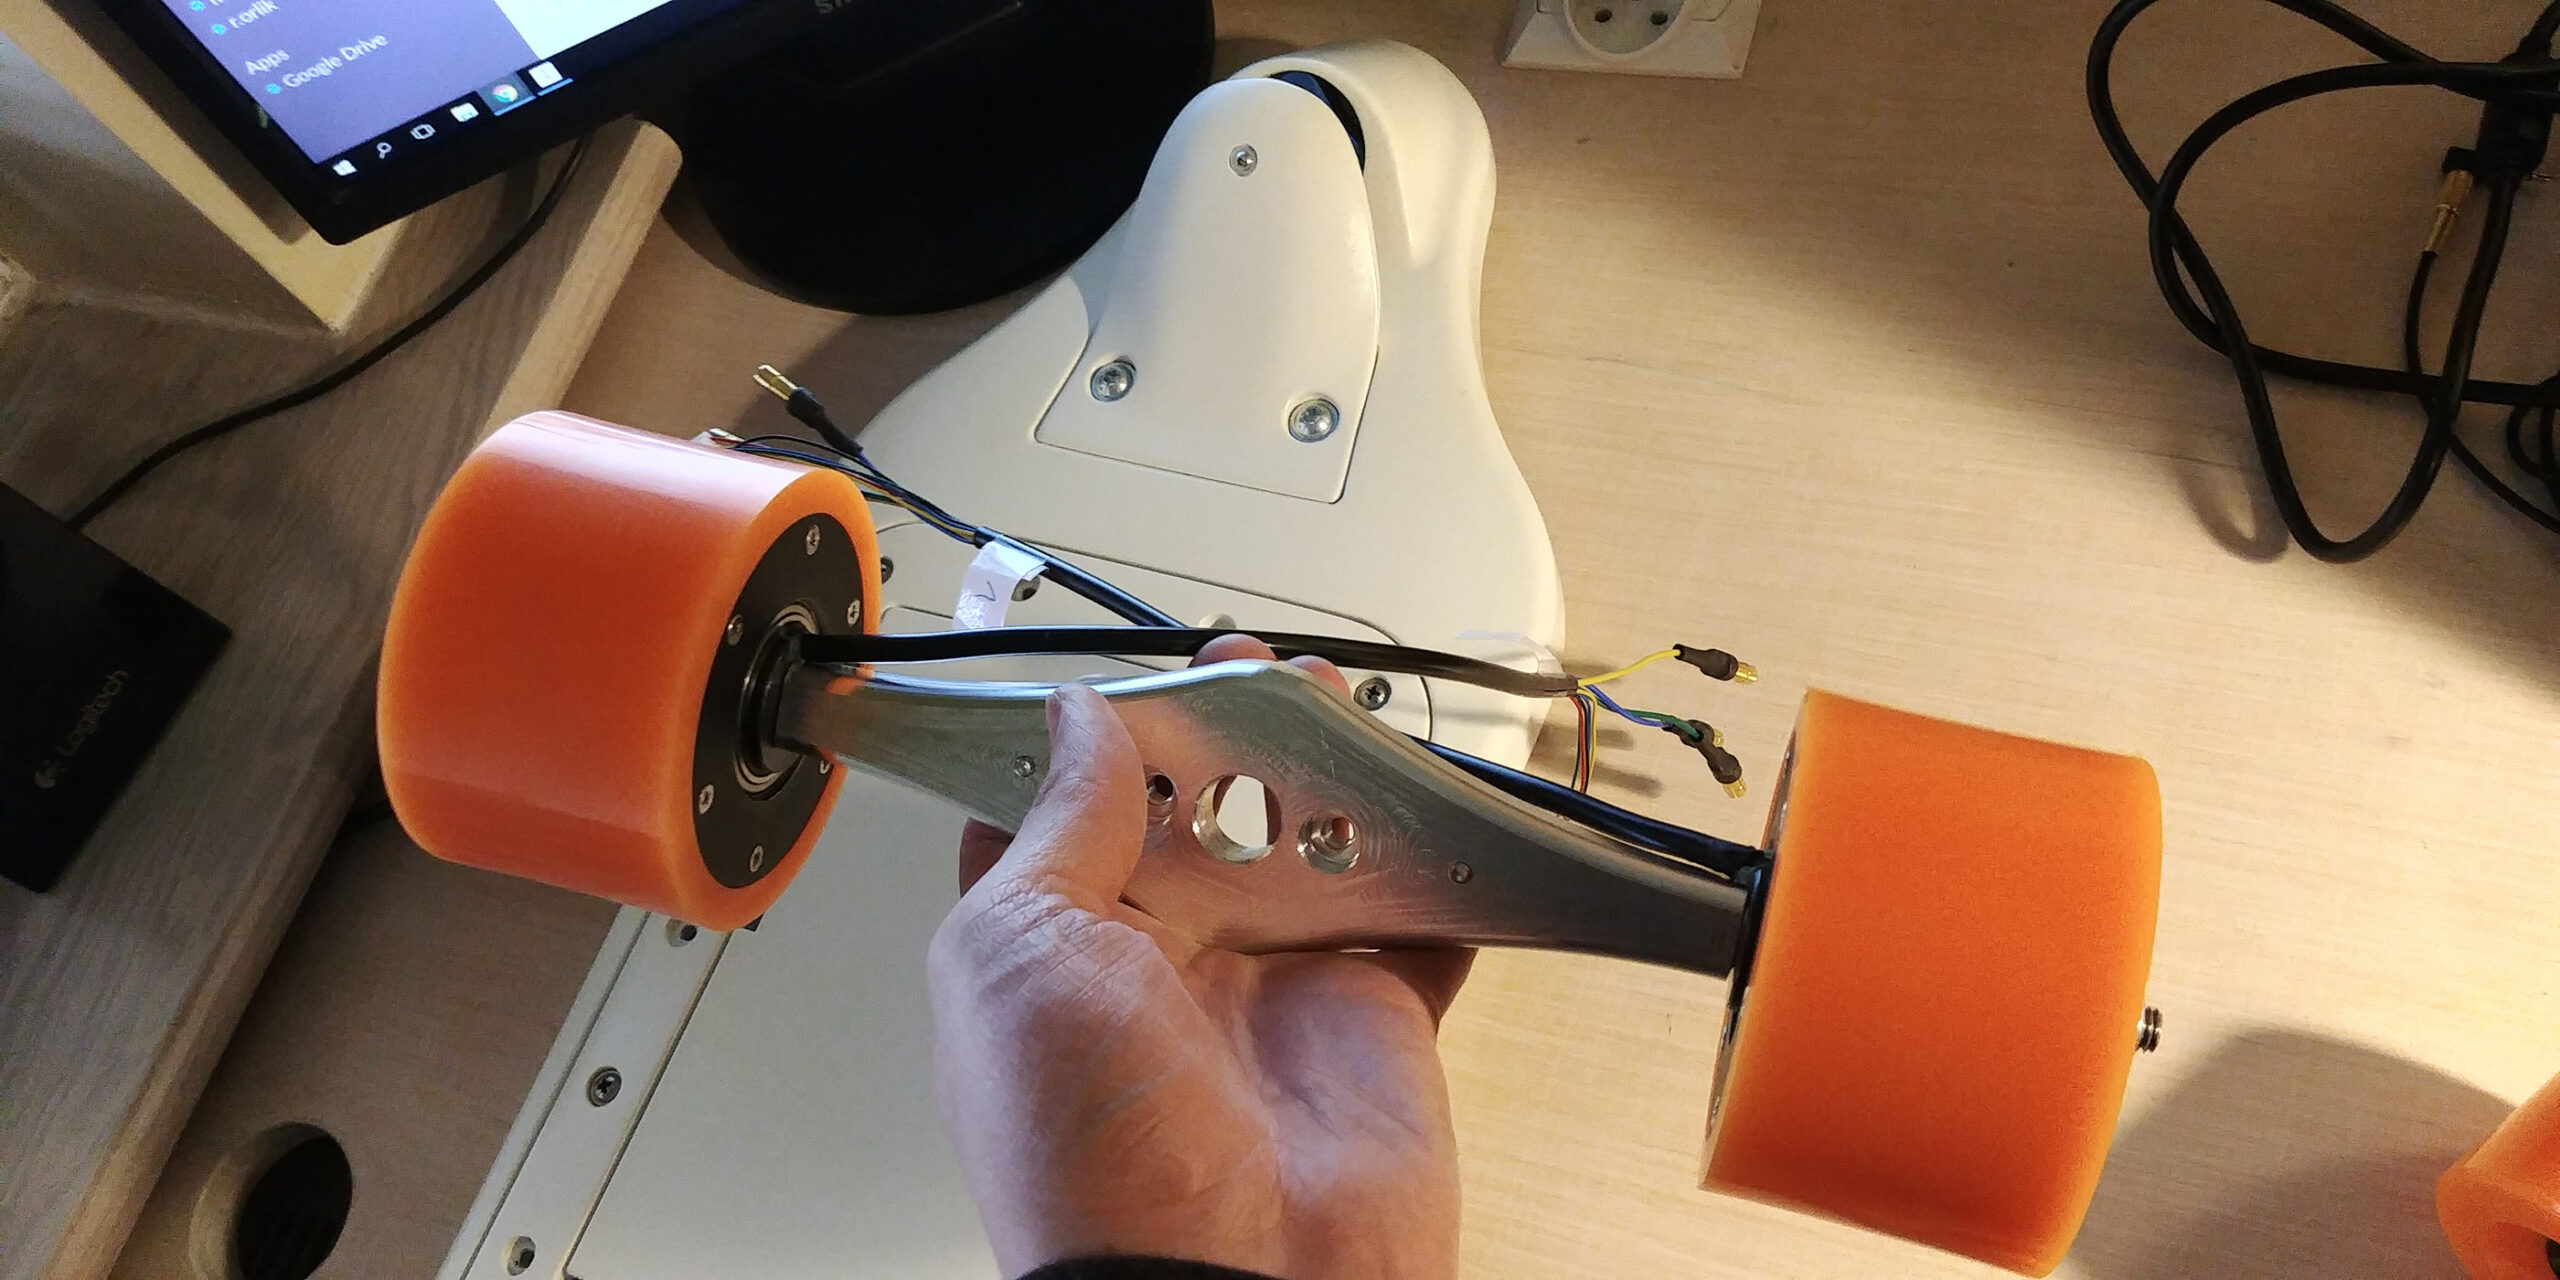
Close look at URBAN trucks mounting joint. It is possible to use different type of bushings to adjust stiffness to the rider weight.
Here is assembled 10s2p battery pack with18650 LG HG2 3Ah 20A LiIon cells. Housing was made from HP MJF 3D printer using PA12 material. I like to use this technique of prototyping when an element is characterized by high complexity and has to withstand greater loads during tests.
As you can see pack has integrated steel latches to make battery swapping fast and easy.
Making board smart
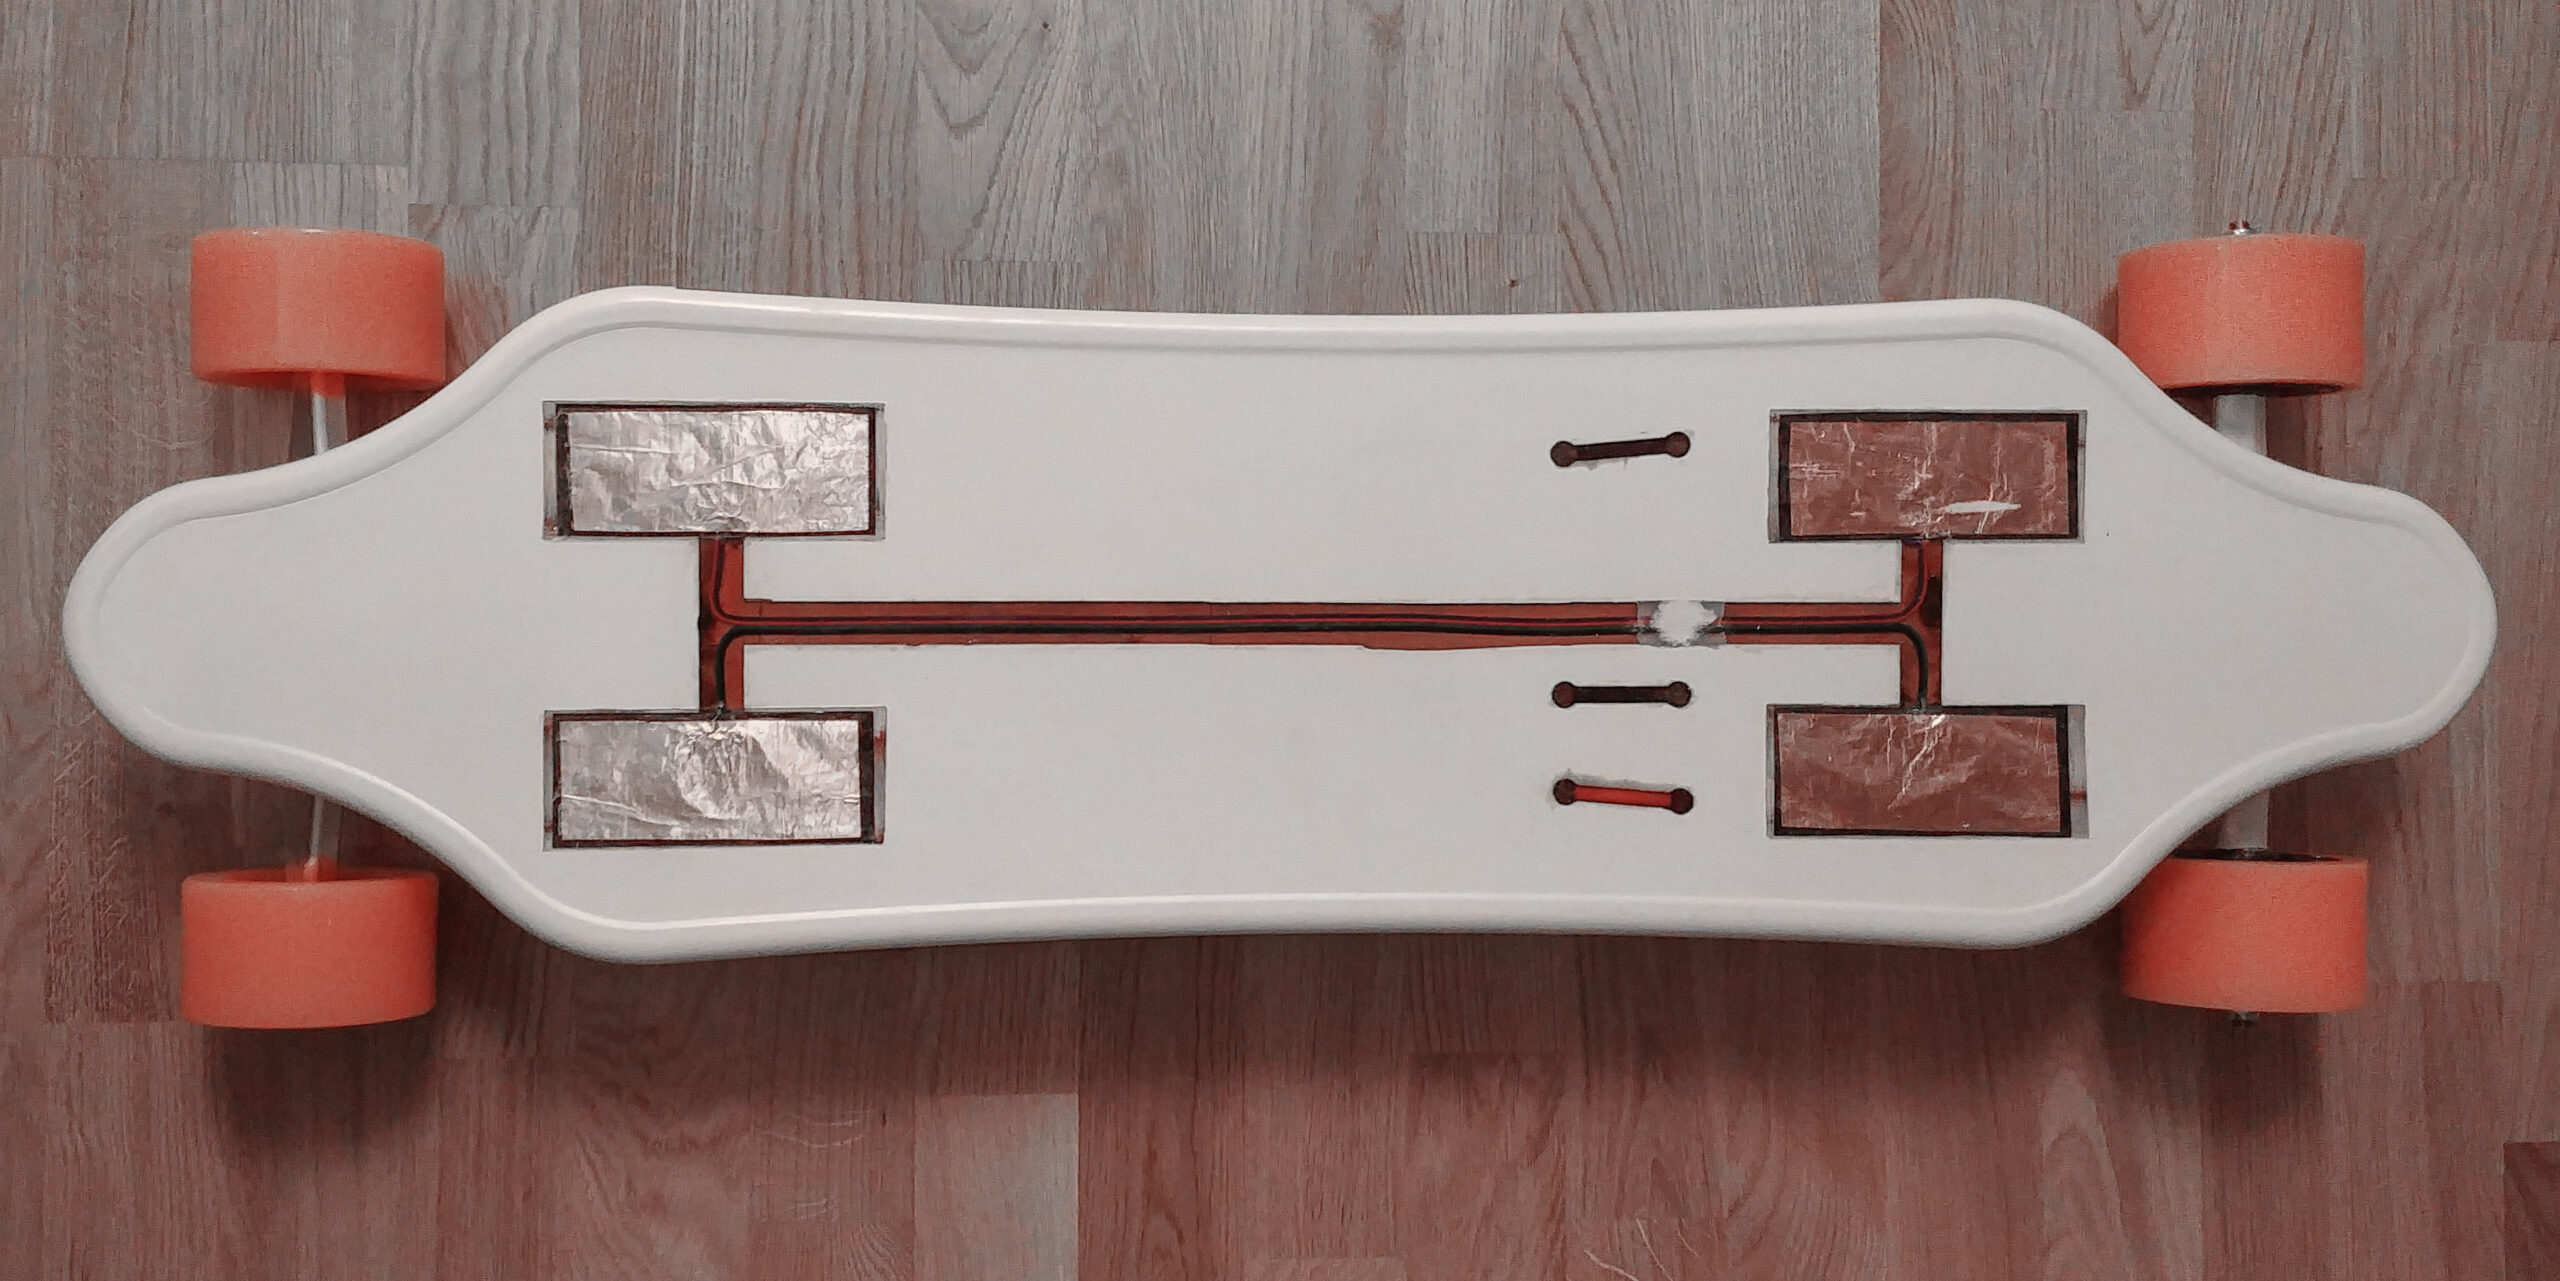
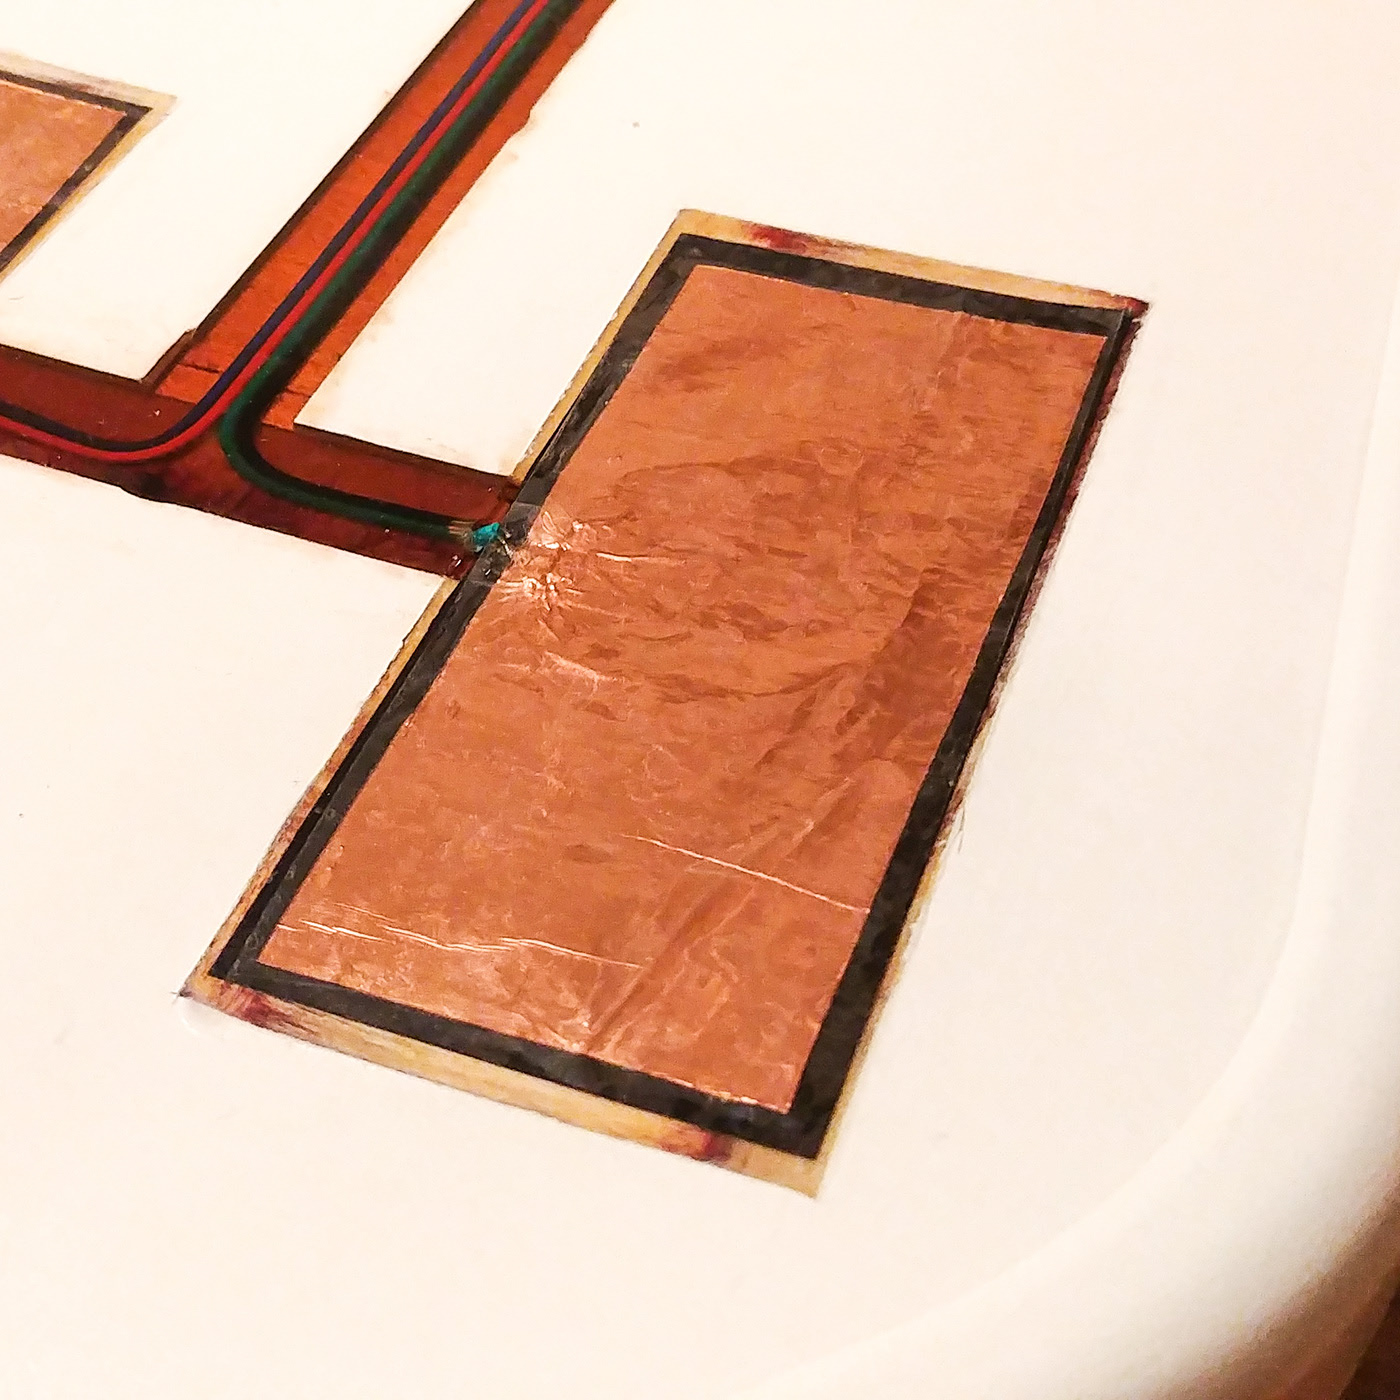
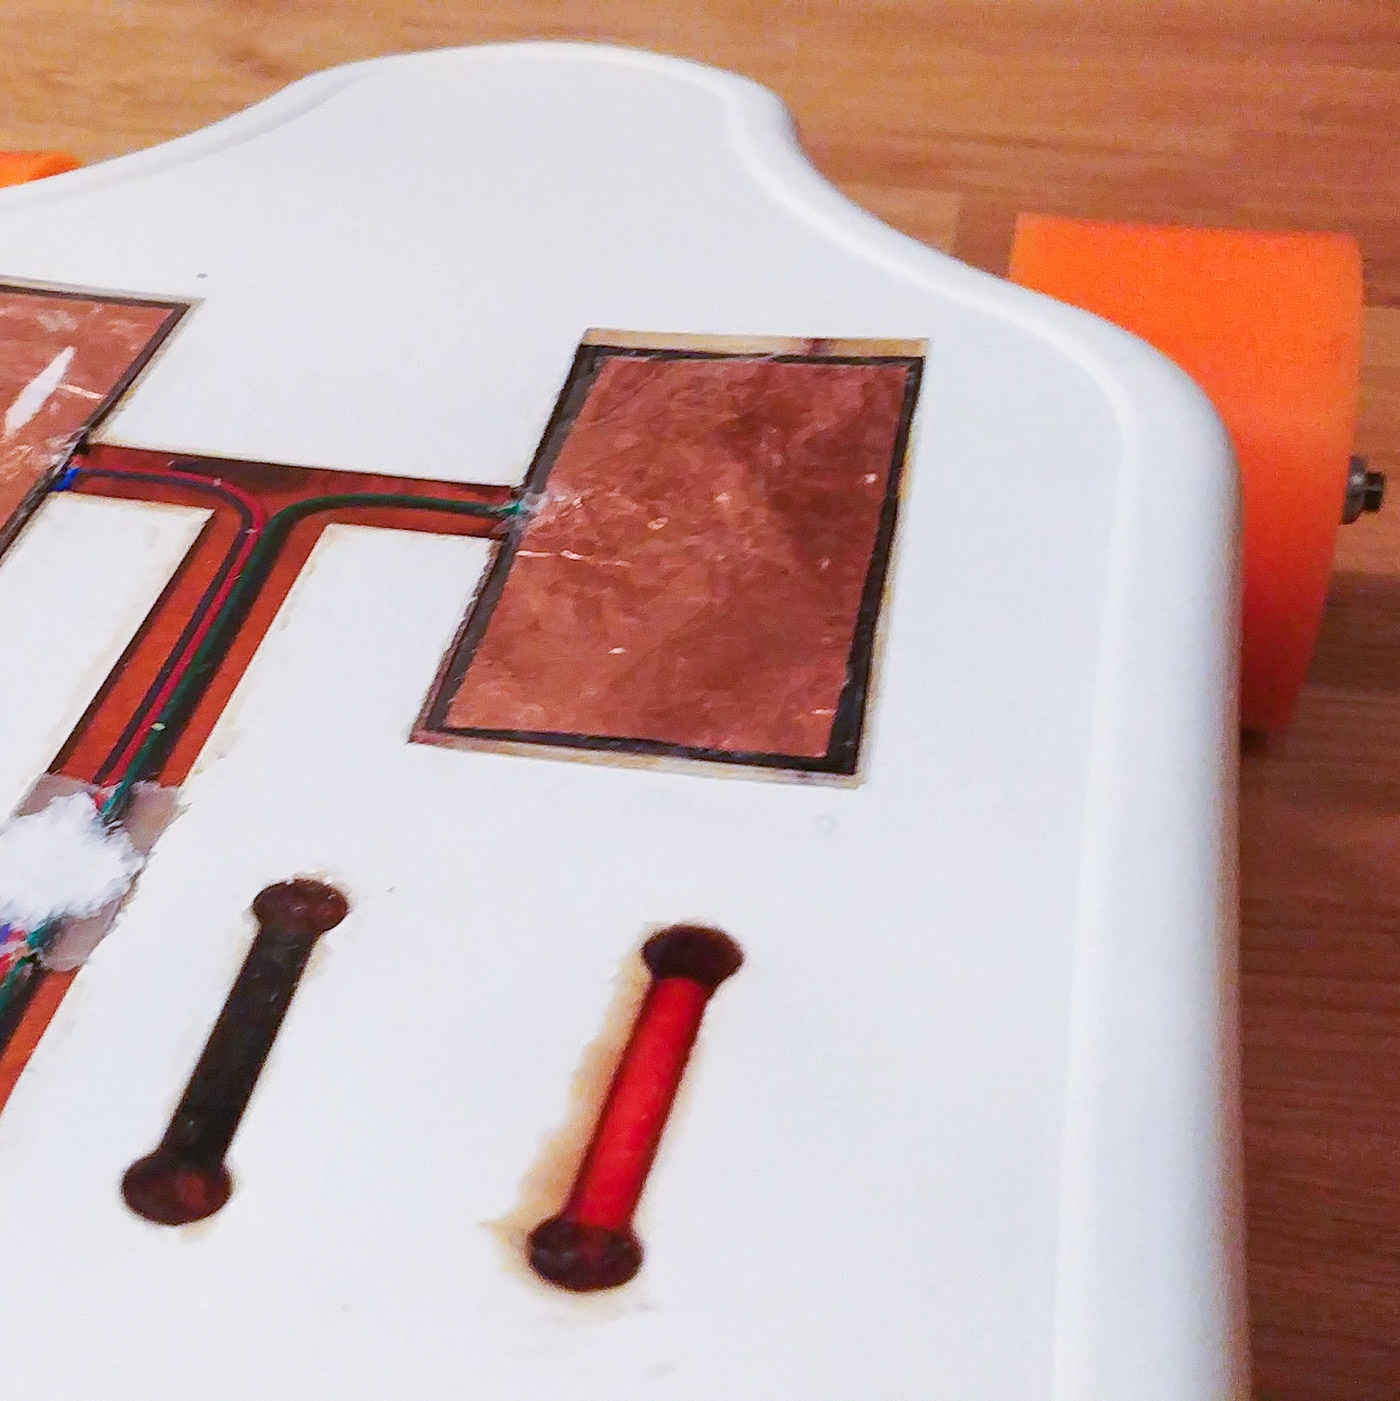
URBAN electric skateboard was equipped with Velostat – the foil sensitive to pressure and bending. Combined with copper tape it gives accurate and extremely thin pressure sensor. Of course, correct indications from all four sensors requires the use of a strain gauge bridge and appropriate amplification.
In URBAN project I wanted to test them in a use case like:
- controling the speed – tilting forward to accelerate and backward
- acceleration management combined with traditional hand transmitter – accelerating and braking in the way that the user will never fall down

Final prototype
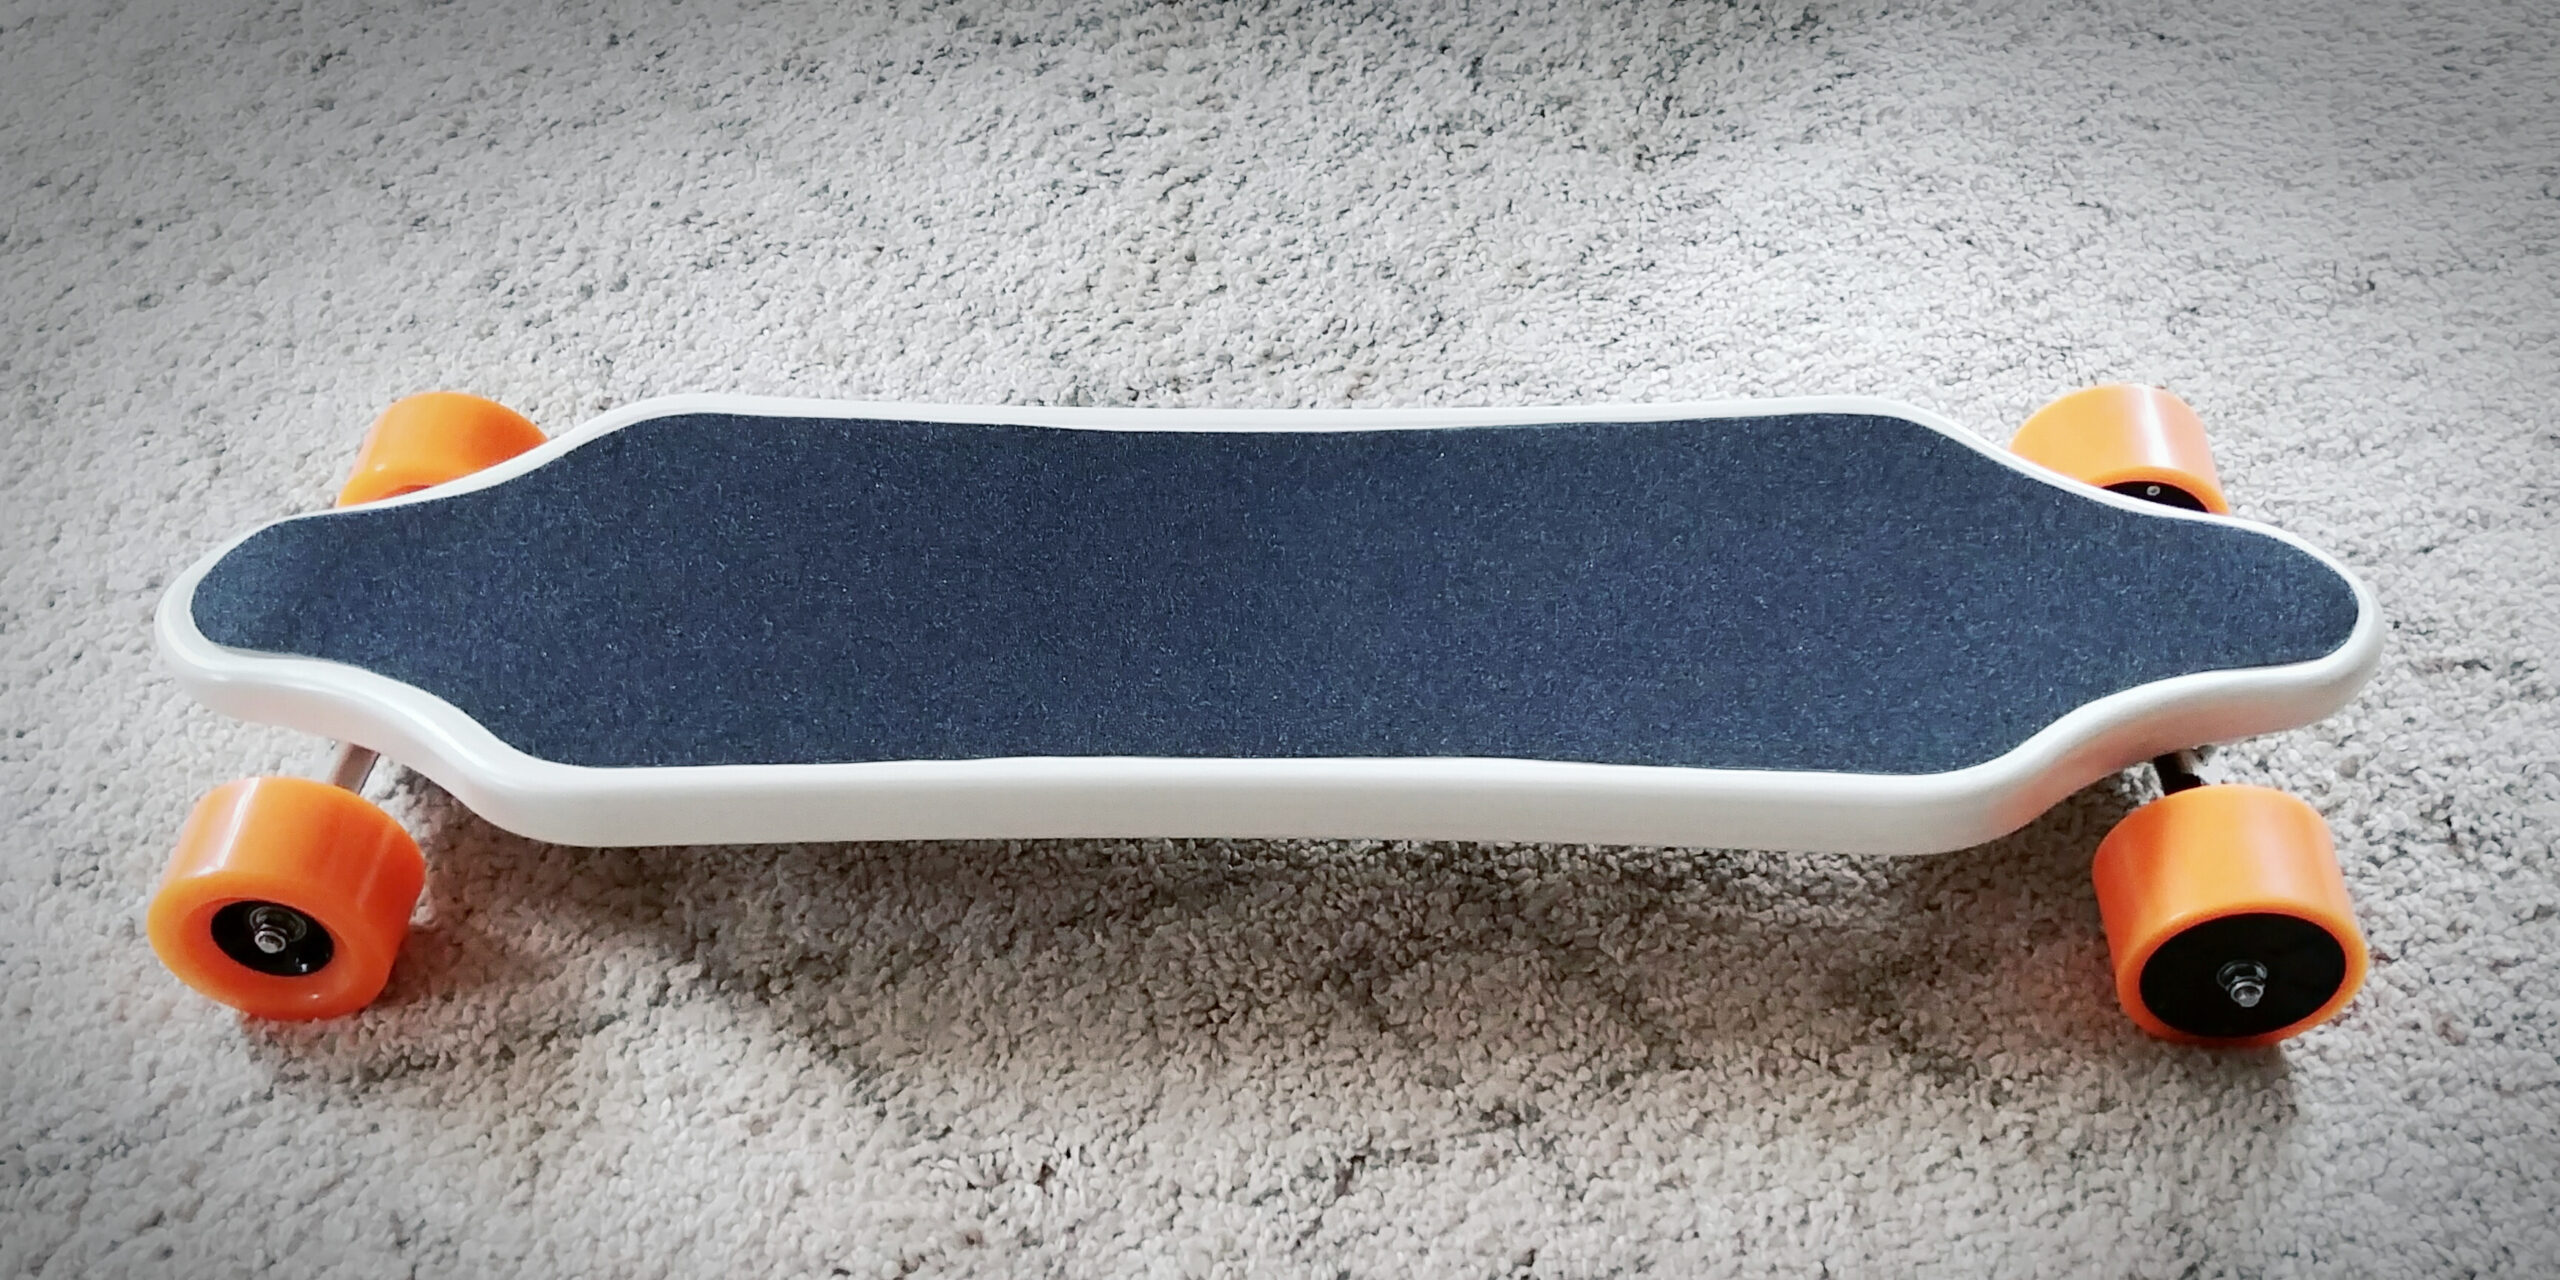
I’m glad to present you final look of my esk8 URBAN project prototype. Extremely fun to ride and full of tech electric skateboard